Radiator Support: Service and Repair
Lock Carrier with Attachments
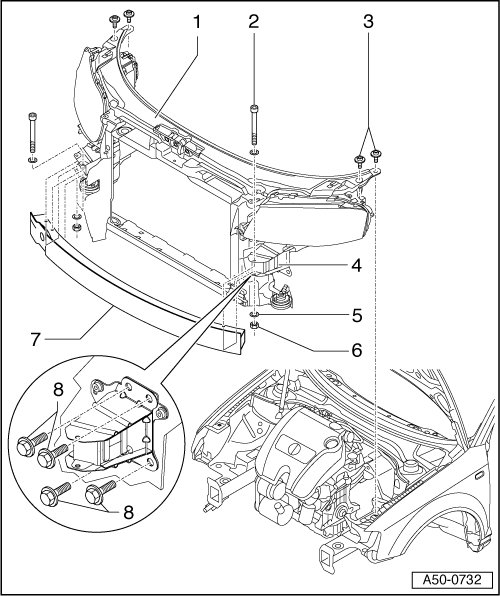
1 - Lock Carrier
• Disengage bumper cover before removing, refer to => [ Front Bumper ] Front Bumper
• Lock carrier can be removed with headlamps installed and water cooler installed.
• If water cooler is to be removed, drain coolant first.
• Disconnect electrical connections for headlamps.
• Disconnect connection for headlamp washer system and clamp off line.
• Hood lock removed, refer to => [ Hood Lock, Removing ] Service and Repair or disconnect release for hood release at coupling.
• To remove, remove bolts - 3 - and - 8 -.
• Remove lock carrier toward front.
2 - TORX(R) Bolt
• 10 Nm
3 - TORX(R) Bolt
• 23 Nm.
4 - Bumper Mount
• Must not be removed while removing lock carrier.
5 - Washer
6 - Hex nut
7 - Bumper
• Removal, refer to => [ Front Bumper ] Front Bumper
8 - Hex Head Bolt
• 60 Nm
• For service position, bolt guide pins (T10093) into outer top bolt holes of bracket for bumper.
Remove Left Bracket for Bumper
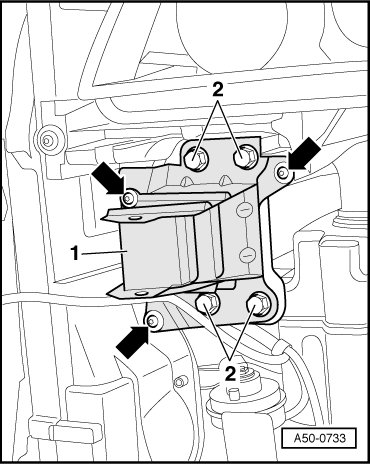
- Bumper cover removed.
- Remove hex bolts - 2 -.
- Remove the TORX(R) bolts - arrow - and then remove the bracket from the lock carrier.
- When installing, tighten hex bolts - 2 - to 60 Nm.
- Tighten TORX(R) bolts to 8.5 Nm.
Remove Right Bracket for Bumper
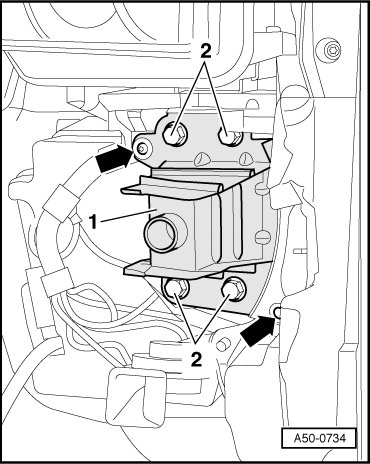
- Bumper cover removed.
- Remove hex bolts - 2 -.
- Remove the TORX(R) bolts - arrow - and then remove the bracket from the lock carrier.
- When installing, tighten hex bolts - 2 - to 60 Nm.
- Tighten TORX(R) bolts to 8.5 Nm.