Timing Cover: Service and Repair
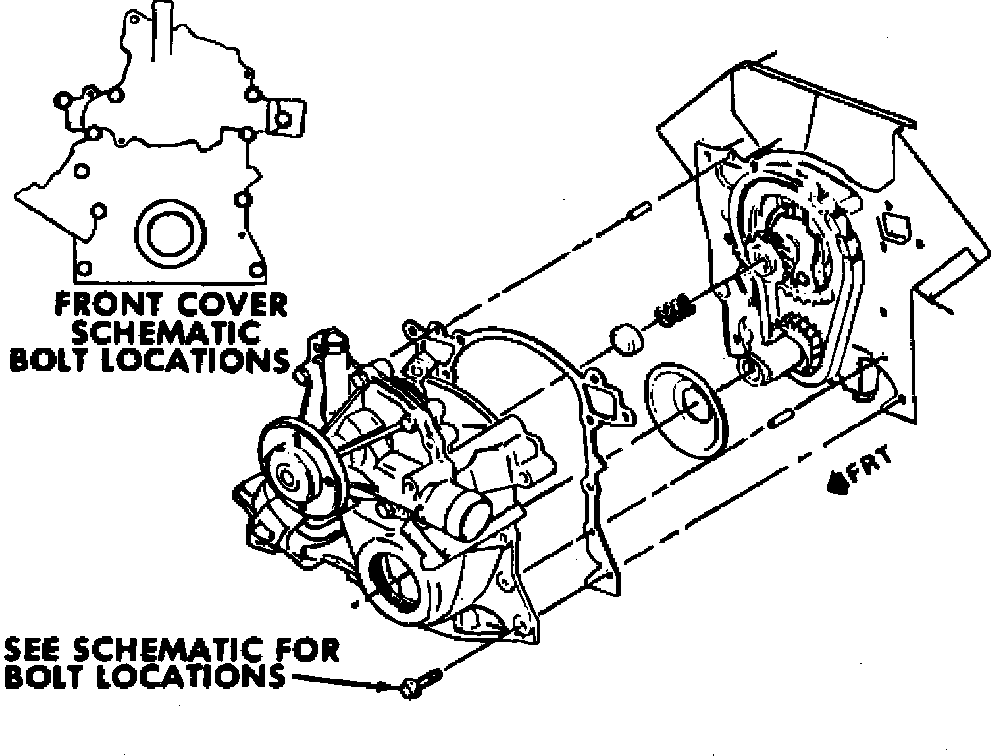
Fig. 9 Engine front cover removal & installation:
1. Drain engine coolant.
2. Disconnect upper and lower radiator hoses and heater return hose at water pump.
3. Remove nuts securing front engine mount to cradle, raise engine using suitable lifting device, then remove water pump pulley and drive belts.
4. Remove alternator bracket and alternator.
5. Remove distributor, if applicable. If timing chain and sprockets are not going to be disturbed, note position of distributor rotor for reinstallation in same position.
6. Remove balancer bolt and washer, then remove balancer assembly.
7. Remove bolts attaching engine front cover to cylinder block, Fig. 9, also remove two oil pan to engine front cover bolts.
8. Remove engine front cover assembly and gasket, Fig. 9.
9. Reverse procedure to install. On some engines, prior to reinstalling the engine front cover, remove the oil pump cover and pack the space around the oil pump drive gears completely full of petroleum jelly. Failure to do this may result in the pump losing its prime, causing a ``dry'' engine start. When reinstalling engine front cover bolts, apply a suitable sealer to the threads to prevent leakage.