Radiator: Service and Repair
RADIATOR ASSEMBLY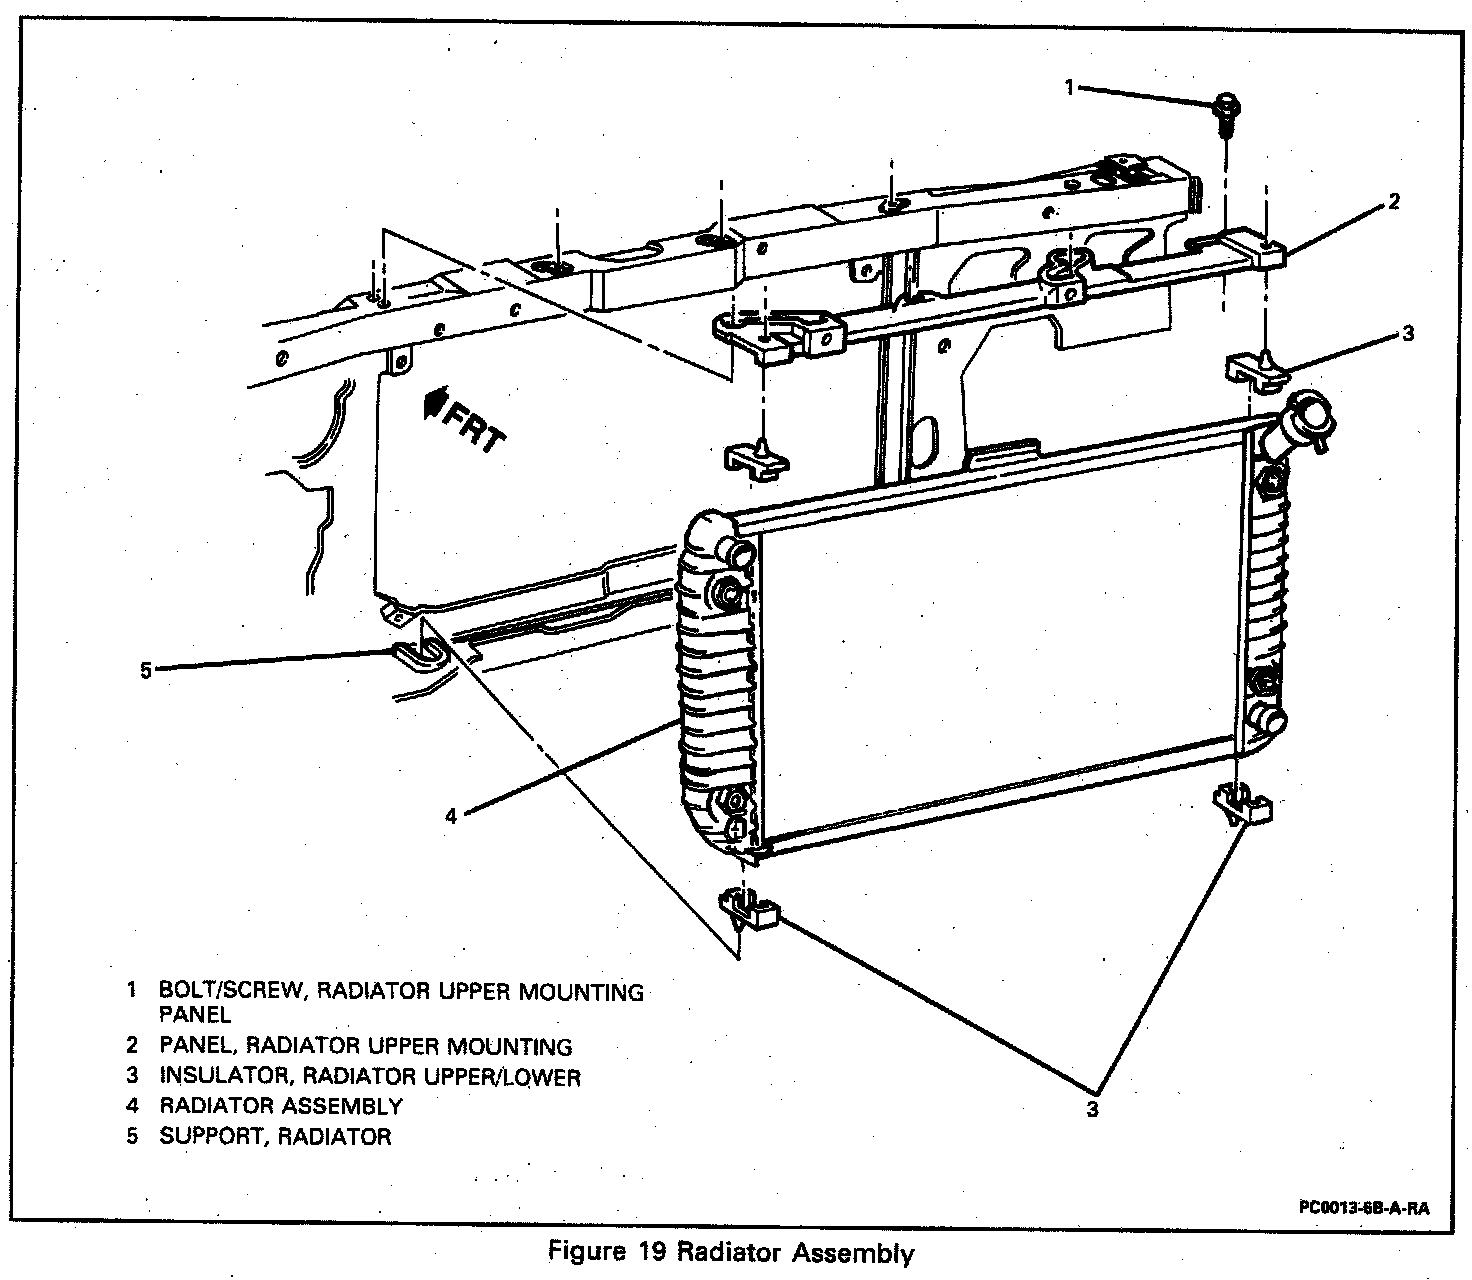

Remove or Disconnect
1. Air cleaner assembly including mounting stud and air cleaner duct.
2. Negative battery cable.
3. Engine coolant.
4. Engine strut brace bolts from upper mounting panel and rotate strut(s) and brace(s) rearward.
Important
^ To prevent shearing of rubber bushing(s) loosen bolt(s) on engine strut(s) before swinging strut(s).
5. Air intake resonator mounting nut.
6. Resonator.
7. Electrical connection from fan(s).
8. Fan attaching bolts.
9. Fan and frame assemblY.
10. Coolant hoses from radiator and coolant recovery tank hose from radiator neck.
11. Transaxle oil cooler lines from radiator.
12. Upper mounting panel attaching bolts.
13. Upper mounting panel and insulators.
14. Radiator.
Install or Connect
1. Radiator to lower insulator pads.
2. Insulators, upper mounting panel and attaching. bolts.
Tighten Bolts to 10 N.m (89 lb. in.).
3. Transaxle oil cooler lines to radiator.
4. Clamps and coolant hoses to radiator.
5. Coolant recovery hose to radiator neck.
6. Fan and frame assembly.
Tighten Bolts to 10 N.m (89 lb. in.).
7. Electrical connection to fan(s).
8. Air intake resonator.
9. Air intake resonator mounting nut.
10. Swing engine strut(s) to proper position.
11. Top off radiator with 50/50 ethylene glycol/water coolant mixture.
12. Negative battery cable.
13. Air cleaner assembly.
Inspect
^ For coolant leaks.