Splicing Twisted/Shielded Cable
1. Remove outer Jacket- Remove and discard out Jacket, taking care to avoid cutting into drain wire or mylar tape.
2. Unwrap tape
- Unwrap aluminum/mylar tape, but do not remove it. The tape will be re-used to rewrap the twisted conductors after splices have been made.
Splicing Twisted/Shielded Cable:
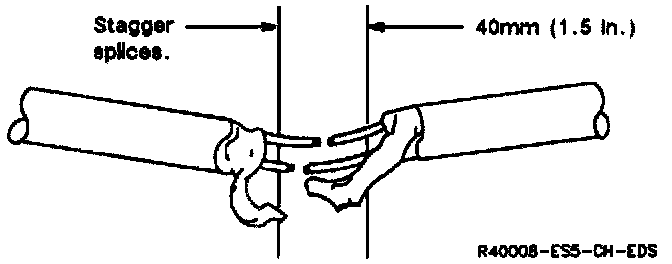
3. Prepare splice
- Untwist conductors, then prepare splice. Refer Splicing Copper Wire for instructions. Stagger splices to avoid shorts. Splicing Copper Wire Using Crimp and Seal Splice Sleeves
Splicing Twisted/Shielded Cable:
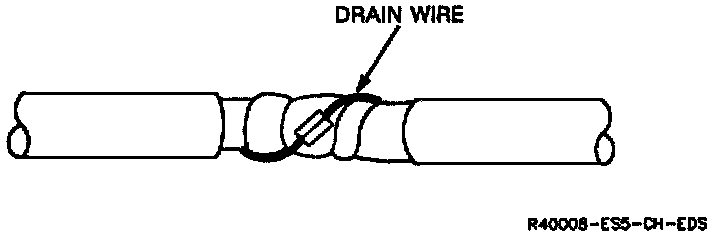
4. Reassemble cable
- After each wire is spliced and taped, rewrap conductors with the mylar tape. Do not wrap drain wire.
- Splice drain wire. Refer Splicing Copper Wire. Wrap drain wire around the conductors and mylar tape. Splicing Copper Wire Using Crimp and Seal Splice Sleeves
Splicing Twisted/Shielded Cable:
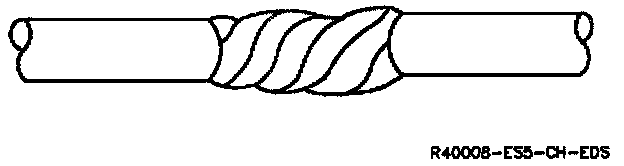
5. Tape cable
- Tape over entire cable using a winding motion. This tape will replace the section of the Jacket removed to make the repair.