Fuel Tank Module Replacement
FUEL TANK MODULE REPLACEMENT
TOOLS REQUIRED
J 45722 Fuel Sender Lock Ring Wrench
REMOVAL PROCEDURE
1. Remove the fuel tank.

2. Disconnect the fuel sender module electrical connectors.

3. Disconnect the fuel pipes from the fuel sender.
NOTE: Do Not handle the fuel sender assembly by the fuel pipes. The amount of leverage generated by handling the fuel pipes could damage the joints.
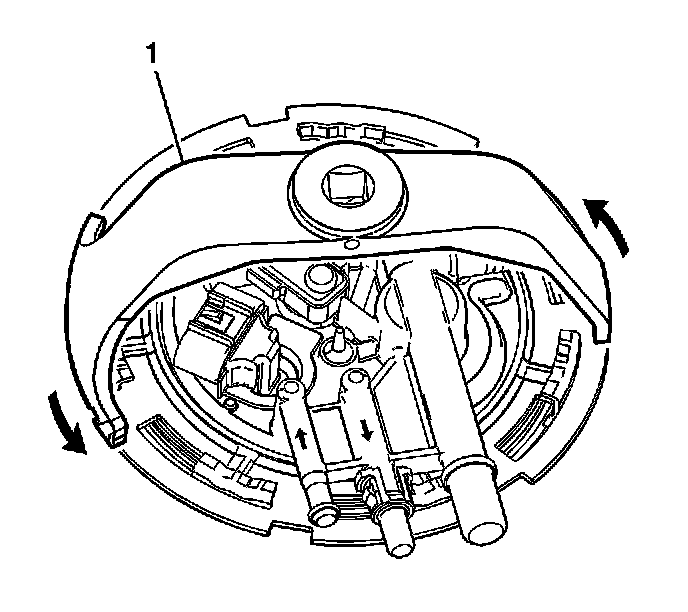
4. Use the J 45722 (1) and a long breaker-bar in order to unlock the fuel sender lock ring.
IMPORTANT: Do NOT use impact tools. Significant force will be required to release the lock ring. Secure the fuel tank in order to prevent fuel tank rotation.

5. Remove the fuel sender lock ring (1) and the fuel sender (2) from the fuel tank.
6. Remove and discard the fuel sender seal (3).
7. Remove the fuel level sensor from the fuel sender module.
INSTALLATION PROCEDURE
1. Install the fuel level sensor to the fuel sender module.
2. Clean the fuel sender sealing flange.
3. Install the NEW fuel sender seal (3) to the fuel tank seal groove.
IMPORTANT: Always replace the fuel sender seal when installing the fuel sender assembly.
4. Install the fuel sender (2) and the fuel sender lock ring (1).
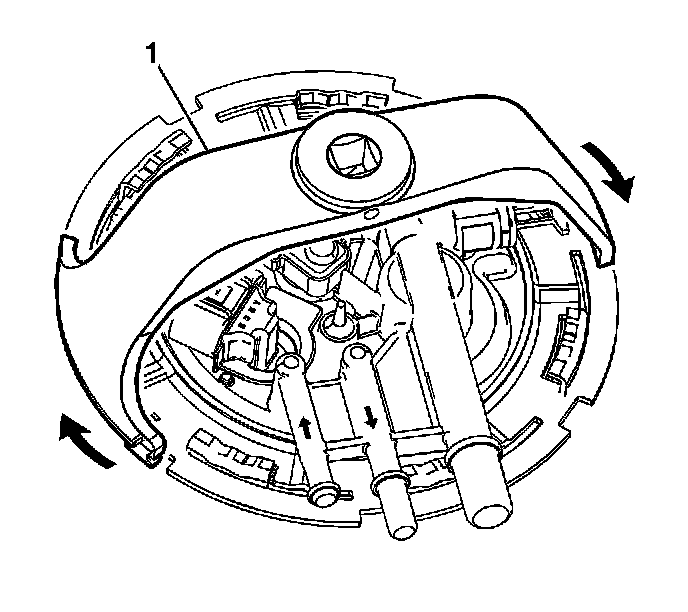
5. Use the J 45722 (1) in order to install the fuel sender lock ring.
6. Install the fuel pipes to the fuel sender.
7. Install the fuel sender sensor electrical connectors.
8. Install the fuel tank.