Front Fender
REMOVAL PROCEDUREFender Replacement (Front): Removal Procedure:
1. Remove the front fascia.
2. Remove the rocker molding.
IMPORTANT: Tape the fender and tape the door edges for protection against chipping the paint.
3. Remove the front fender liner.
4. Support the hood.
5. Remove the hood strut from the fender.
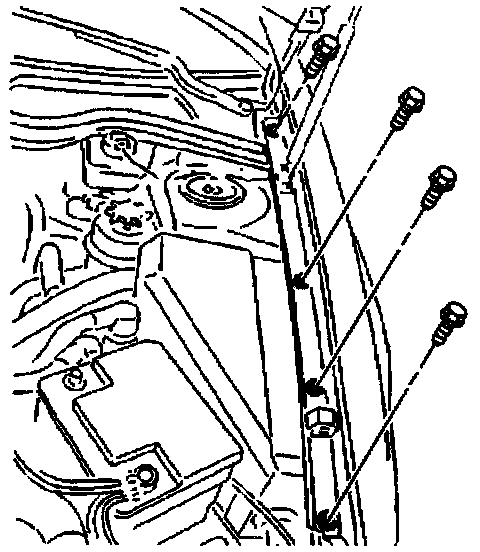
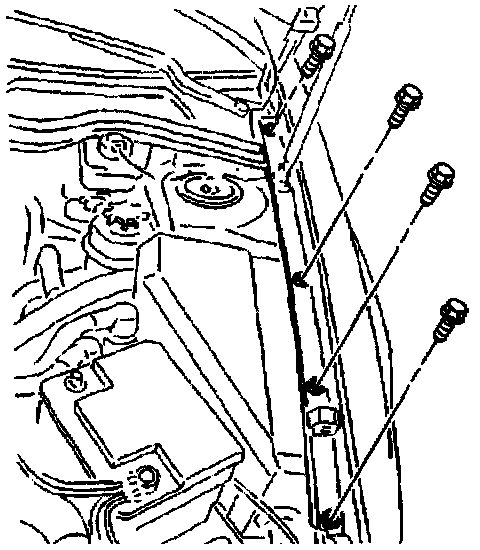
6. Remove upper fender bolts.
Fender Replacement (Front): Removal Procedure:
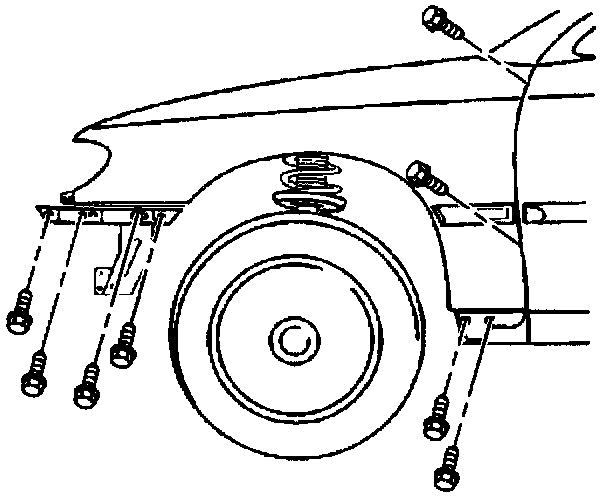
7. Remove the side fender bolts.
8. Remove the fender.
9. Transfer the hood bumper.
INSTALLATION PROCEDURE
Fender Replacement (Front): Installation Procedure:
1. Undercoat the underside of the fender prior to installation.
2. Install the fender.
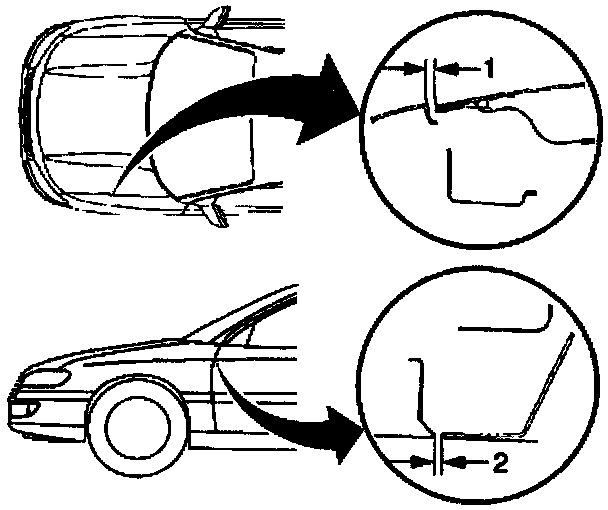
3. Adjust the fender-to-hood clearance (1) to 5 mm ± 1 mm.
4. Adjust the fender-to-front door clearance (2) to 5 mm ± 1 mm.
Fender Replacement (Front): Installation Procedure:
5. Install the fender side bolts.
Fender Replacement (Front): Installation Procedure:
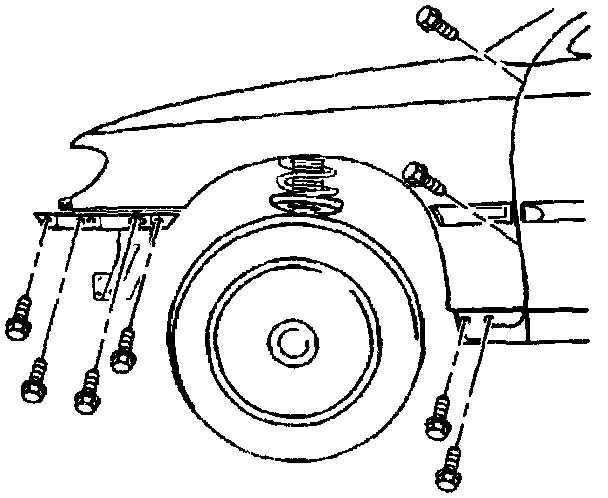
6. Install the upper fender bolts.
Tighten
Tighten the fender bolts to 4 N.m (35 lb in)..
7. Install the hood strut to the fender.
8. Remove the hood support.
9. Install the front fender liner.
10. Install the rocker molding.
11. Install the front fascia.