Front Fender Replacement (Left)
Front Fender Replacement (Left)
Removal Procedure
Caution: Unless directed otherwise, the ignition and start switch must be in the OFF or LOCK position, and all electrical loads must be OFF before servicing any electrical component. Disconnect the negative battery cable to prevent an electrical spark should a tool or equipment come in contact with an exposed electrical terminal. Failure to follow these precautions may result in personal injury and/or damage to the vehicle or its components. For Vehicles equipped with OnStar (UE1) with Back Up Battery: The Back Up Battery is a redundant power supply to allow limited OnStar functionality in the event of a main vehicle battery power disruption to the VCIM (OnStar module). Do not disconnect the main vehicle battery or remove the OnStar fuse with the ignition key in any position other than OFF. Retained accessory power (RAP) should be allowed to time out or be disabled (simply opening the driver door should disable RAP) before disconnecting power. Disconnecting power to the OnStar module in any way while the ignition is On or with RAP activated may cause activation of the OnStar Back-Up Battery (BUB) system and will discharge and permanently damage the back-up battery. Once the Back-Up Battery is activated it will stay on until it has completely discharged. The BUB is not rechargeable and once activated the BUB must be replaced.
1. Disconnect the negative battery cable.
2. Remove the link assembly from the fender. Refer to Hood Link Replacement Service and Repair.
3. Remove the hood. Refer to Hood Replacement Service and Repair.
4. Remove the battery and the battery tray, if equipped.
5. Remove the windshield washer reservoir.
6. Remove the electrical connector.
7. Remove the 4 retaining bolts.
8. Remove the 4 washer reservoir bracket bolts from the fender.
9. Remove the hood release cable from the clip on the fender.
10. Remove the wiring harness from the clips.
11. Remove the auxiliary battery relay, if equipped.
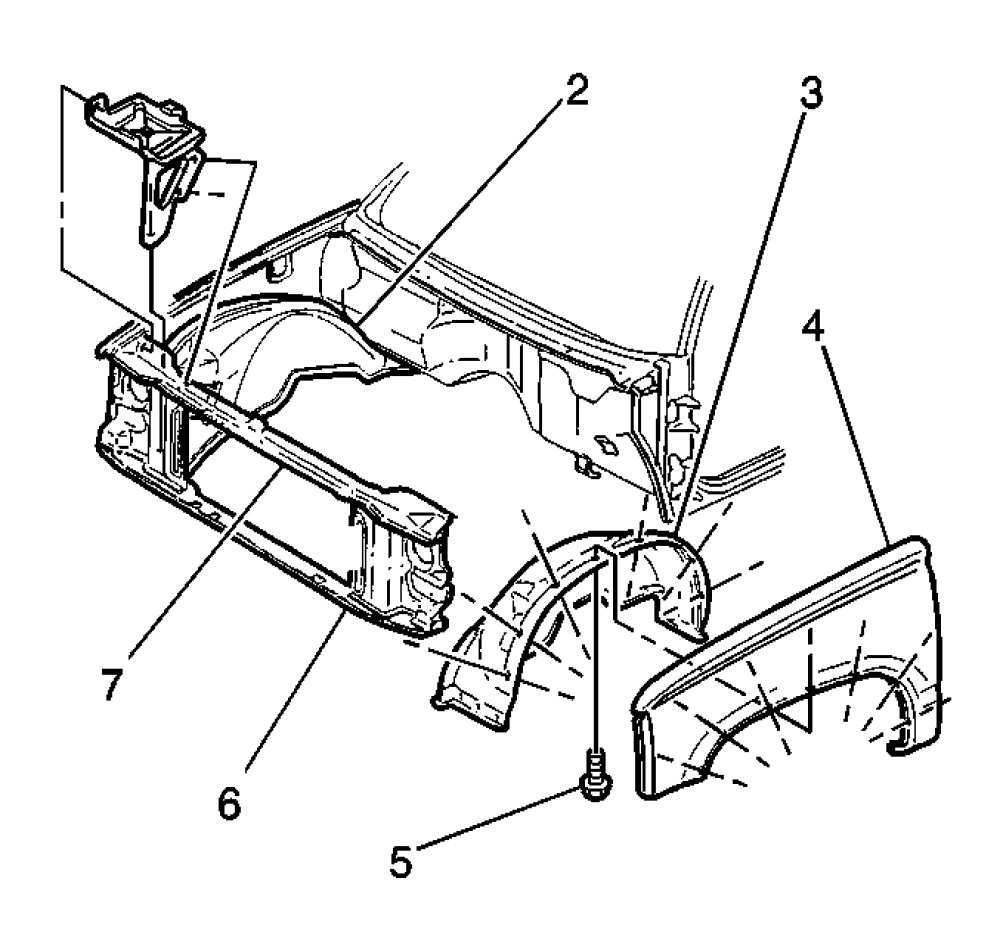
12. Remove the bolts (5) holding the fender (4) to the wheelhouse (3).
13. Remove the bolt (6) holding the fender to the rocker assembly.
14. Open the door.

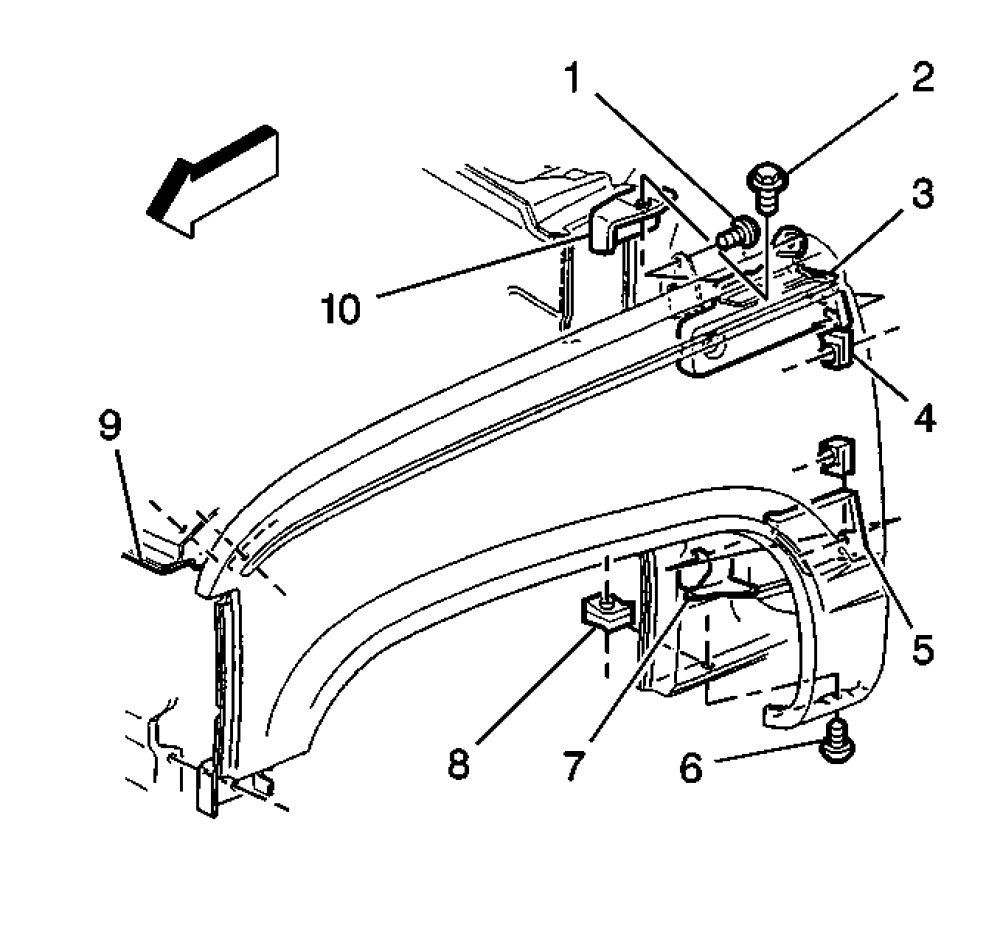
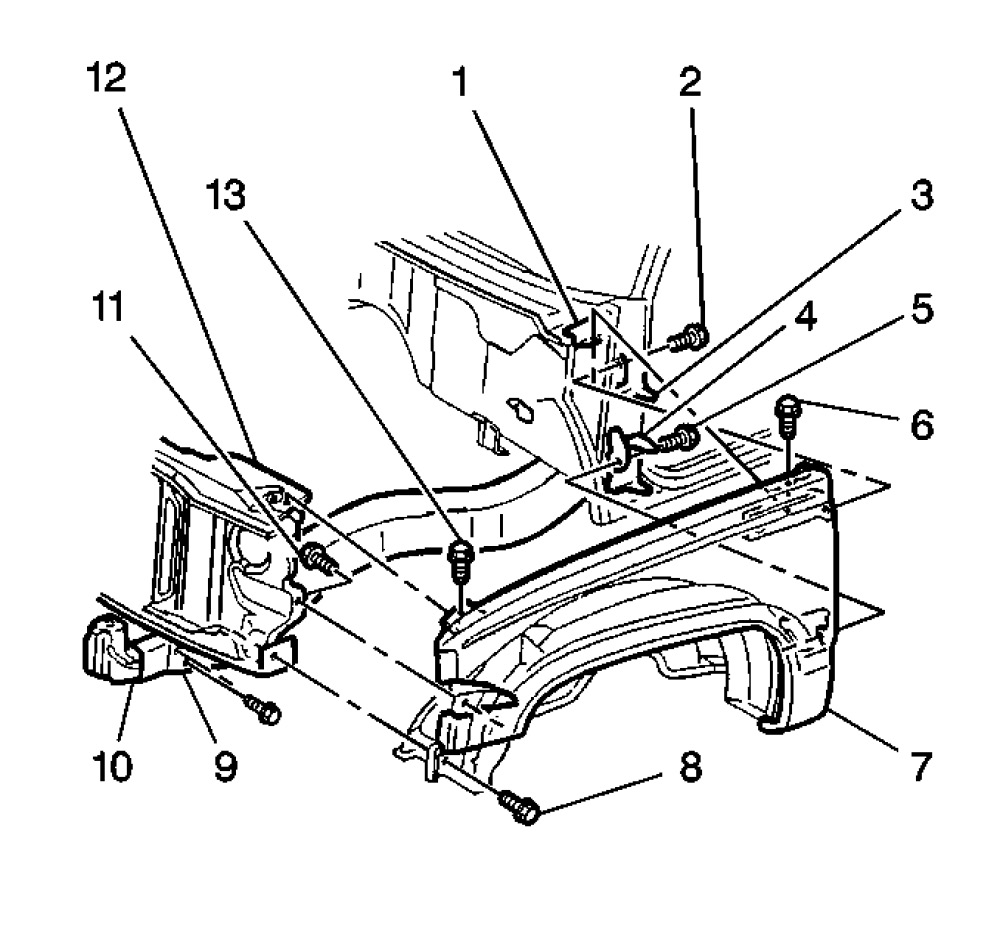
15. Remove the bolts (1) holding the fender to the door hinges.
16. Remove the bolts holding the fender to the radiator support (9).
17. Remove the fender from the vehicle.
Installation Procedure
1. Install the fender to the vehicle.
Notice: Use the correct fastener in the correct location. Replacement fasteners must be the correct part number for that application. Fasteners requiring replacement or fasteners requiring the use of thread locking compound or sealant are identified in the service procedure. Do not use paints, lubricants, or corrosion inhibitors on fasteners or fastener joint surfaces unless specified. These coatings affect fastener torque and joint clamping force and may damage the fastener. Use the correct tightening sequence and specifications when installing fasteners in order to avoid damage to parts and systems.
2. Install the bolts to the radiator support (12).
Tighten
Tighten the bolts to 25 Nm (18 lb ft).
3. Open the door.
4. Install the bolts and the nuts holding the fender to the door hinges.
Tighten
Tighten the fender bolts to 25 Nm (18 lb ft).

5. Install the bolt (6) and the nut from the fender to the cab assembly.
Tighten
Tighten the fender bolts (6) to 25 Nm (18 lb ft).
6. Install the bolt by reaching up behind the wheelhouse.

7. Install the bolts (5) through the wheelhouse to the fender.
8. Install the auxiliary battery relay.
9. Install the wiring harness into the clip on the fender.
10. Install the hood release cable into the clips.
11. Install the 4 windshield washer bracket to the fender bolts.
12. Install the reservoir to the bracket.
13. Install the battery and the tray, if equipped.
14. Install the hood link assembly.
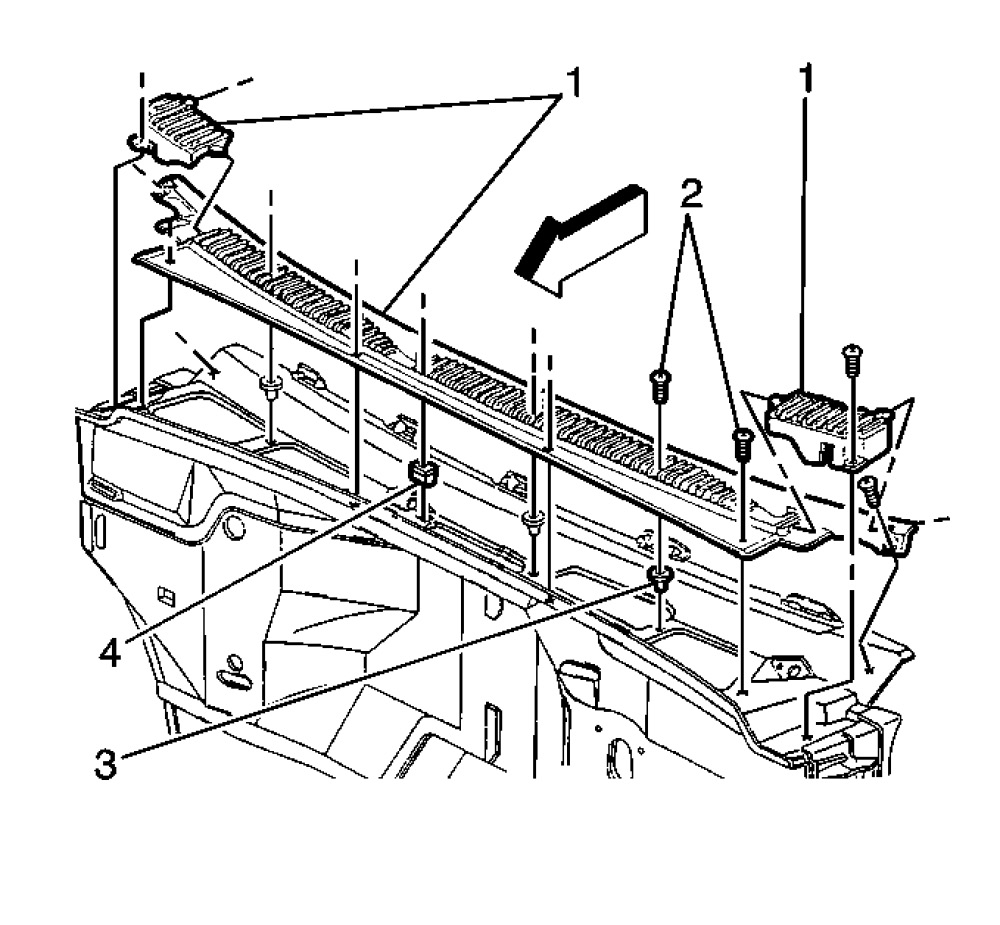
15. Install the outboard cowl grille section (1).
16. Install the hood to the vehicle. Refer to Hood Replacement Service and Repair.
17. Inspect the fender for proper clearance.
18. Connect the negative battery cable.