Intake Manifold Replacement
Removal Procedure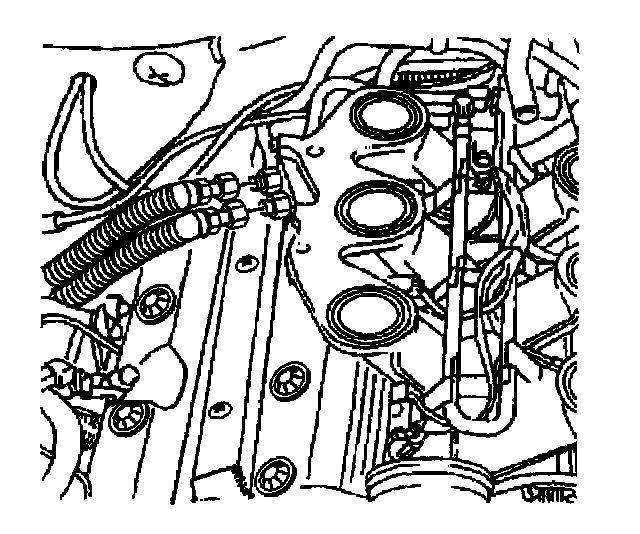
1. Remove the intake plenum. Refer to Intake Plenum Replacement.
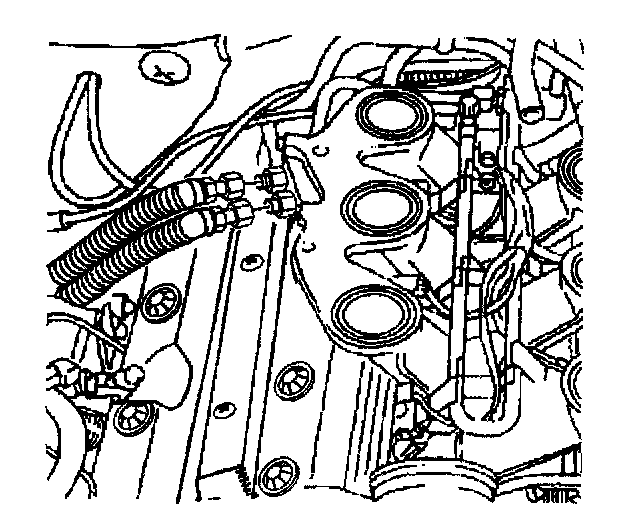
2. Relieve the fuel system pressure.
3. Remove the fuel supply hose from the fuel rail.
4. Remove the fuel return hose from the fuel rail.
5. Disconnect the fuel injector electrical harness connector.
6. Disconnect the fuel pressure regulator vacuum connection.
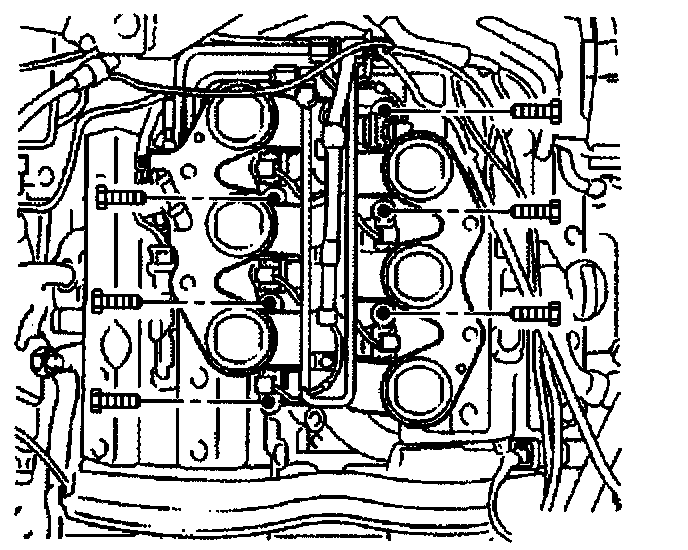
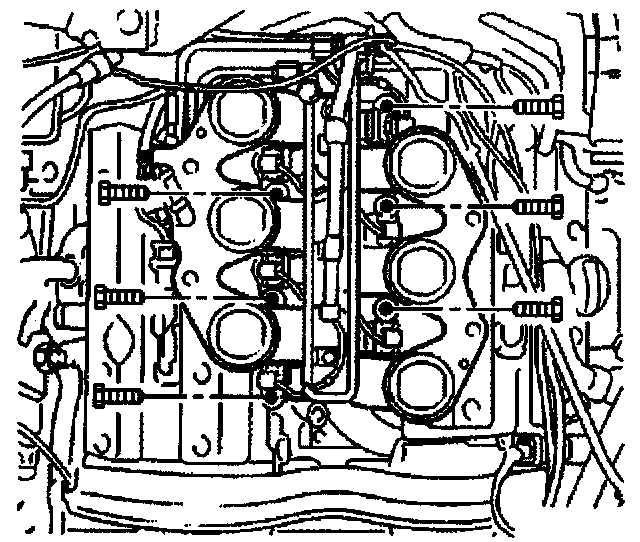
7. Remove the intake manifold bolts.
8. Remove the intake manifold.
Important: Mask off the ports to the intake manifold spacer. Severe damage may result if foreign objects enter the engine.
Do not damage the machined aluminum surfaces or improper sealing may occur.
Installation Procedure
1. Clean the intake manifold sealing surfaces with a nonabrasive tool or solvent.
2. Remove masking from the intake ports.
3. Install the intake manifold.
Notice: Refer to Fastener Notice in Service Precautions.
4. Install the intake manifold bolts.
Tighten the intake manifold bolts to 20 Nm (15 ft. lbs.).
5. Connect the fuel pressure regulator vacuum connection.
6. Connect the fuel injector electrical harness connector.
Important: Counterhold the connections to prevent damage to the fuel rail.
7. Install the fuel supply hose.
Tighten the fuel supply hose connections to 15 Nm (11 ft. lbs.).
8. Install the fuel return hose.
Important: Counterhold the connections to prevent damage to the fuel rail.
Tighten the fuel return hose connections to 15 Nm (11 ft. lbs.).
9. Install the intake plenum. Refer to Intake Plenum Replacement.