Steering Column - Removal and Installation
CHEVROLET CHEVETTE & PONTIAC 1000
REMOVAL
1. Disconnect battery ground cable and remove steering wheel.
2. Remove steering column cover screws and the cover.
3. Remove floor pan bracket screw and the two steering column brackets to instrument panel nuts, then lower steering column and disconnect wiring harnesses.
4. Raise vehicle and remove flexible coupling nuts. Separate steering shaft from coupling.
5. Loosen rag joint pinch bolt.
6. Using caution, pull steering column rearward and remove from vehicle.
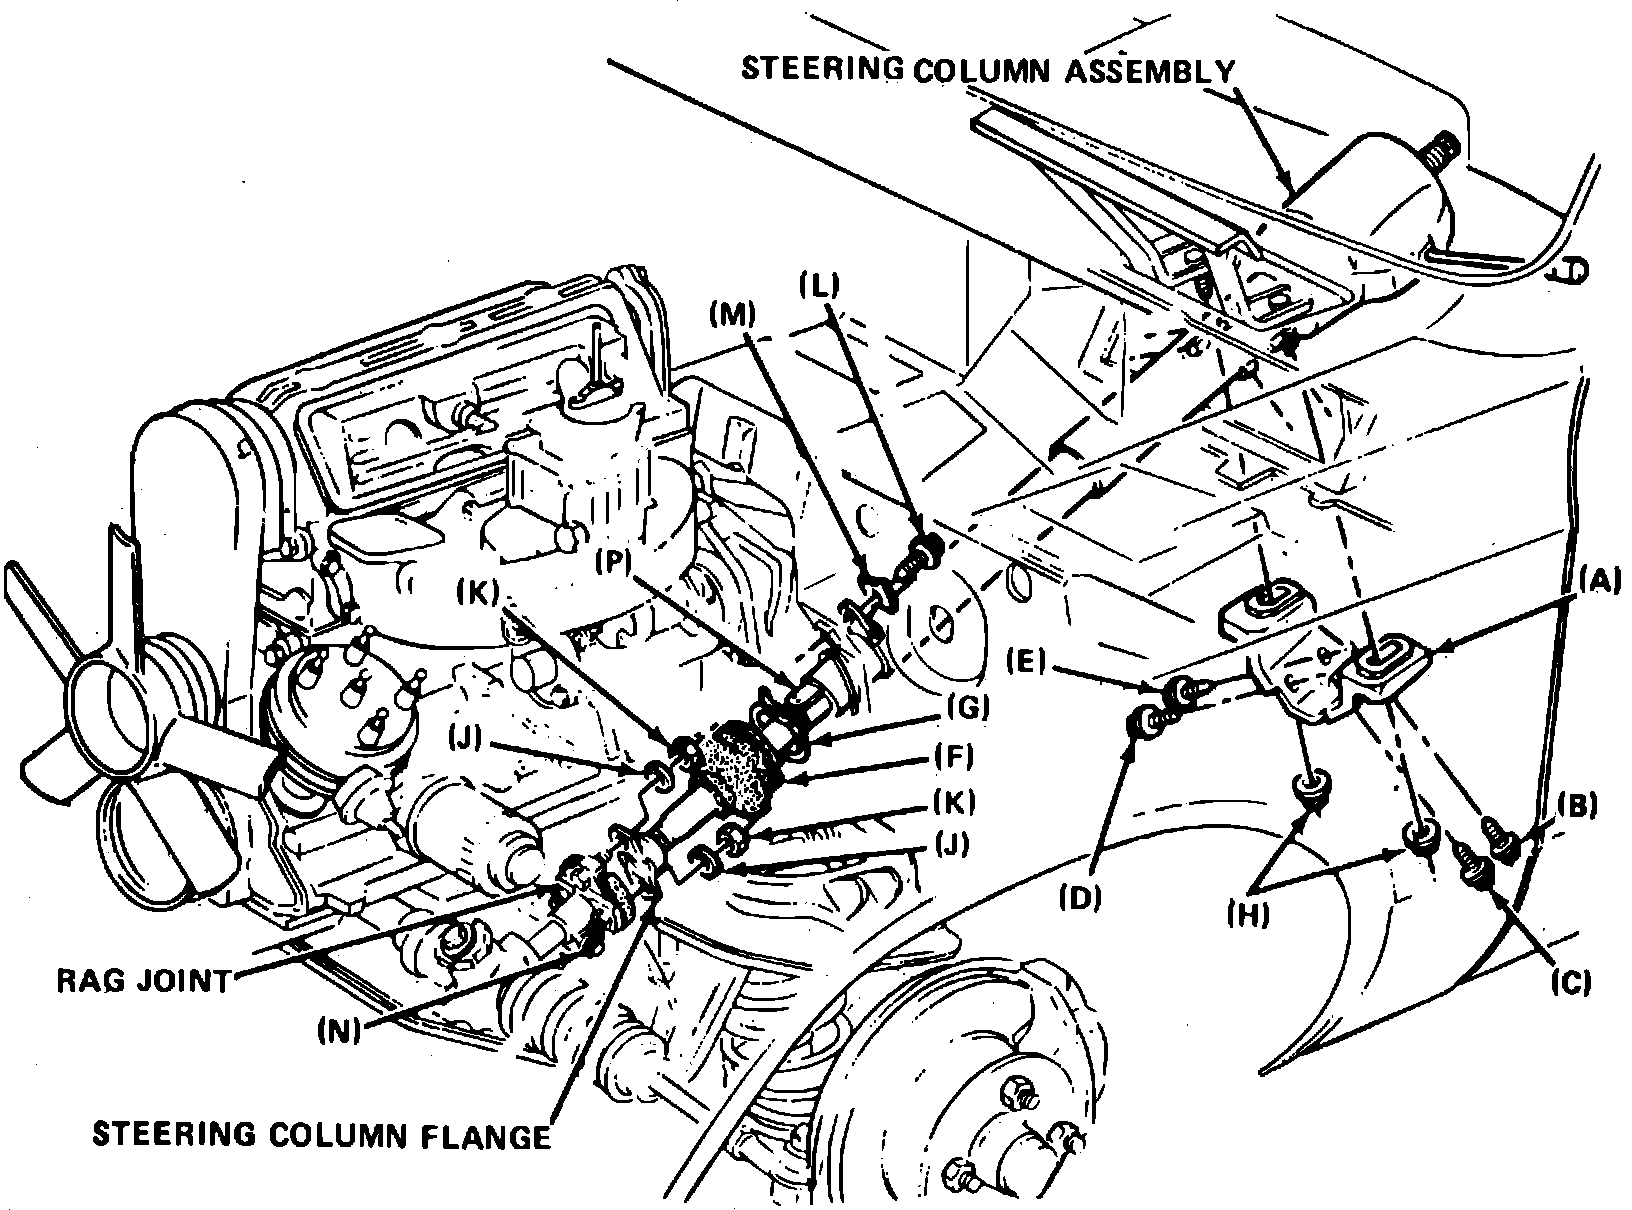
Fig. 10 Typical steering column installation. 1982 Chevette & 1000:
INSTALLATION
1982 Chevette & 1000
1. Attach bracket (A) to jacket and install the following bolts in sequence: (B), (C), (D) and (E). Then, torque bolts, in installation sequence, to 22 lb ft, Fig. 10.
2. Install steering into vehicle. Seal (F) and retainer (G) must be installed after column is positioned through front of dash.
3. Position coupling flange to rag joint studs.
4. Loosely assemble capsule nuts (H) to within .5---1.5 mm of capsule surface.
5. Install and torque flange coupling to rag joint lockwashers (J) and nuts (K) to 18 lb ft
6. Attach steering column to front of dash with screw (L) and washer (M), then torque to 18 lb in
7. Torque capsule nuts (H) to 20 lb ft
8. Torque rag joint pinch bolt to 30 lb ft
9. Install seal (F) and remove alignment spacer (P).
10. With vehicle at curb height, minimum clearance between outside diameter of shaft and inside diameter of jacket lower bushing should be 1.15 inch minimum.