Differential Axle Housing: Service and Repair
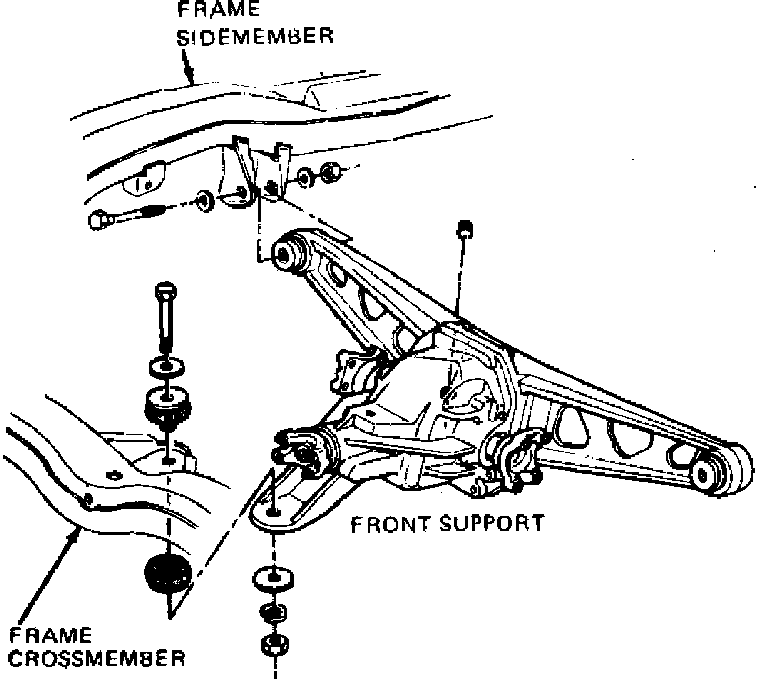
Fig. 2 Rear axle assembly mounting. 1982 Corvette:
1982
1. Raise vehicle and remove spare tire.
2. Remove spare tire cover by removing support hooks attached to carrier cover.
3. Remove exhaust system, then position jack stands under front control arms to support vehicle.
4. Remove heat shield.
5. Using a suitable jack and C-clamp, raise spring to relieve tension, then disconnect spring from spindle support.
6. Remove rear spring cover plate.
7. Place alignment marks on cam bolt for reassembly, then remove cam bolt from bracket.
8. Remove bolts attaching strut bracket to carrier, then lower strut rods by pushing outward on wheel and tire assembly.
9. Mark propeller shaft and pinion flange, then disconnect propeller shaft.
10. Remove differential carrier to frame crossmember mount bolt, Fig. 2.
11. Position jack stand under carrier, then remove carrier to body attaching bolts, Fig. 2.
12. Lower differential to gain access to cover bolts.
13. Drain differential and remove cover.
14. Disconnect drive shaft at spindle at companion flange.
15. Lower and remove differential assembly.
16. Remove drive shafts from side yokes.
17. Reverse procedure to install.