Lower Control Arm & Bushing
Fig. 10 Lower control arm front bushing removal. 4 x 2 models:
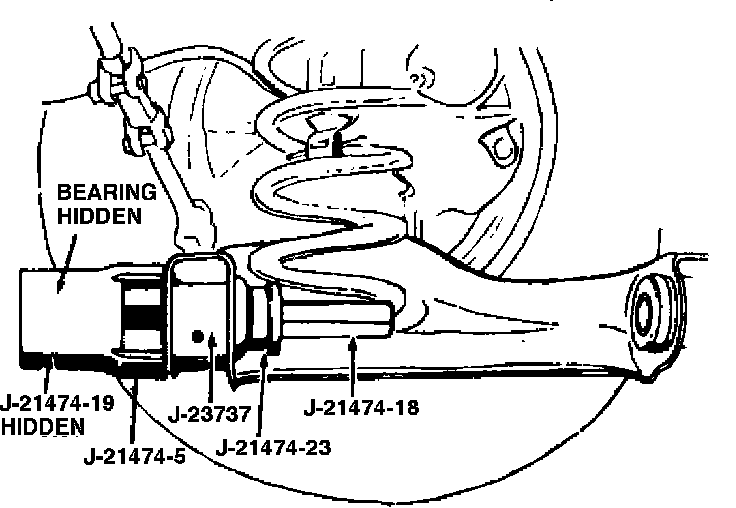
Fig. 11 Lower control arm rear bushing removal. 4 x 2 models:
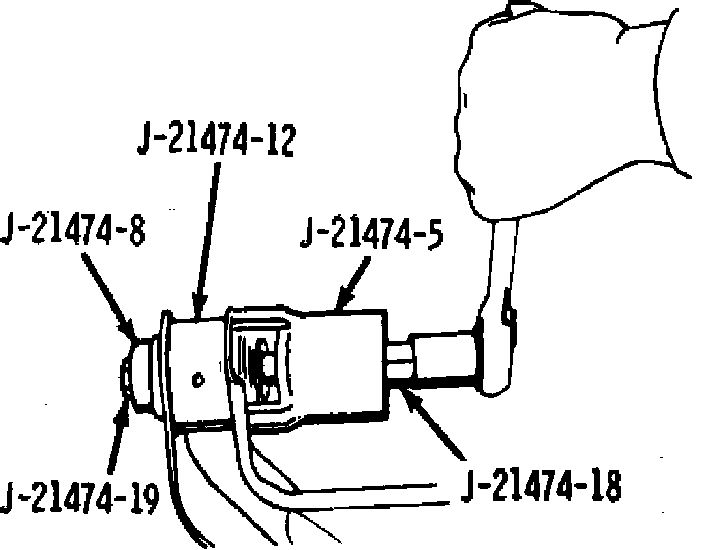
Fig. 12 Lower control arm front bushing installation. 4 x 2 models:
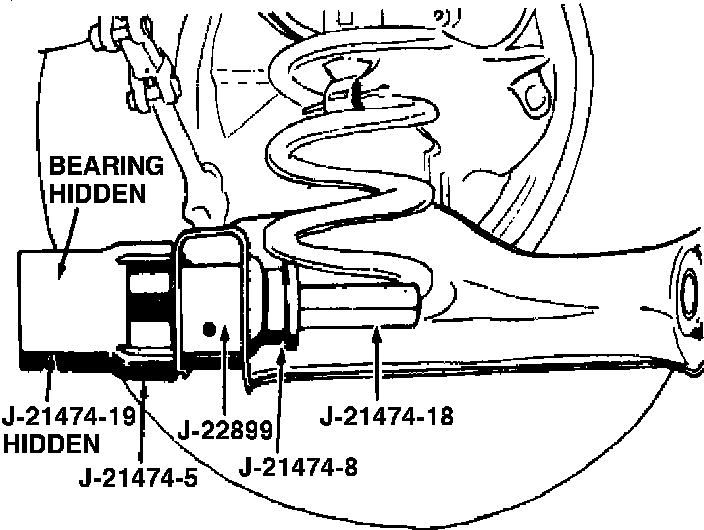
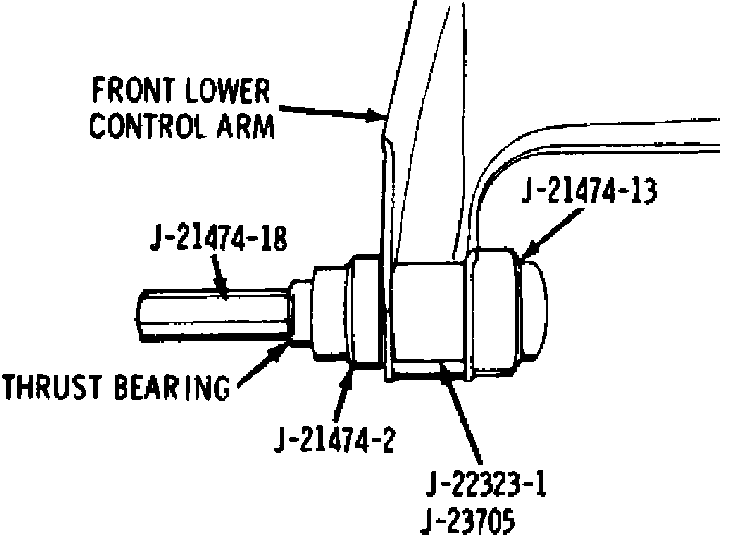
Fig. 13 Flaring lower control arm front bushing. 4 x 2 models:
4 X 2 MODELS
1. Drive bushing flare down flush with rubber of front bushing, then remove front and rear bushings from control arm, Figs. 10 and 11.
2. Install front bushing, Fig. 12, then flare the bushing, Fig. 13.
Fig. 14 Lower control arm rear bushing installation. 4 x 2 models:
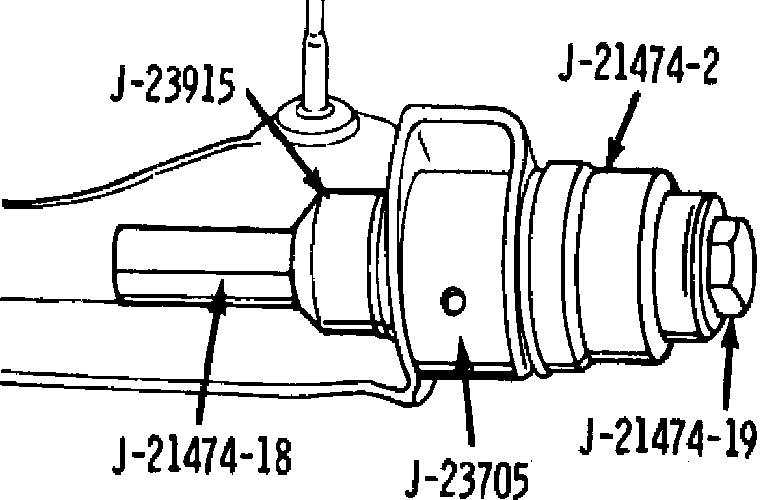
3. Install rear bushings, Fig. 14, then the lower control arm as described previously.
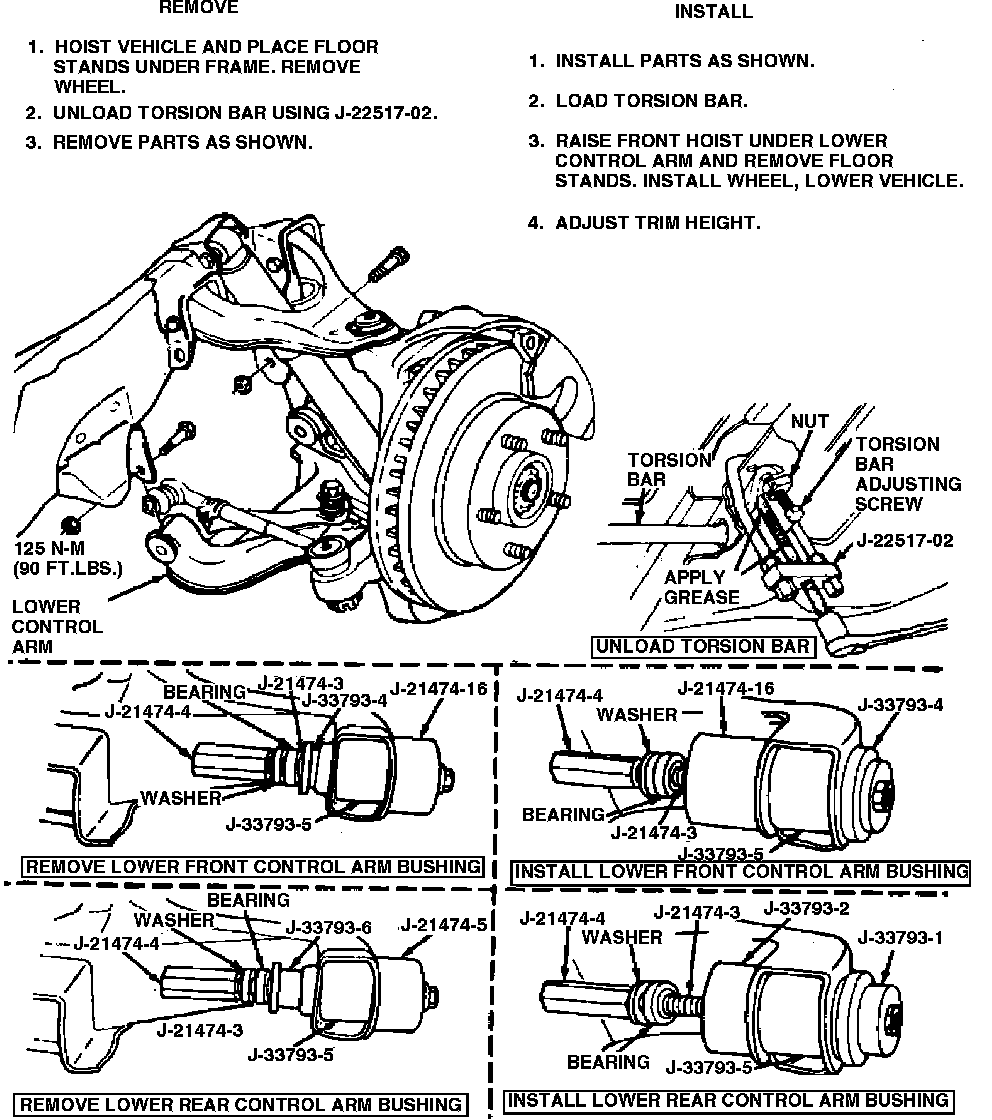
Fig. 15 Lower control arm bushing replacement. 4 x 4 models:
4 X 4 MODELS
Refer to Fig. 15 for lower control arm bushing replacement procedure on 4 x 4 vehicles.