Synchronizers Assemble
1ST /2ND SYNCHRONIZER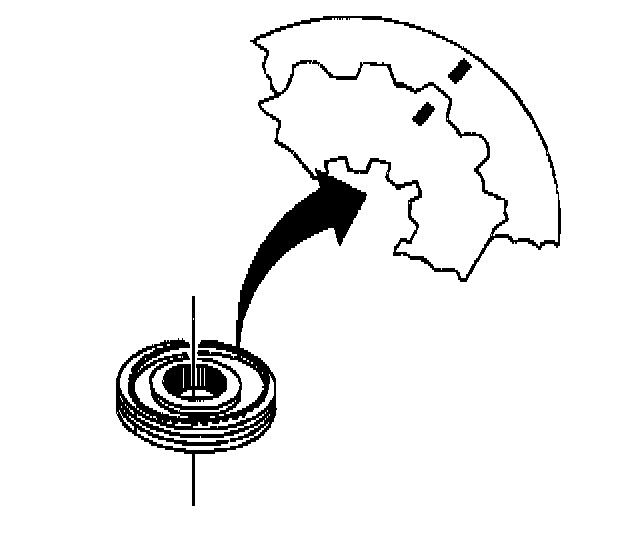
1. Check the synchronizer assembly scribe marks for correct positions.
2. Install the following parts:
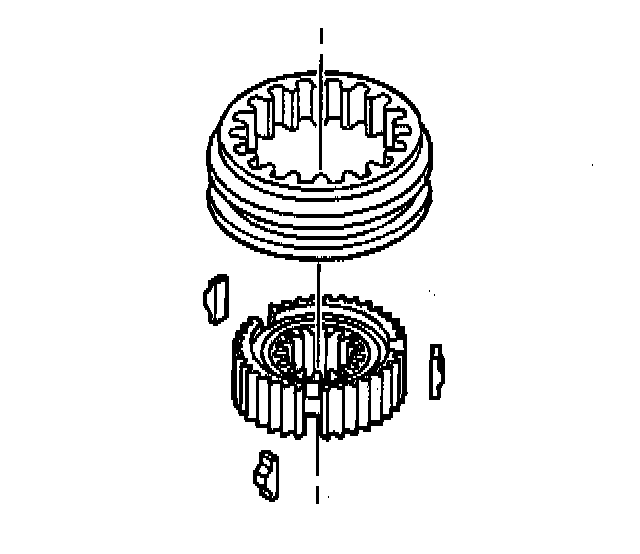
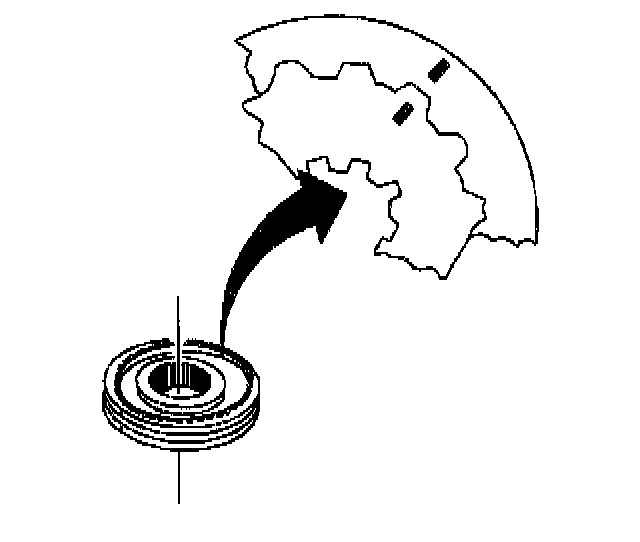
2.1. The synchronizer sleeve to the hub (align the key openings in the hub with the cuts in the synchronizer sleeve).
2.2. The keys with the slots facing the hub
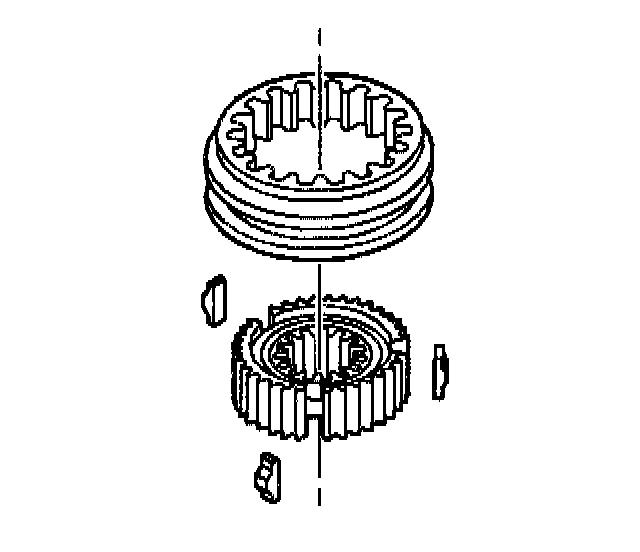
3. Assemble the following parts:
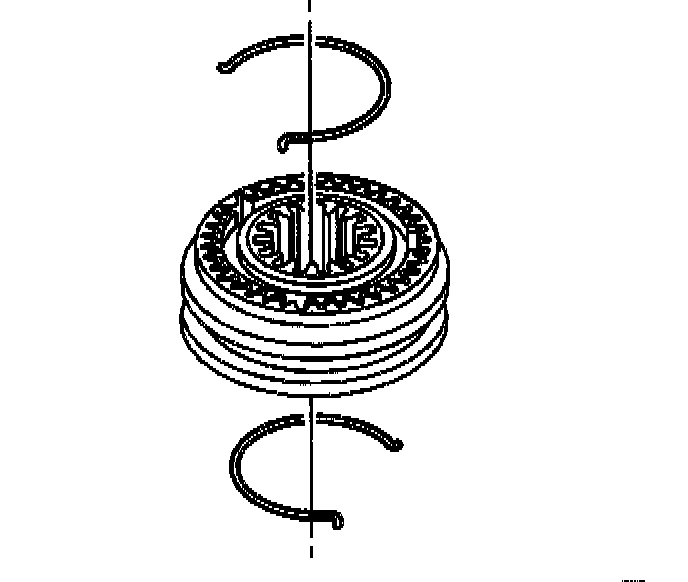
3.1. The first spring (assemble the spring tangs to the side of two keys).
3.2. The second spring (assemble the spring tangs to the side of two keys such that the gap is not between the same two keys as the first spring).
3RD /4TH, 5TH /6TH SYNCHRONIZERS
1. Check the synchronizer assembly scribe marks for correct positions.
2. Install the following parts:
2.1. The synchronizer sleeve to the hub (align the key openings in the hub with the cuts in the synchronizer sleeve).
2.2. The keys with the slots facing the hub
3. Assemble the following parts:
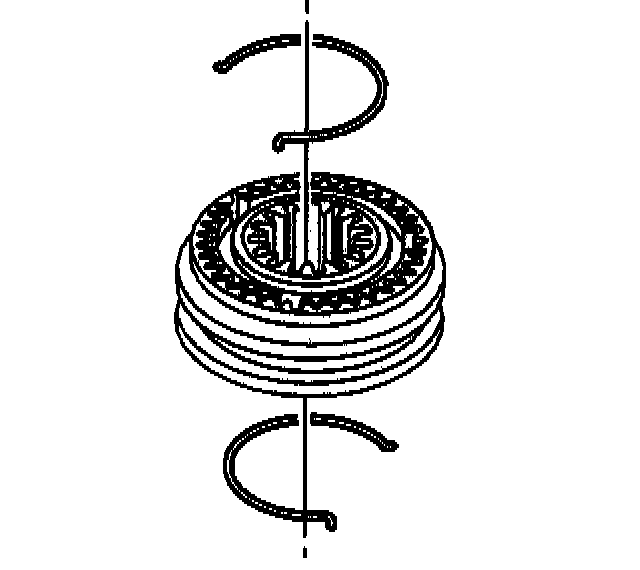
3.1. The first spring (Assemble the spring tang to one of the key slots).
3.2. The second spring (Assemble the spring tang on the same key but in the opposite direction).
REVERSE SYNCHRONIZER
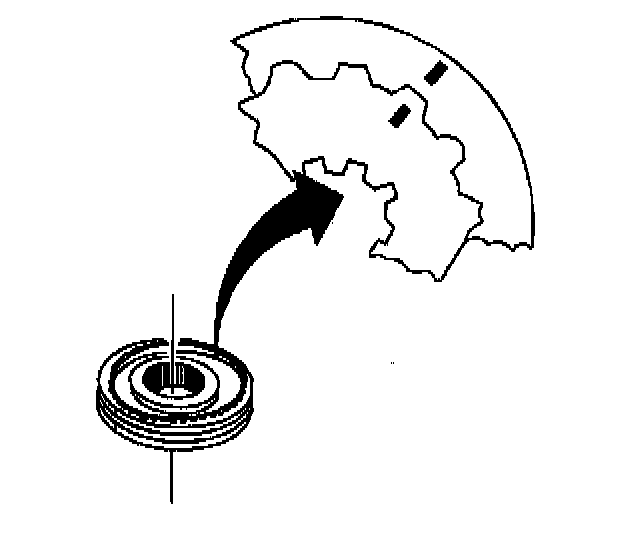
1. Check the synchronizer assembly scribe marks for correct positions.

2. Install the following parts:
2.1. The synchronizer sleeve to the hub (Align the key openings in the hub with the cuts in the synchronizer sleeve).
2.2. The keys with the slots facing the hub

3. Assemble the following parts:
3.1. The first spring (Assemble the spring tang to one of the key slots).
3.2. The second spring (Assemble the spring tang on the same key but in the opposite direction).
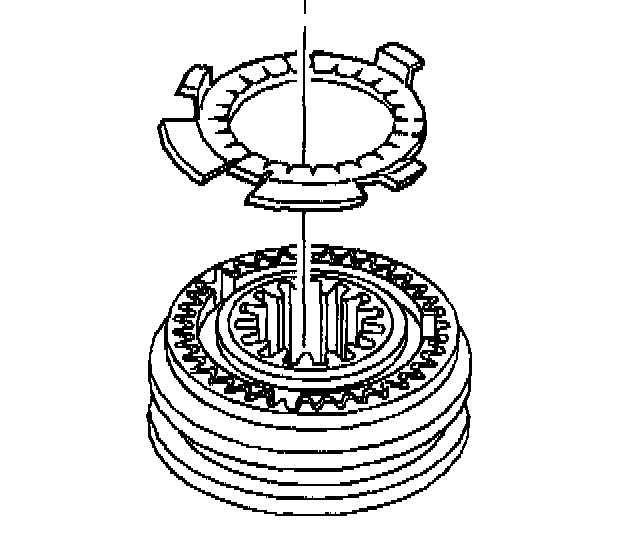
4. Install a new synchronizer key retainer with the key retainer tangs over the synchronizer keys.