Brake Caliper Overhaul
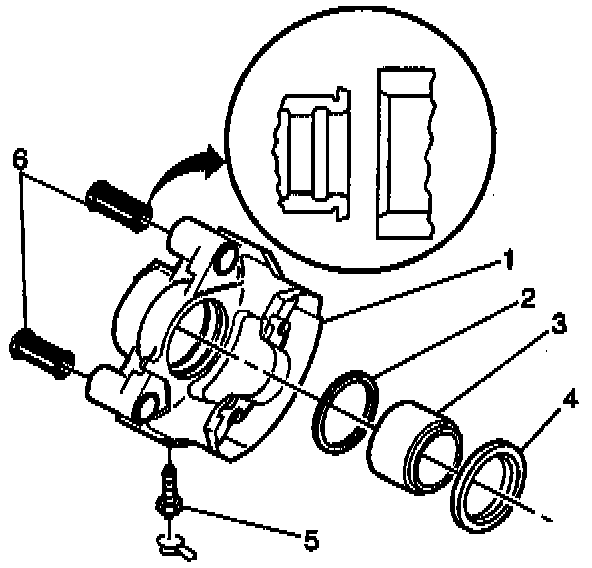
REMOVAL PROCEDURE
1. Remove the caliper completely from the vehicle. Refer to Brake Caliper Replacement.
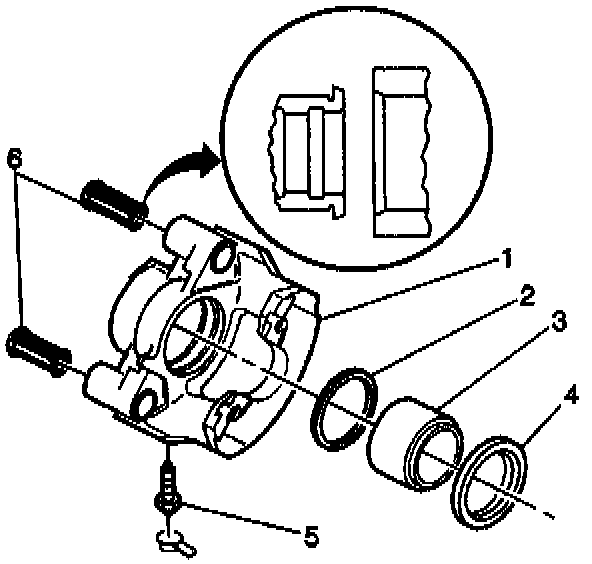
2. Disassemble the bushings (6).
3. Inspect the bushings (6) for cuts and nicks. Replace the bushings (6) if damaged.
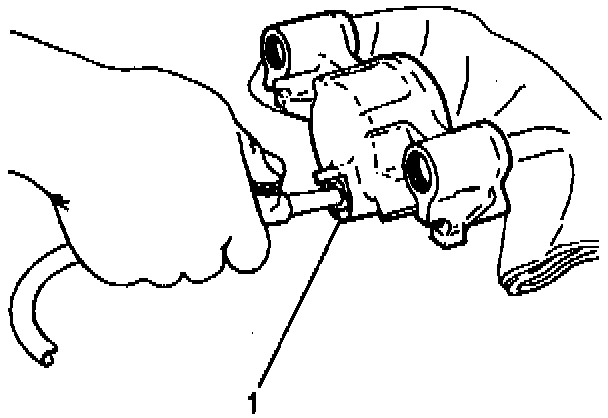
CAUTION: Do not place your fingers In front of the piston in order to catch or protect the piston while applying compressed air. This could result in serious injury.
IMPORTANT: Use clean shop towels in order to pad the interior of the caliper housing during the removal.
4. Remove the piston using compressed air into the caliper inlet hole (1).
5. Inspect the piston for scoring, nicks, corrosion and worn or damaged chrome plating. Replace the piston if any of these conditions are found.
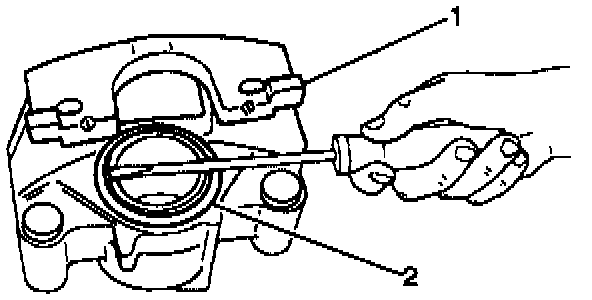
6. Remove the boot (2) from the caliper housing bore. Be careful not to scratch the housing bore.
Notice: Do not use a metal tool for seal removal. Damage to the caliper bore or the seal grooves can result.
7. Remove the piston seal grove in the caliper housing bore with a small wood or plastic tool.
8. Inspect the caliper housing bore and seal groove for scoring, nicks, corrosion and wear.
9. Use a crocus cloth to polish out light corrosion.
10. Replace the caliper (1) housing if corrosion in and around the seal groove will not clean up with a crocus cloth.
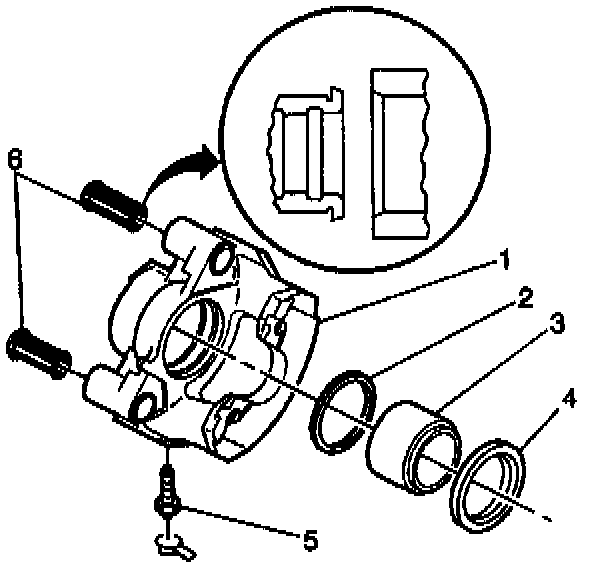
11. Remove the bleeder valve and bleeder valve (5) cap from the caliper.
12. Clean all parts in clean, denatured alcohol.
13. Dry the parts with unlubricated compressed air.
14. Blow out all passages in the caliper housing and bleeder valve.
INSTALLATION PROCEDURE
Tools Required
^ J29077-A Front Disc Brake Caliper Dust Boot Installer
NOTICE: Always use the correct fastener in the proper location. When you replace a fastener, use ONLY the exact part number for that application. The manufacturer will call out those fasteners that require a replacement after removal. The manufacturer will also call out the fasteners that require thread lockers or thread sealant. UNLESS OTHERWISE SPECIFIED, do not use supplemental coatings (paints, greases, or other corrosion inhibitors) on threaded fasteners or fastener joint interfaces. Generally, such coatings adversely affect the fastener torque and joint clamping force, and may damage the fastener. When you install fasteners, use the correct tightening sequence and specifications. Following these instructions can help you avoid damage to parts and systems.
1. Assemble the bleeder valve (5) and bleeder valve cap into caliper.
^ Tighten the bleeder valve to 13 Nm (115 inch lbs.).
2. Lubricate the new piston seal (2) and install the new piston seal into the caliper bore groove.
3. Make sure the seal (2) is not twisted.
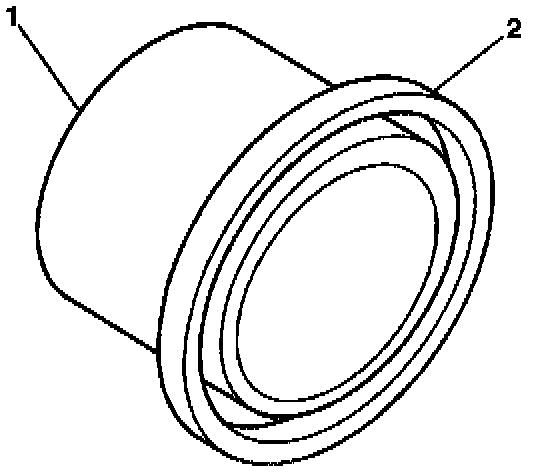
4. Install the lubricated boot (2) onto the piston (1).
5. Install the piston and boot onto the bore of the caliper and push to the bottom of the bore.
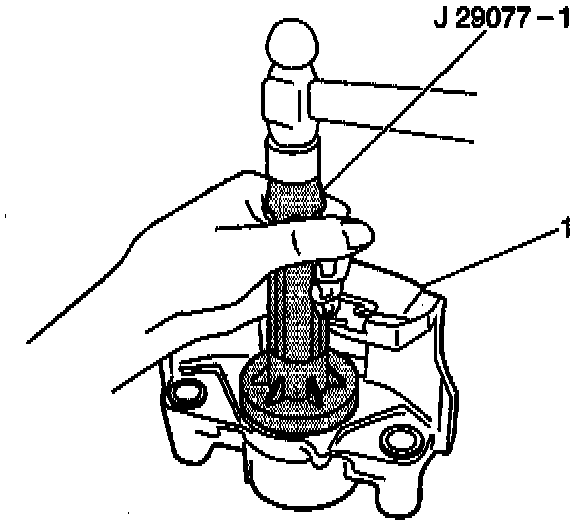
6. Seat boot fin the caliper housing counter bore using J29077-A.
7. Perform the following steps in order to install the bushings:
7.1. Lubricate the beveled end of the bushing with silicone grease, or the equivalent.
7.2. Pinch the bushing and install the bevel end first.
7.3. Push the bushing through the housing mounting bore.
8. Install the caliper. Refer to Brake Caliper Replacement.