Transaxle Mount Replacement
INSPECTION PROCEDURE1. Pull up and down on the transaxle case while observing the front lower transaxle mount.
2. Replace a mount when the following conditions occur:
3. The rubber separates from the metal case
4. If movement occurs between the metal plate of the mount and its attaching point, tighten the mount bolts.
^ Tighten the bolts to 75 Nm (55 ft. lbs.).
NOTICE: Refer to Fastener Notice in Service Precautions.
REMOVAL PROCEDURE
^ Tools Required
- J 28467-360 Engine Support Fixture Adapter.
1. Disconnect the negative battery cable.
Install J 28467-360.
Raise the transaxle enough to take pressure off of the motor mounts.
CAUTION: Refer to Battery Disconnect Caution in Service Precautions.
2. Remove the left front tire and the wheel assembly. Refer to Wheel Removal in Tires and Wheels.
3. Remove the left front splash shield.
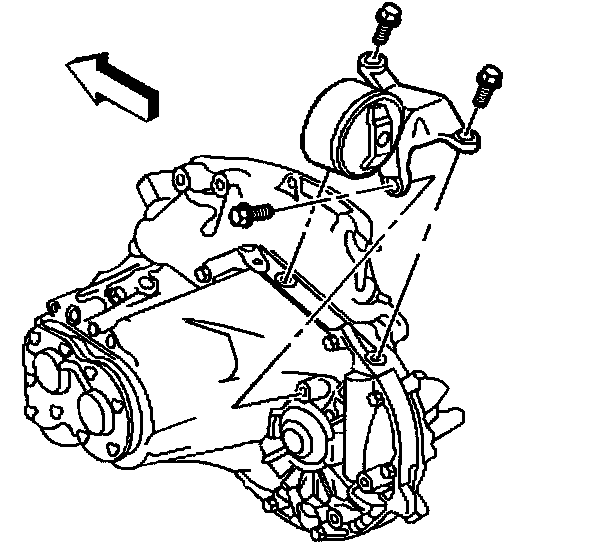
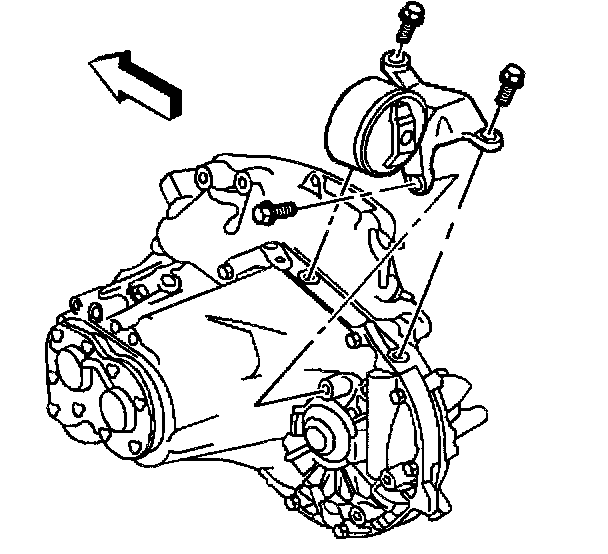
4. Remove the front transaxle mount bolts.
5. Remove the front transaxle mount.
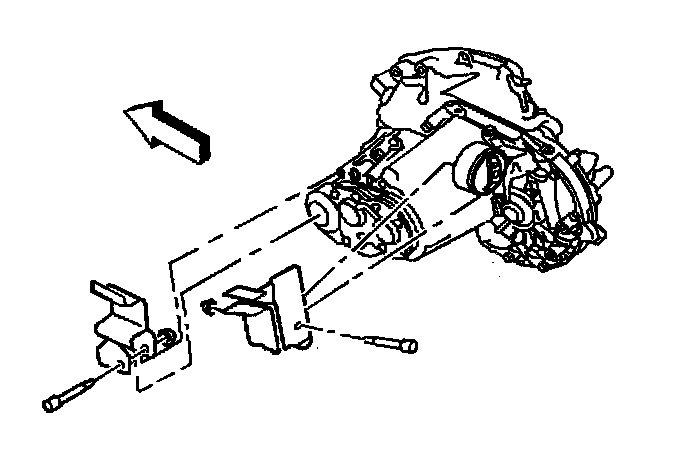
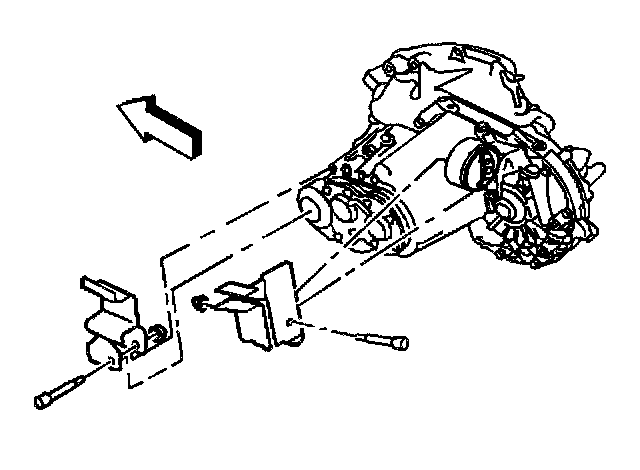
6. Remove the rear transaxle mount bolts.
7. Remove the rear transaxle mount.
INSTALLATION PROCEDURE
1. Install the front transaxle mount.
2. Install the front transaxle mount bolts.
^ Tighten the bolts to 60 Nm (44 ft. lbs.).
NOTICE: Refer to Fastener Notice in Service Precautions.
3. Install the rear transaxle mount.
4. Install the rear transaxle mount bolts.
^ Tighten the bolts to 75 Nm (55 ft. lbs.).
5. Install the left front splash shield.
6. Install the left front tire and the wheel assembly. Refer to Wheel Installation in Tires and Wheels.
7. Remove J 28467-360.
8. Connect the negative battery cable.