Differential Case Assembly Disassemble
REMOVAL PROCEDURE^ Tools Required
- J 3289-20 Holding Fixture Base
- J 3289-21 Holding Fixture
- J 37769 Differential Holding Fixture Adapters
- J 8614-01 Pinion Bearing Installer
- J 22912-01 Rear Bearing Remover
- J 22888-D Side Bearing Remover
- J 8107-4 Differential side Bearing Remover Plug
- J 26941 Knuckle Seal Remover
- J 23907 Slide Hammer
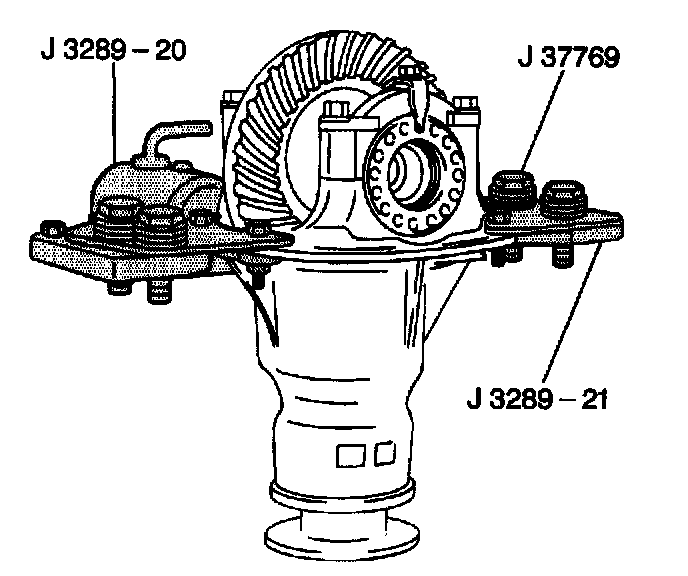
1. Install the mount differential carrier with the J 37769
2. Place the differential carrier and the holding fixture into the J 3289-20
3. Inscribe alignment marks on the differential side bearing caps to ensure proper assembly.
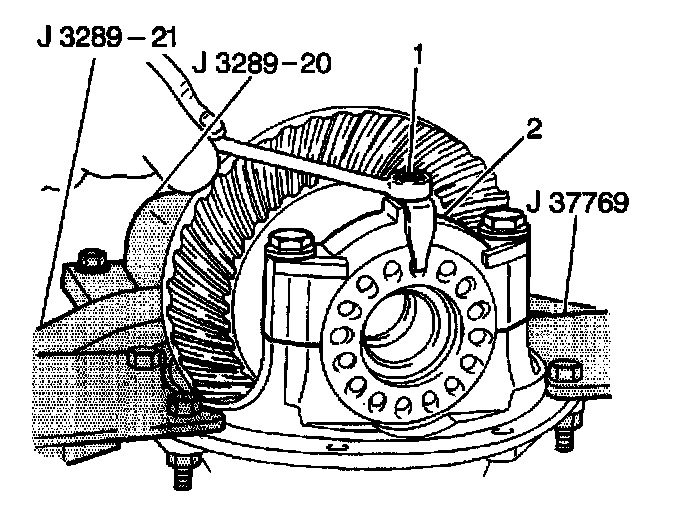
4. Remove the two bolts (1) and the side bearing lock plates (2) from the differential carrier.
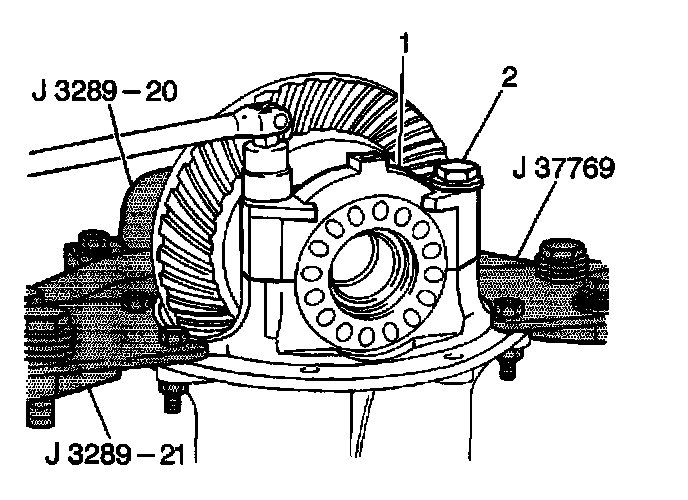
5. Remove the four bolts (2) and the side bearing caps (1) from the differential carrier.
6. Remove the side bearing adjusters and the bearing races from the differential carrier.
7. Remove the differential ring gear and the case from the differential carrier.
8. Turn the differential carrier and the holding fixture over so that the pinion flange nut is horizontal (90 degrees).
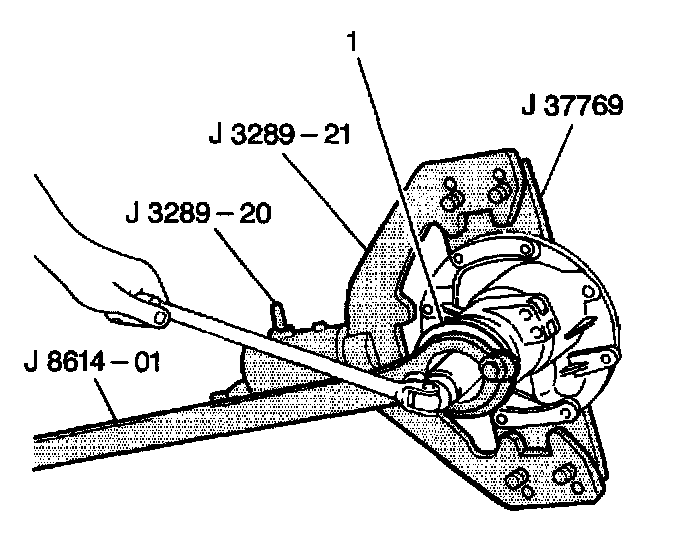
9. Unstake the pinion flange (1) nut.
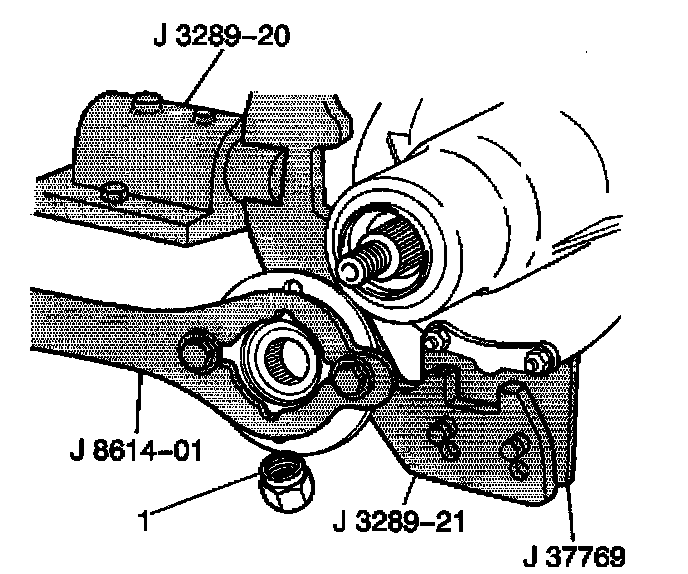
10. Remove the pinion flange nut (1) from the pinion gear using the J 8614-01 to hold the pinion flange stationary.
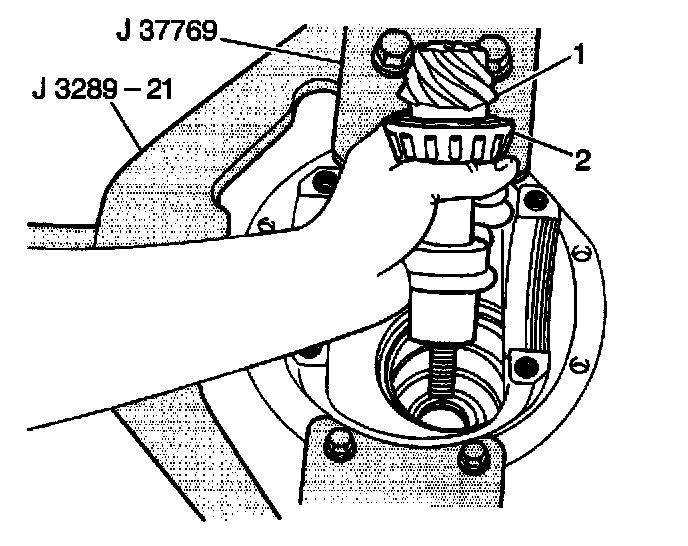
11. Remove the pinion gear (1) from the differential carrier.
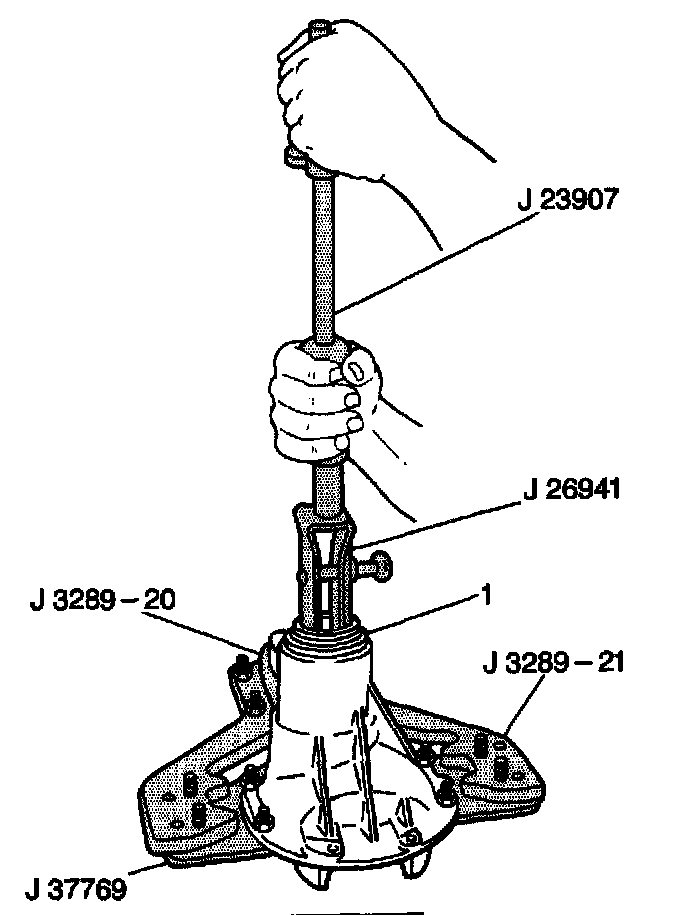
12. Remove the pinion seal (1) from the differential carrier using the J 26941 with the J 23907
13. Remove the outer pinion bearing from the differential carrier.
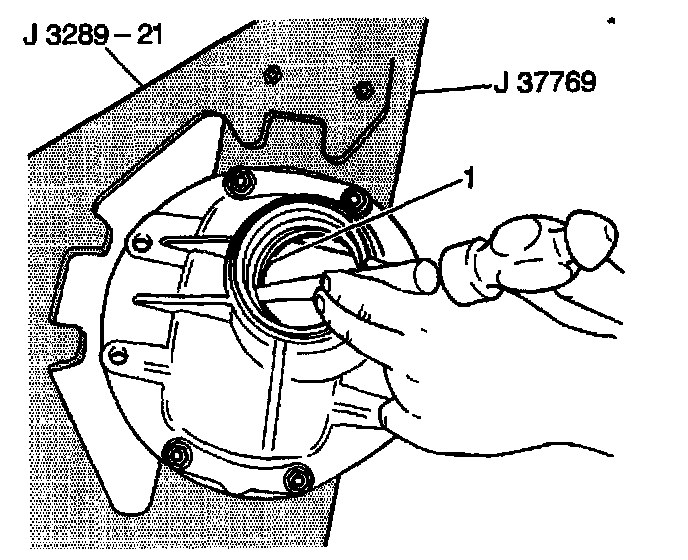
14. Remove the inner pinion bearing races (1) from the differential carrier using a large drift punch and a hammer. Tap around the rear of each bearing race and slowly drive each race out evenly.
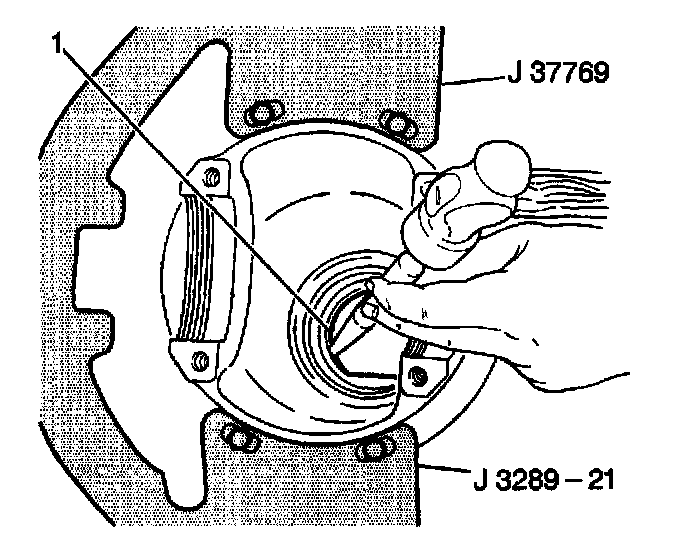
15. Remove the outer pinion bearing races (1) from the differential carrier using a large drift punch and a hammer, Tap around the rear of each bearing race and slowly drive each race out evenly.
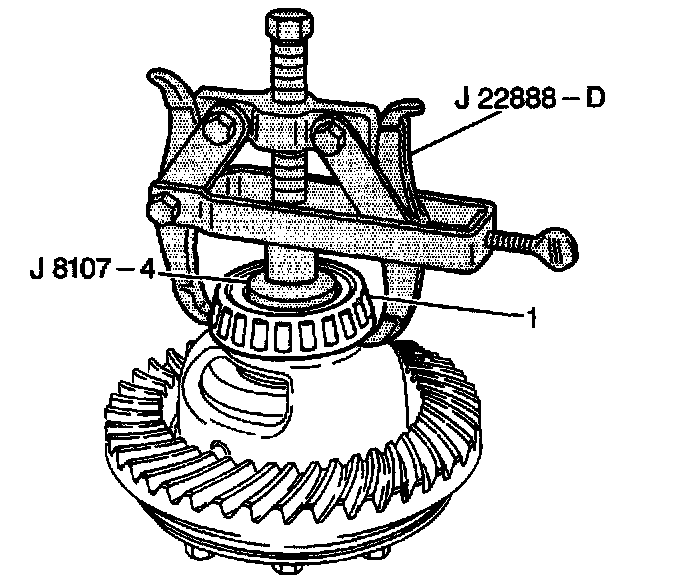
16. Remove the side bearings (1) from the differential case using the J 22888-D with the J 8107-4.
17. Remove the ten bolts and the ring gear from the differential case.
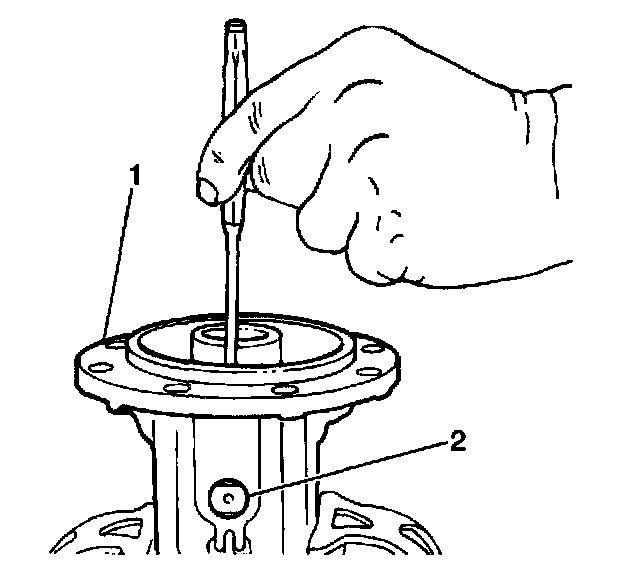
18. Remove the pinion shaft roll pin, the pinion shaft (2), the differential pinion gears, the washers and the side gears with selective washers from the differential case.
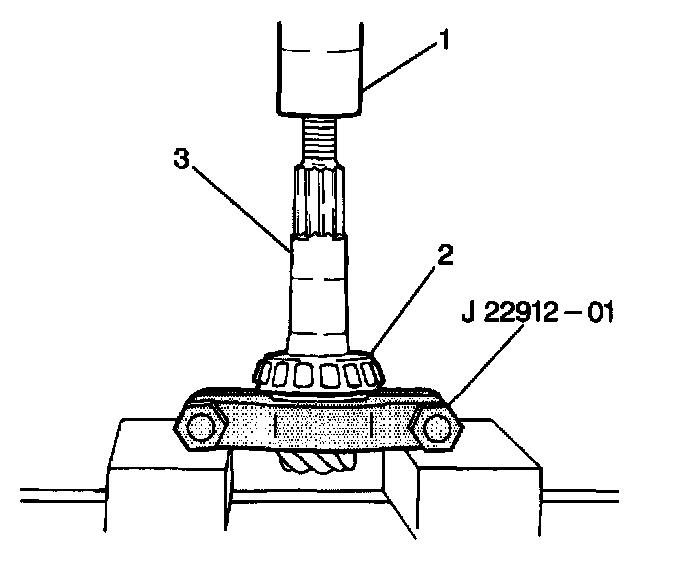
19. Remove the inner pinion bearing (2) and the collapsible spacer from the pinion gear shaft using the J 22912-01. Place the J 22912-01 on the pinion gear shaft with the concave side toward the pinion gear. Then place the pinion gear (3) in a hydraulic press (1) and remove the inner pinion bearing.
20. Remove the pinion selective shim from the pinion gear shaft.
21. Clean all parts thoroughly with clean solvent and air dry.
IMPORTANT: If compressed air is used to dry the parts, do not spin dry the roller bearings with compressed air or bearing damage may result.
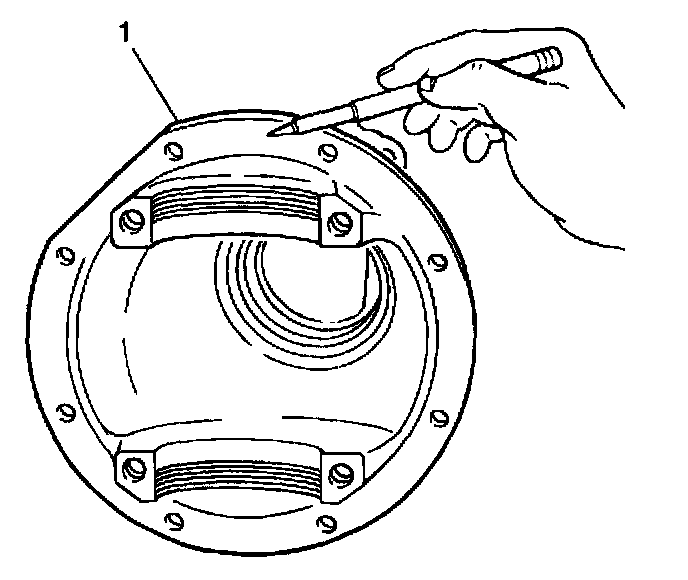
22. Inspect the differential carrier (1) and case for cracks or stripped threads and repair or replace as necessary.
IMPORTANT: Differential components are set to very close tolerances and are prone to wear should one component fail. In order to ensure accurate adjustment and even wear, the ring and pinion gears as well as all tapered roller bearings and races must be replaced as sets.
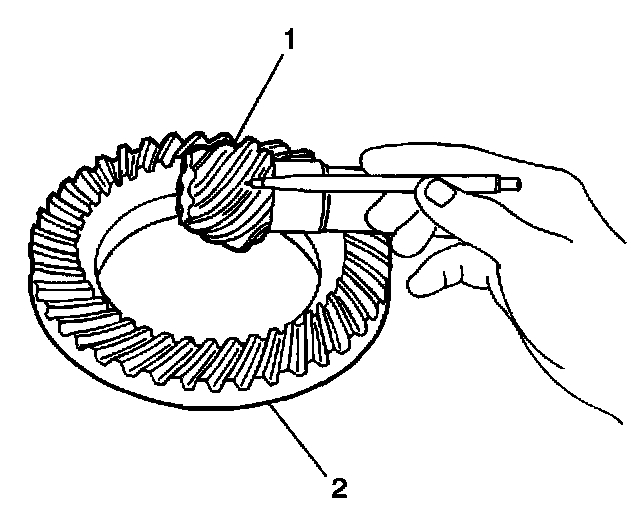
23. Inspect the ring (2) and pinion (1) gears for excessive or unusual wear, cracks, overheating or other damage and replace as necessary.
24. Inspect all roller bearings and races for roughness, locking, or other wear or damage. Replace defective parts as necessary.
25. Inspect the side and differential pinion gears for unusual wear or damage. Replace defective parts as necessary.