Accumulator Replacement
Accumulator ReplacementREMOVAL PROCEDURE
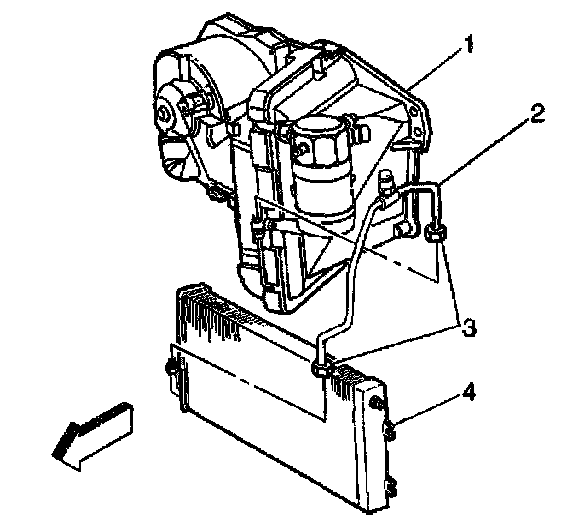
1. Remove the air cleaner.
2. Discharge and recover the refrigerant from the system. Refer to Refrigerant Recovery and Recharging.
3. Remove the evaporator (1) from the accumulator.
4. Remove the compressor and condenser hose assembly.
5. Remove the O-ring seals.
6. Disconnect the electrical connectors.
7. Remove the pressure switch.
8. Remove the mounting bracket bolt.
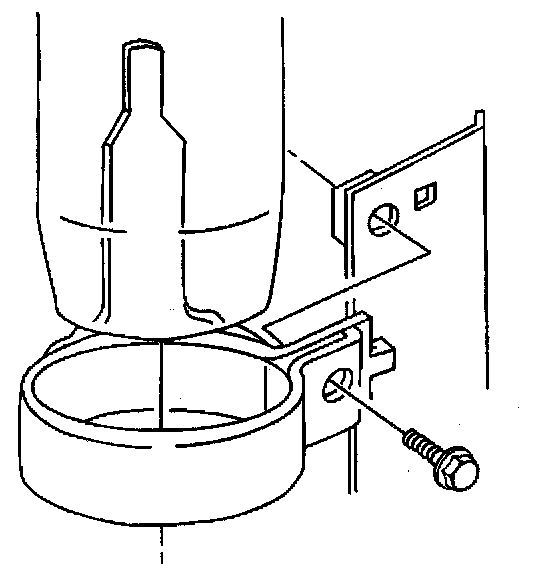
9. Remove the mounting bracket.
10. Remove the accumulator.
11. Install sealing caps if you are not replacing the accumulator.
INSTALLATION PROCEDURE
1. Install the accumulator.
NOTE: Refer to Fastener Notice in Service Precautions.
Install the evaporator (1) to the accumulator.
Tighten
Tighten the evaporator to the accumulator to 48 N.m (35 lb ft).
2. Install the mounting bracket.
3. Install the mounting bracket bolt.
Tighten
Tighten the mounting bracket bolt to 4 N.m (35 lb in).
4. Install the pressure switch.
5. Connect the electrical connections.
6. Coat the O-ring seals with 525 Viscosity refrigerant oil.
7. Install new O-ring seals.
8. Install the compressor and condenser hose assembly.
9. Evacuate and charge the system. Refer to Refrigerant Recovery and Recharging.
10. Ensure that no leaks exist in the system.
11. Install the air cleaner.