Sunroof / Moonroof Module: Service and Repair
REMOVAL PROCEDURE
1. Remove the headliner.
2. Disconnect the front and rear drain hoses from the sunroof module.
3. Disconnect the electrical connector from the actuator harness to the roof harness.
4. Remove the two bolts and two nuts from the sunroof switch bracket and remove the bracket.
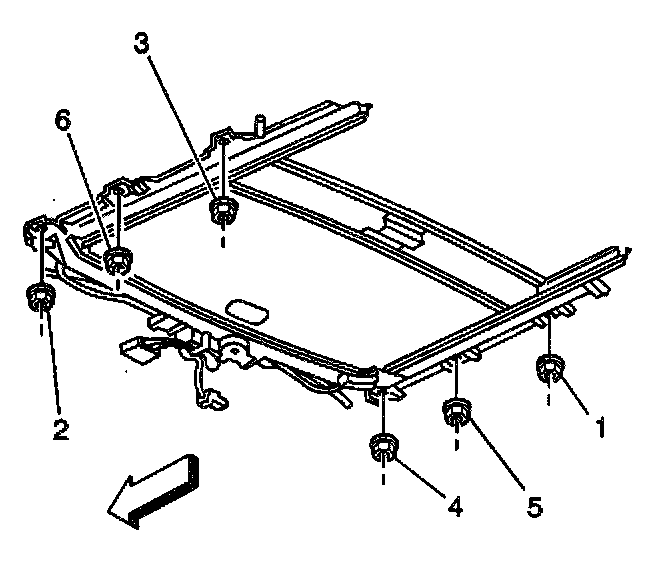
5. Remove the sunroof module nuts (1, 2, 3, 4, 5, 6).
6. Remove the sunroof module from the vehicle.
INSTALLATION PROCEDURE
1. Position the module to the vehicle.
NOTE: Refer to Fastener Notice in Cautions and Notices.
2. Install the sunroof module nuts in the correct fastener tightening sequence as shown (1, 2, 3, 4, 5, 6).
Tighten
Tighten the sunroof module nuts to 10 N.m (89 lb in).
3. Install the two bolts and two nuts in the sunroof switch bracket.
Tighten
Tighten the sunroof switch bracket nuts to 10 N.m (89 lb in).
Tighten
Tighten the sunroof switch bracket bolts to 10 N.m (89 lb in).
4. Connect the electrical connector from the actuator harness to the roof harness.
5. Connect the front and rear drain hoses to the sunroof module.
6. Temporarily connect the sunroof switch and check the sunroof operation.
7. Install the headliner.
8. Check the sunroof operation. Refer to Power Sunroof Circuit Description. Description and Operation