Control Arm Bushing: Service and Repair
Removal Procedure- Tools Required
- J21474-5 Bushing Receiver
- J21474-23 Bushing Remover
Important: If replacing both lower control arms, remove and replace only one control arm at a time in order to prevent the rear axle from rolling or slipping sideways.
1. Raise and suitably support the vehicle. Refer to Vehicle Lifting.
2. Support the rear axle with an adjustable jack stand.
3. Remove the lower control arm. Refer to Rear Axle Lower Control Arm Replacement
4. Install J21474-5 over the flanged side of the bushing.
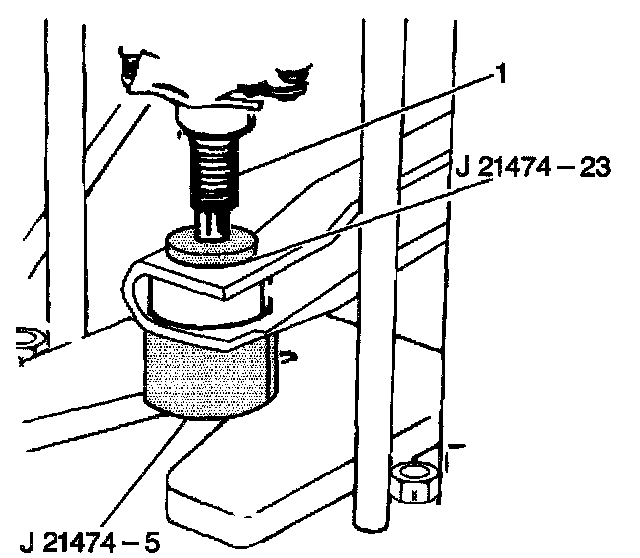
5. Using a arbor press (1), place the large outside diameter of J21474-23 in contact with the outside diameter of the outer sleeve in order to force the bushing out of the lower control arm.
Installation Procedure
- Tools Required
- J21474-5 Bushing Receiver
- J21474-20 Front and Rear Bushing Installer
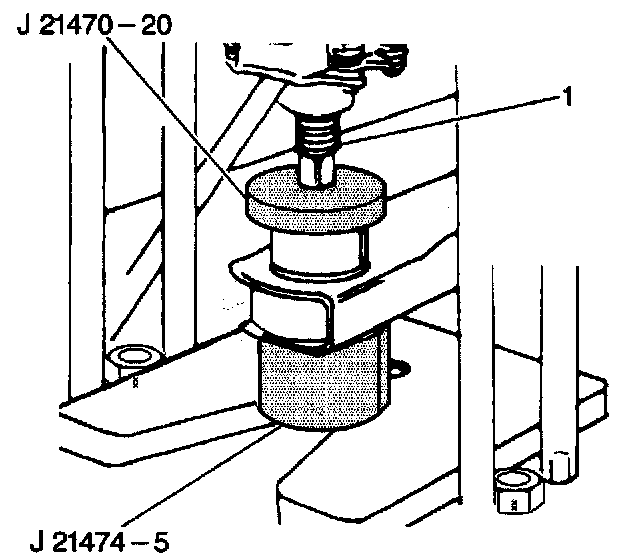
1. Install J21474-5 over the flanged side of the bushing.
2. Install the bushing into position using J21474-20.
3. Install the lower control arm. Refer to Rear Axle Lower Control Arm Replacement
4. Remove the rear axle support.
5. Lower the vehicle.