Compressor Hose Assembly Replacement
REMOVAL PROCEDURE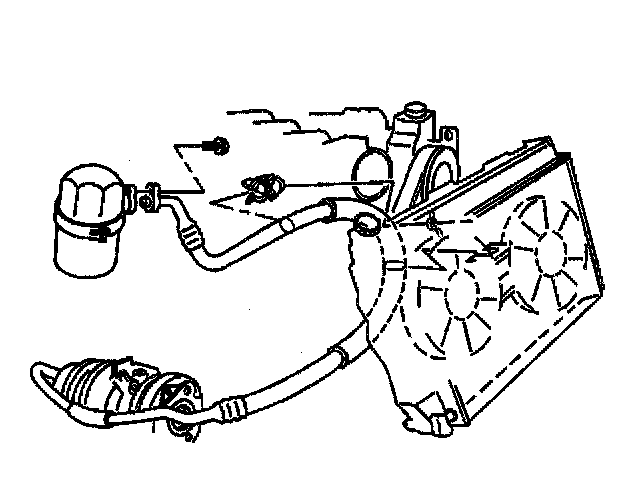
1. Recover the refrigerant.
2. Remove the air conditioning (A/C) compressor and condenser hose from the clip on the fan shroud.
3. Remove the A/C compressor and condenser hose bolt at the accumulator.
4. Discard the O-ring.
5. Raise and suitably support the vehicle.
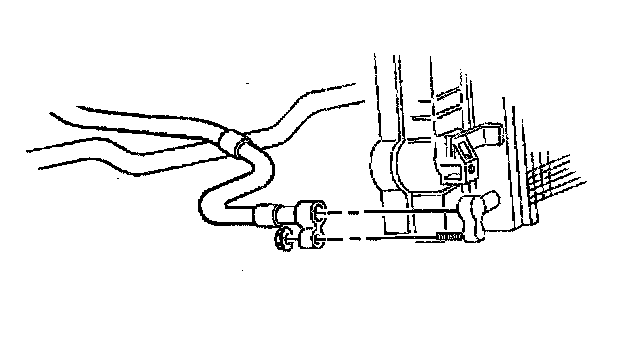
6. Remove the A/C compressor and condenser hose nut at the condenser.
7. Discard the O-ring.
8. Remove the A/C compressor.
9. Remove the A/C compressor and condenser hose from the vehicle.
10. Discard the O-ring.
INSTALLATION PROCEDURE
Lightly coat the O-rings with the mineral base 525 viscosity refrigerant oil.
1. Install a new O-ring to the A/C compressor and condenser hose.
2. Install the compressor and condenser hose to the vehicle.
3. Install the A/C compressor.
4. Install a new O-ring.
NOTE: Refer to Fastener Notice in Service Precautions.
5. Install the A/C compressor and condenser hose nut at the condenser.
Tighten
Tighten the A/C compressor and condenser hose nut at the condenser to 16 N.m (12 lb ft).
6. Lower the vehicle.
7. Install a new O-ring.
8. Install the A/C compressor and condenser hose bolt at the accumulator.
Tighten
Tighten the A/C compressor and condenser hose bolt at the accumulator to 16 N.m (12 lb ft).
9. Install the A/C compressor and condenser hose to the clip on the fan shroud.
10. Recharge the A/C system.
11. Perform a leak test on the A/C system.