Shift Solenoid: Service and Repair
Removal Procedure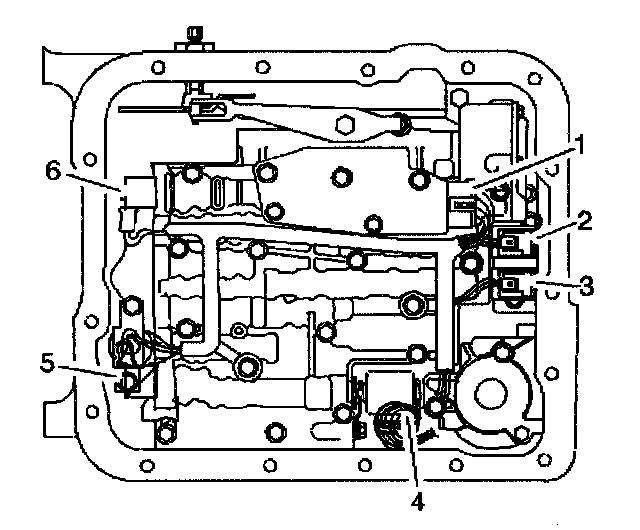
1. Raise and suitably support the vehicle. Refer to Vehicle Lifting.
2. Remove the transmission oil pan and filter. Refer to Automatic Transmission Fluid/Filter Changing.
3. Remove the 1-2 accumulator. Refer to Accumulator Assembly, Spacer Plate, and Gaskets.
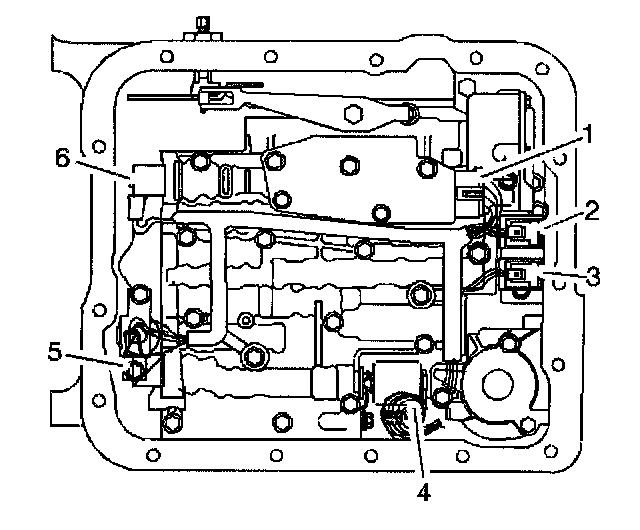
4. Disconnect the internal wiring harness electrical connectors from the following components:
^ Transmission pressure switch (1)
^ 1-2 shift control solenoid (2)
^ 2-3 shift control solenoid (3)
^ Pressure control solenoid (4)
^ TCC PWM solenoid (5)
^ 3-2 control solenoid (6)
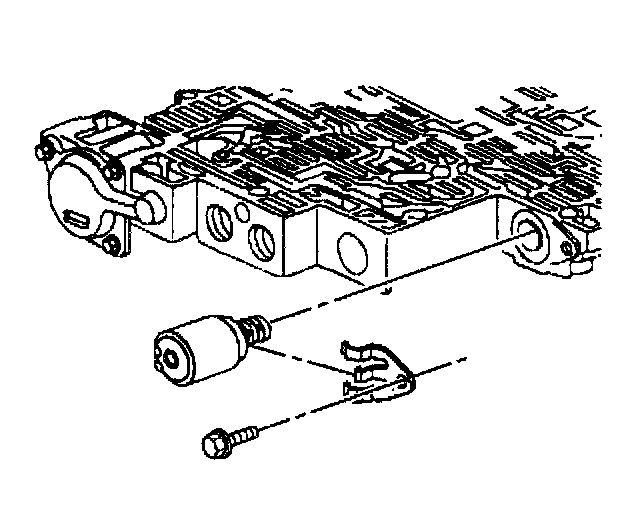
5. Remove the pressure control solenoid retainer bolt and retainer.
6. Remove the pressure control solenoid.
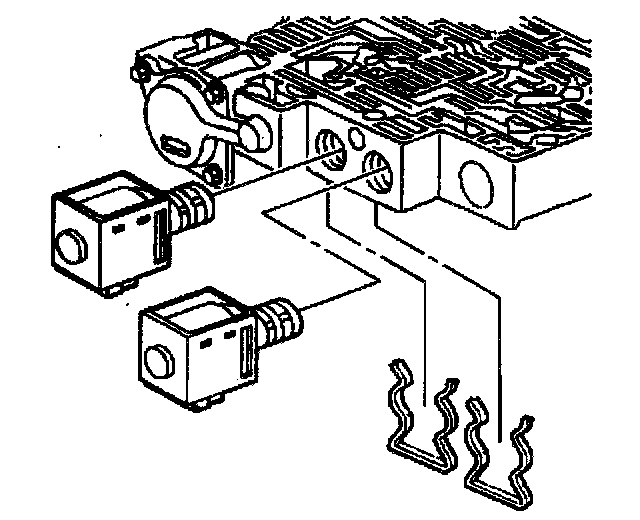
7. Remove the 1-2 and 2-3 shift solenoid retainers.
8. Remove the 1-2 and 2-3 shift solenoids.
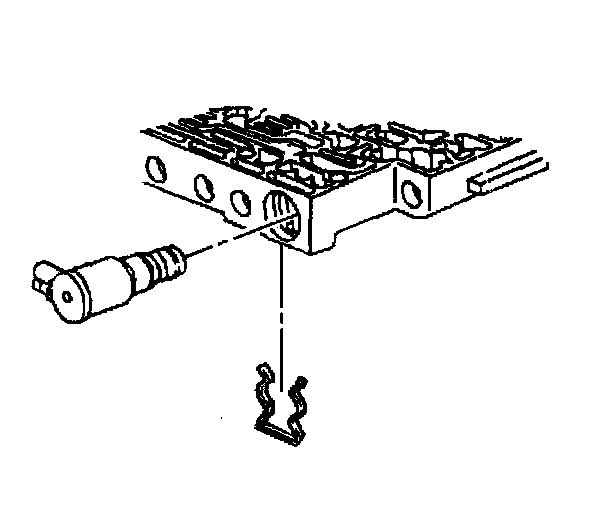
9. Remove the 3-2 control solenoid retainer.
10. Remove the 3-2 control solenoid.
Installation Procedure
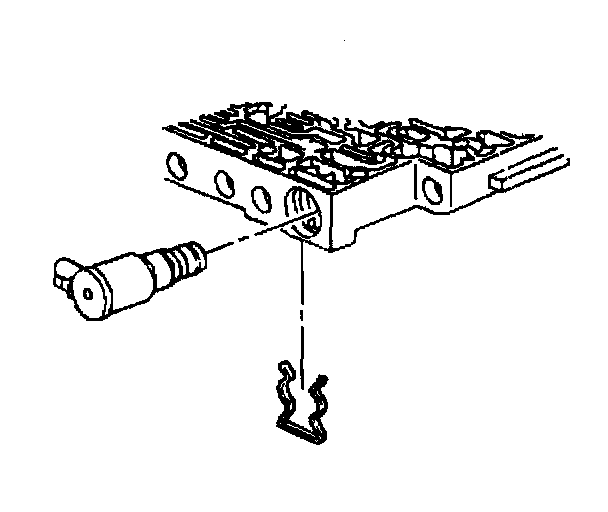
1. Install the 3-2 control solenoid.
2. Install the 3-2 control solenoid retainer.
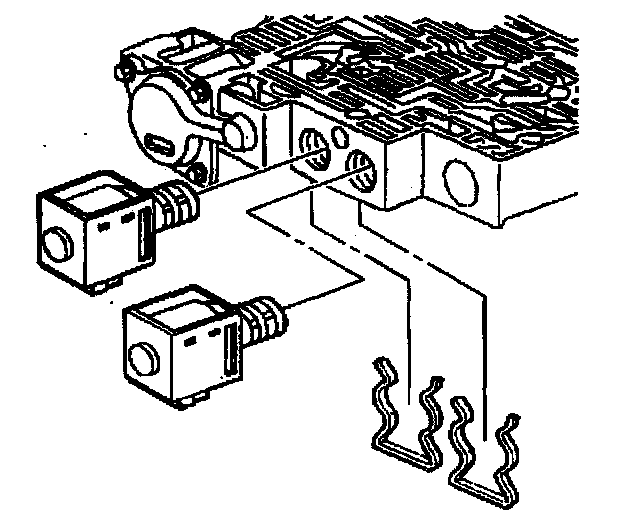
3. Install the 1-2 and 2-3 shift solenoids.
4. Install the 1-2 and 2-3 shift solenoid retainers.
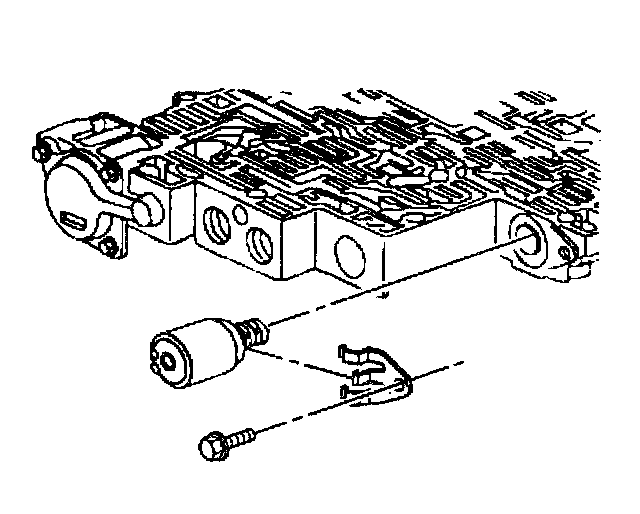
5. Install the pressure control solenoid.
Ensure that the electrical tabs are facing outboard.
Notice: Refer to Fastener Notice in Service Precautions.
6. Install the pressure control solenoid retainer and retaining bolt.
Tighten the pressure control solenoid retaining bolt to 11 Nm (97 inch lbs.).
7. Connect the internal wiring harness electrical connectors to the following components:
^ Transmission pressure switch (1)
^ 1-2 shift control solenoid (2)
^ 2-3 shift control solenoid (3)
^ Pressure control solenoid (4)
^ TCC PWM solenoid (5)
^ 3-2 control solenoid (6)
8. Install the 1-2 accumulator. Refer to Accumulator Assembly, Spacer Plate, and Gaskets.
9. Install the transmission oil pan and filter. Refer to Automatic Transmission Fluid/Filter Changing.
10. Lower the vehicle.