Component Tests and General Diagnostics
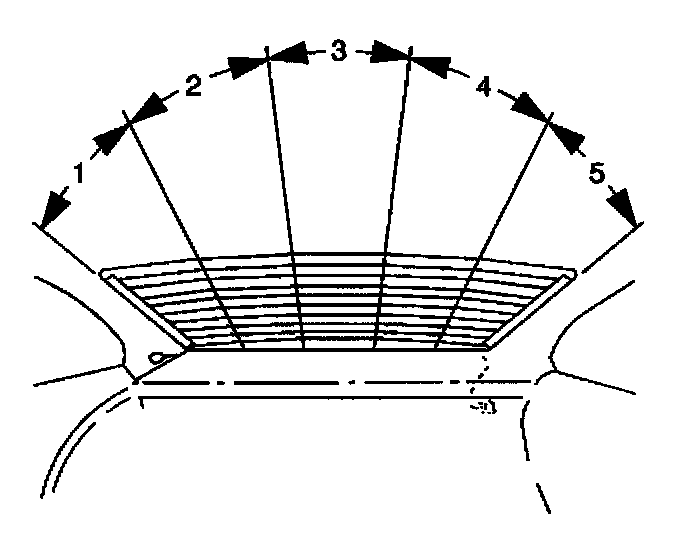
1. Full bulb brilliance
2. Three quarters bulb brilliance
3. One half bulb brilliance
4. One quarter bulb brilliance
5. No bulb brilliance
To locate inoperative grid lines, start the engine and turn on the rear window defogger system. Ground one test lamp lead (probe) and lightly touch the other probe to each grid line. Refer to the pattern of test lamp brilliance to be expected with a properly functioning grid. If test lamp bulb shows full brilliance at both ends of grid lines, check for loose ground wire contact to body metal.
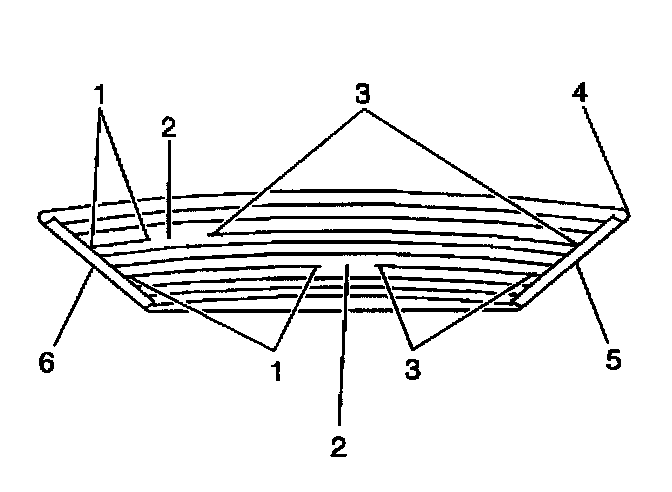
1. No light
2. Broken grid
3. Full brilliance
4. Full brilliance
5. Feed bus bar
6. Ground bus bar
The range of zones may vary slightly from one window to another; however, the bulb brilliance will decrease proportionately to the increased resistance in the grid line as the probe is moved from the left bus bar to the right. All grid lines must be tested in at least two places to eliminate the possibility of bridging a break. For best results, contact each grid line a few millimeters either side of the window centerline. If an abnormal light reading is apparent on a specific grid line, place test lamp probe on that grid at the left bus bar and move probe toward the right bus bar until light goes out. This will indicate a break in the continuity of the grid line.