Rear Seat Riser Replacement
Rear Seat Riser Replacement
Removal Procedure
1. Remove the rear seat. Refer to Rear Seat Replacement (Rear Seat Replacement) .
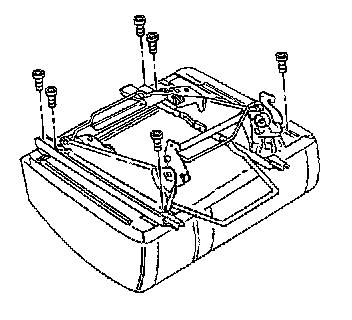
2. Remove the seat riser bolts.
3. Remove the seat riser from the seat cushion.
Installation Procedure
Important: Ensure that the seat adjusters are in phase with one another before attaching the seat riser. Move both of the left and right adjusters to the most rearward position prior to the riser installation. Failure to keep the adjusters in phase may result in poor adjuster travel.
1. Install the seat riser to the seat cushion.
Notice: Refer to Fastener Notice in Cautions and Notices.
2. Install the seat riser bolts.
Tighten the bolts.
* For bucket seats only, tighten the seat riser bolts to 45 N.m (33 lb in).
* For split benches only, tighten the seat riser bolts to 32 N.m (24 lb in).
3. Install the rear seat. Refer to Rear Seat Replacement (Rear Seat Replacement) .