Compressor Shaft Seal Install
TOOLS REQUIRED^ J 34614 Shaft Seal Protector
^ J 41790 Compressor Holding Fixture
^ J 42136 A/C Lip Seal Remover
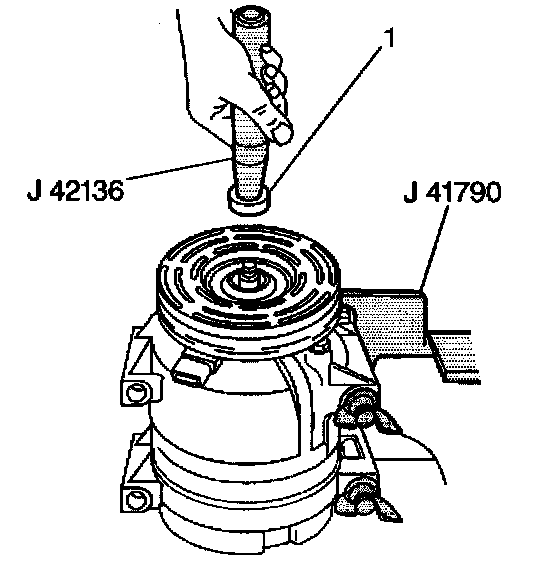
1. Dip the new compressor shaft seal (1) in clean 525 viscosity refrigerant oil and assemble the seal onto the J 42136, by turning the handle clockwise.
2. Install the J 34614 onto the compressor shaft.
3. Using a rotary motion, slide the new compressor shaft seal onto the compressor shaft until the seal is fully seated.
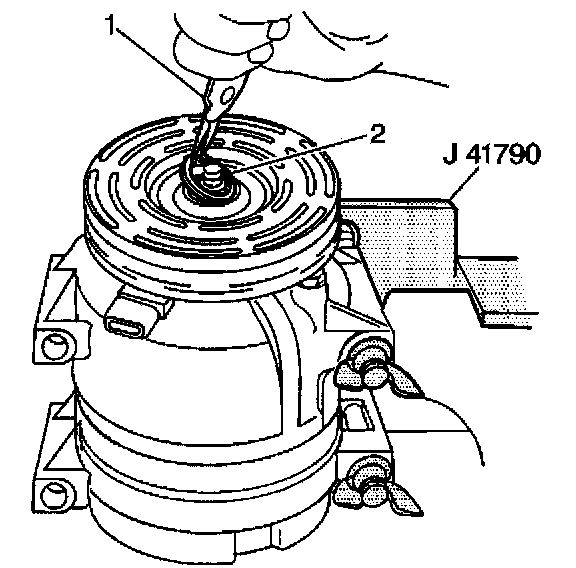
4. Remove the J 42136 by turning the handle counter clockwise.
5. Install a new compressor shaft seal retaining ring (2), using internal snap ring pliers (1).
Ensure that the chamfer side of the retaining ring is facing up and that the retaining ring snaps into the groove.
6. Leak test the compressor. Refer to Compressor Leak Testing (V5 Direct Mount). HVAC System - Manual
7. Remove and clean any excess oil resulting from installing the new seal parts from the shaft and inside the compressor neck.
8. Install the compressor clutch plate and hub assembly.
9. Remove the compressor from the J 41790.