Support Bracket Replacement - VES Over Head Console
TOOLS REQUIREDJ 38778 Door Trim Pad Clip and Garnish Trim Clip Remover
REMOVAL PROCEDURE
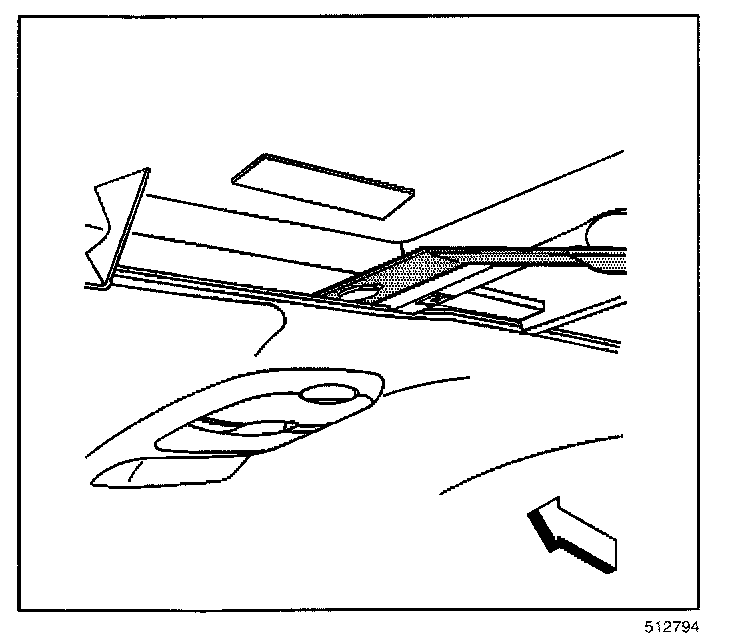
1. Remove the video entertainment system overhead console.
2. Remove the dome lamp.
3. Remove the video screen.
4. Remove the rear seat audio tee (RSAT) module from the support bracket.
5. Use J 38778 in order to remove the support bracket push-in retainers.
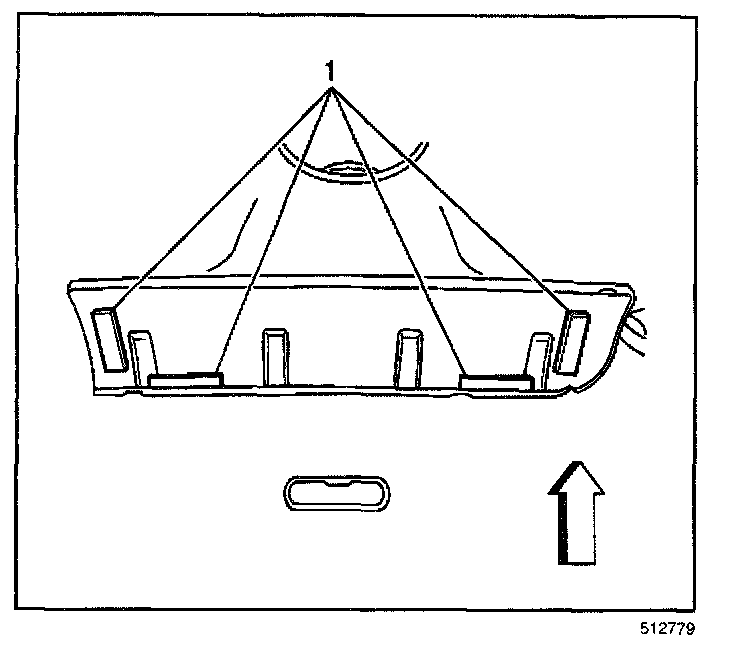
6. Remove the screw from the left corner of the support bracket.
7. Carefully pull downward on the support bracket.
8. Use a flat-bladed tool in order to separate the hook and loop retainers.
9. Carefully slide the support bracket towards the front of the vehicle.
10. Remove the support bracket from the roof.
11. Remove and discard the hook and loop material (1) from the bracket and the roof panel.
INSTALLATION PROCEDURE
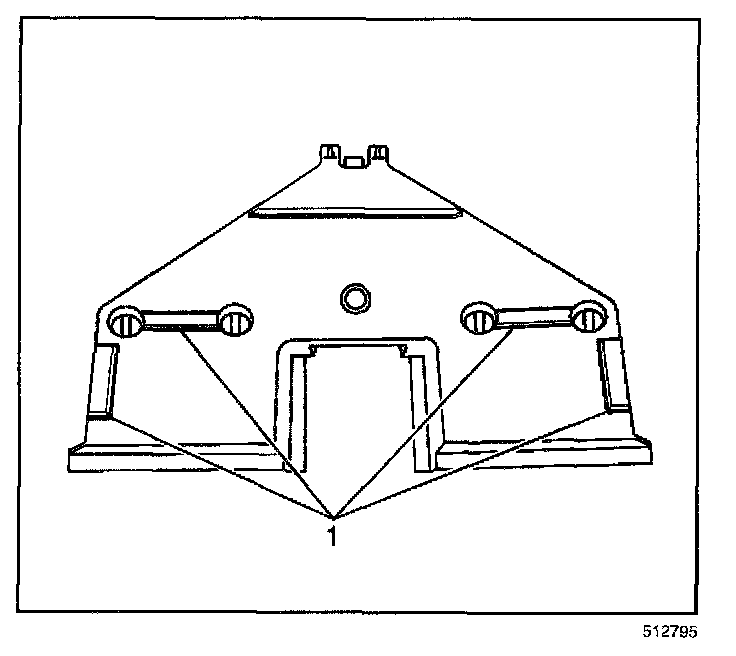
1. Cut new strips of hook and loop for the support bracket.
2. Peel the protective backing off one side of the hook and loop (1) and secure to the support bracket.
3. Peel the protective backing off the other side of the hook and loop.
4. Insert the pointed end of the support bracket through the hole in the headliner towards the rear of the vehicle.
5. Secure the rear pointed end of the support bracket into roof bow.
6. Firmly press upwards on the overhead bracket in order to secure the hook and loop adhesive backing to the roof panel.
7. Using new push-in retainers, secure the front of the support bracket to the roof bow.
NOTE: Refer to Fastener Notice in Service Precautions.
8. Install the screw to the left corner of the support bracket.
Tighten
Tighten the support bracket screw to 2 N.m (18 lb in).
9. Install the RSAT module to the support bracket.
Refer to Audio/Video Rear Seat Audio Tee Module Replacement.
10. Install the video screen.
11. Install the dome lamp.
12. Install the video entertainment system overhead console.