Air Distribution Duct Replacement (Defrost)
REMOVAL PROCEDURECAUTION: Refer to Battery Disconnect Caution in Service Precautions.
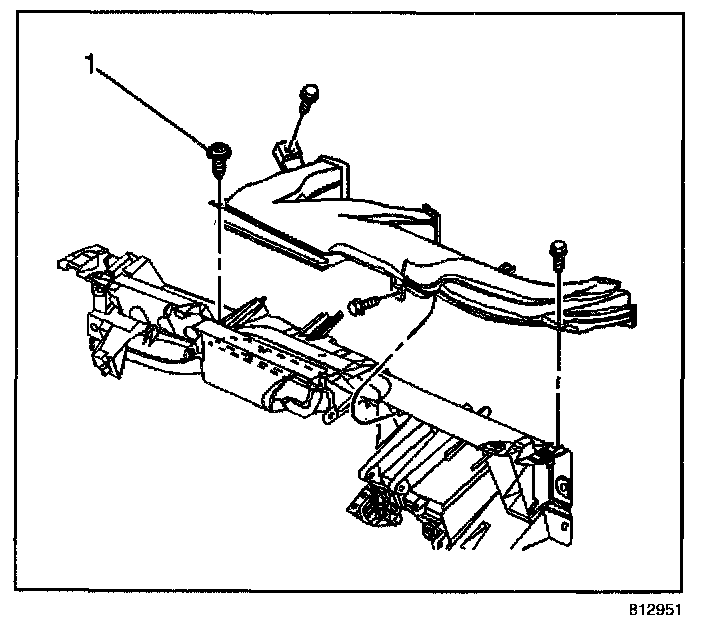
1. Disconnect the battery negative cable.
2. Remove the IP lower trim panel.
3. Remove the retaining screw (1) from the panel air duct.
4. Remove the retaining bolts from the panel air duct.
5. Remove the panel air duct from the cross vehicle beam.
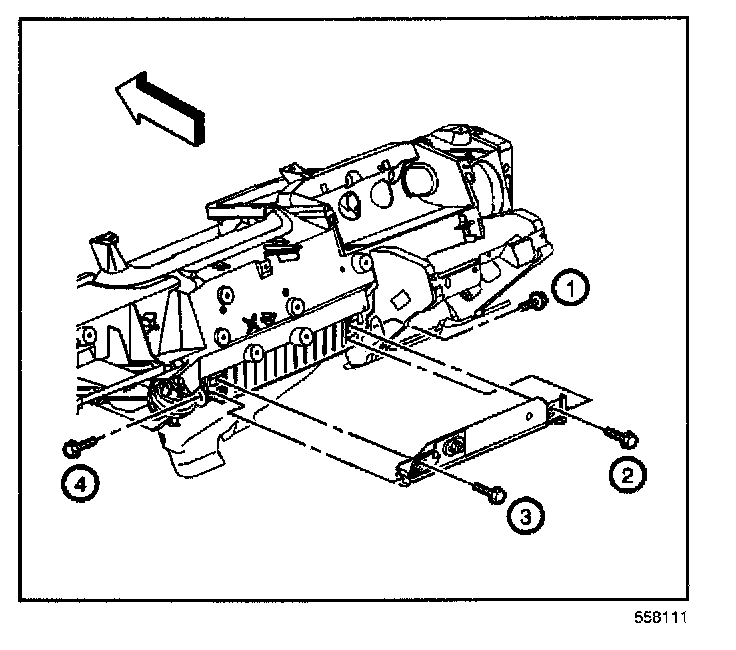
6. Remove the steering column.
7. Disconnect the left side fuse block from the cross vehicle beam.
8. Remove the passenger knee bolster bracket.
9. Position the body control module away from the cross vehicle beam.
10. Remove the brake pedal.
11. Remove the three brake pedal brace bolts from the cross vehicle beam.
12. Disconnect any ground wires, as necessary.
13. Release the wiring harness retaining clips from the cross vehicle beam and position the wiring harness aside.
14. Remove the bolts from the HVAC module center support.
15. Remove the bracket from the HVAC module center support.
16. Reposition the vacuum harness.
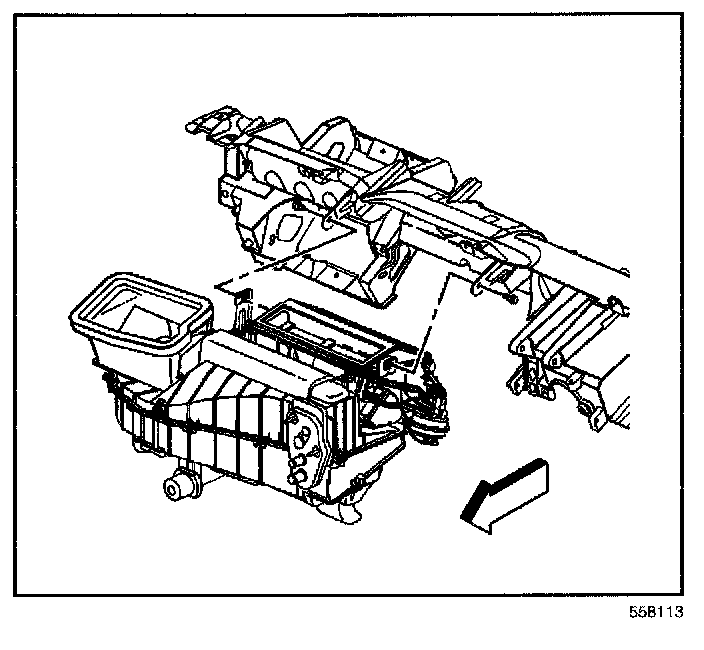
17. Remove the bracket bolts from the HVAC module upper support.
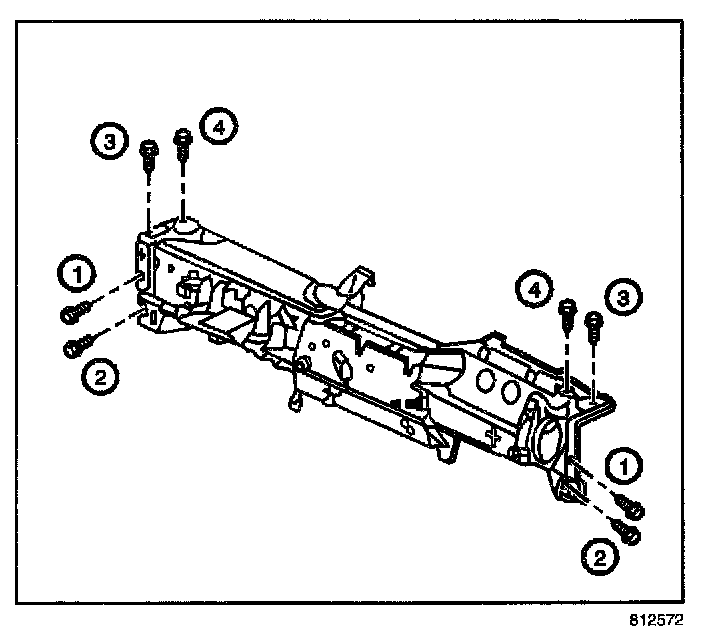
18. Remove the bolts from the right and left side of the cross vehicle beam.
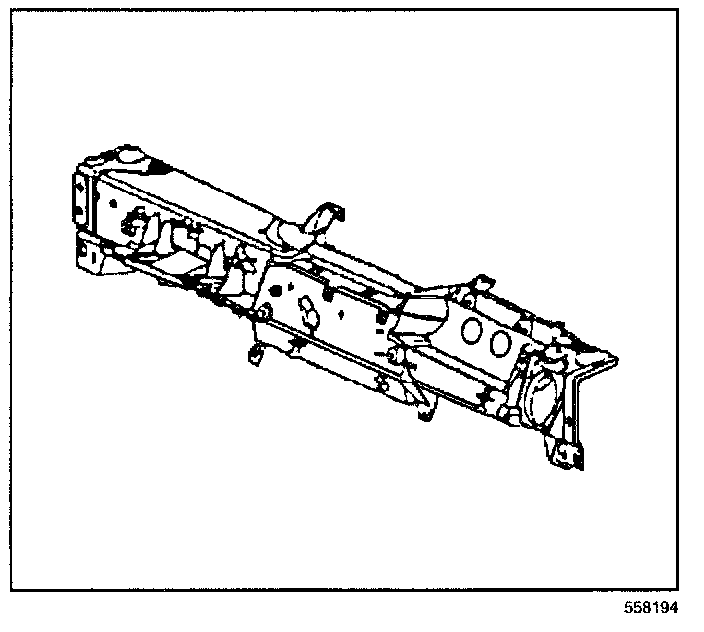
19. Remove the cross vehicle beam.
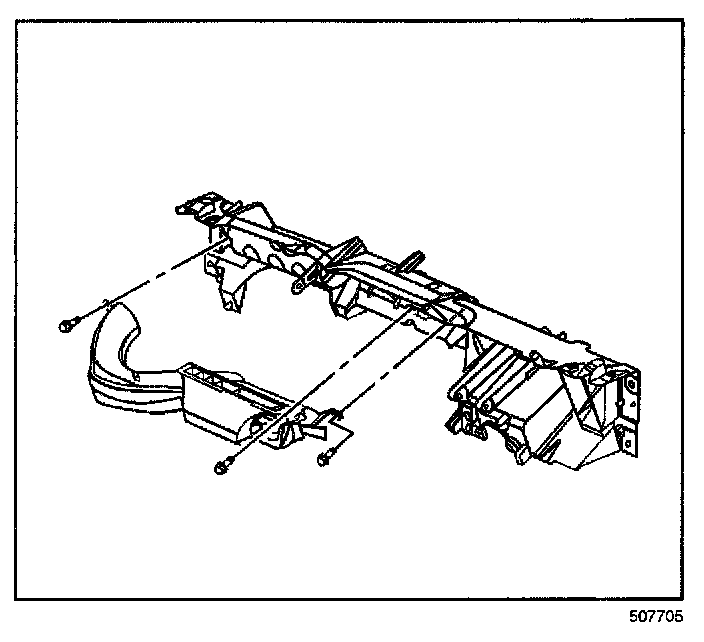
20. Remove the defroster air duct retaining bolts.
21. Remove the defroster air duct from the cross vehicle beam.
INSTALLATION PROCEDURE
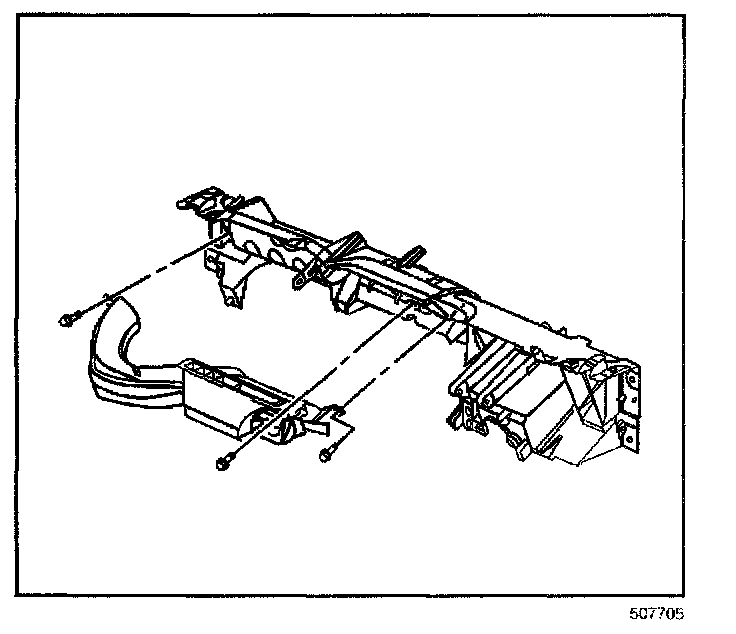
1. Install the defroster air duct to the cross vehicle beam.
NOTE: Refer to Fastener Notice in Service Precautions.
2. Install the defroster air duct bolts.
Tighten
Tighten the bolts to 10 N.m (89 lb in).
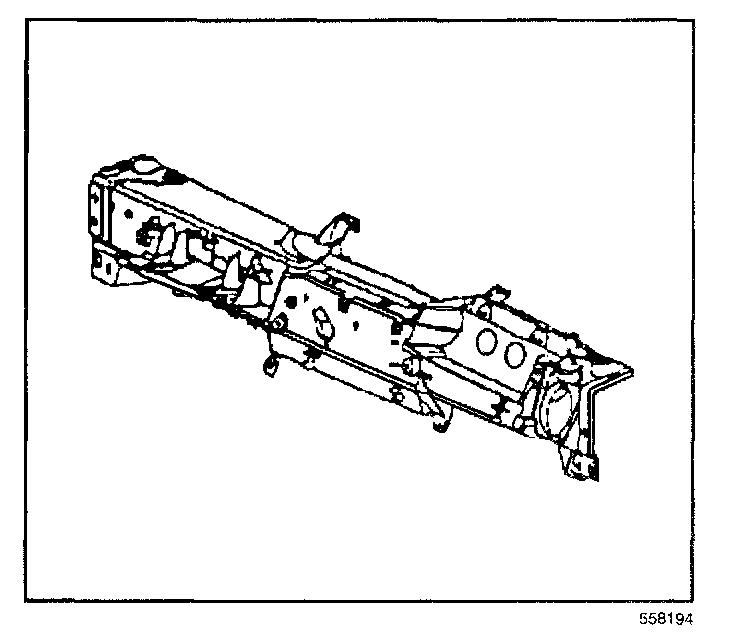
3. Install the cross vehicle beam to the vehicle.
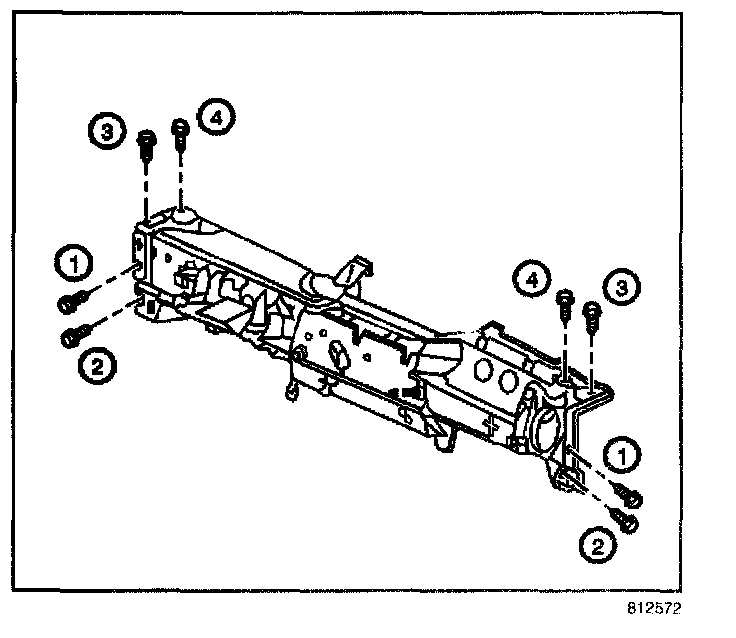
4. Install the bolts to the right and left side of the cross vehicle beam.
5. Tighten the bolts to the right and left side of the cross vehicle beam in sequence.
Tighten
Tighten the bolts to 25 N.m (18 lb ft).
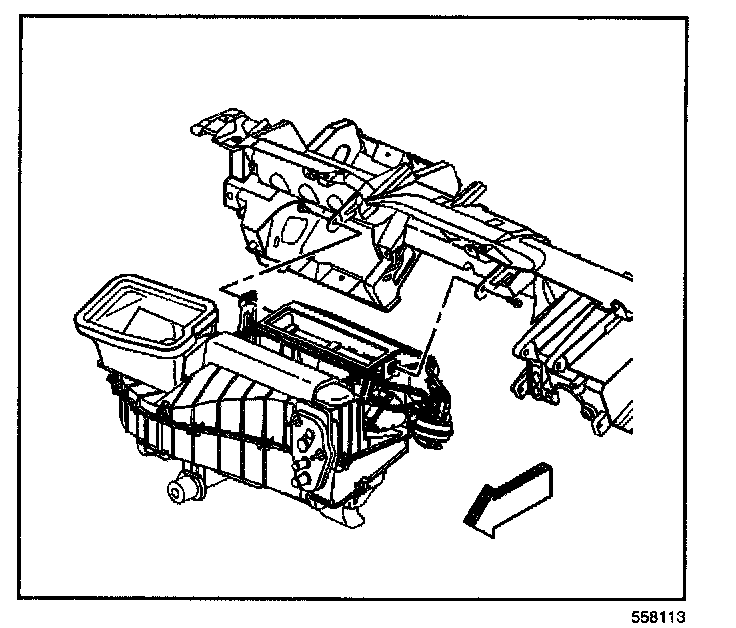
6. Install the bracket bolts to the HVAC module upper support.
Tighten
Tighten the bolts to 10 N.m (89 lb in).
7. Install the passenger knee bolster bracket.
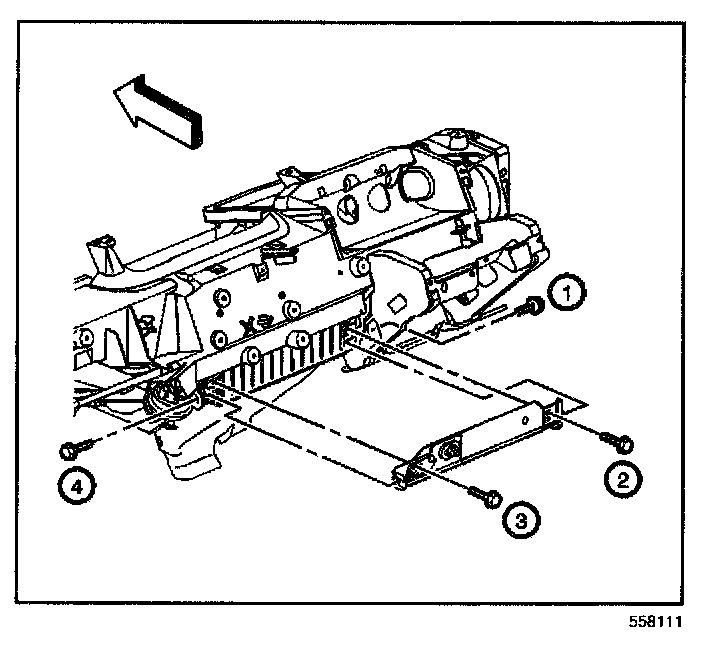
8. Install the bracket to the HVAC module center support.
9. Reposition the vacuum harness to the original position.
10. Install the bracket bolts to the HVAC module center support.
Tighten
Tighten the bracket bolts in sequence to 10 N.m (89 lb in).
11. Reposition the IP wiring harness on to the cross vehicle beam and secure the retaining clips.
12. Connect all disconnected ground wires.
13. Install the three brake pedal brace bolts.
Tighten
Tighten the bolts to 50 N.m (37 lb ft).
14. Install the brake pedal.
15. Reposition the body control module in place.
16. Install the left fuse block to the cross vehicle beam.
17. Install the steering column.
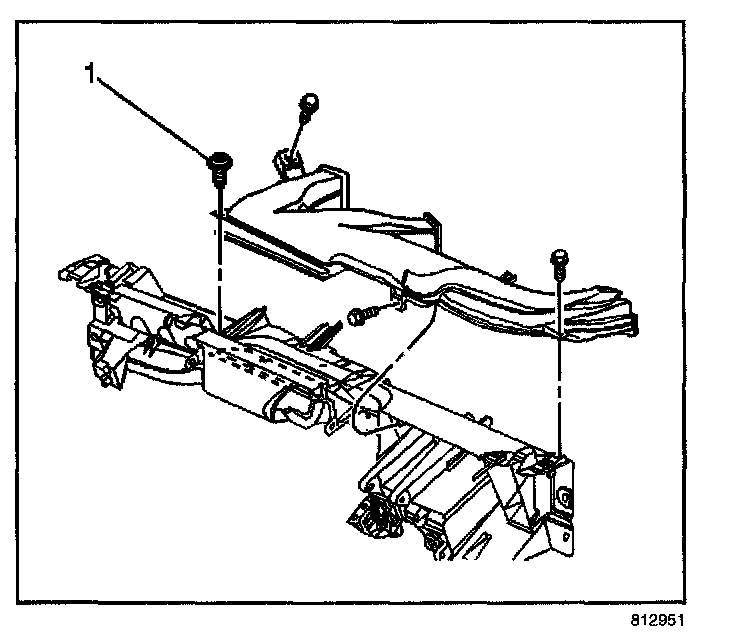
18. Install the panel air duct to the cross vehicle beam.
19. Install the panel air duct screw (1).
Tighten
Tighten the screw to 1.8 N.m (16 lb in).
20. Install the panel air duct bolts.
Tighten
Tighten the bolts to 10 N.m (89 lb in).
21. Install the lower trim panel.
22. Connect the battery negative cable.