Compressor Hose Assembly Replacement
COMPRESSOR HOSE ASSEMBLY REPLACEMENTTOOLS REQUIRED
J 39400-A Halogen Leak Detector
REMOVAL PROCEDURE
1. Remove the air cleaner.
2. Recover the refrigerant from the system.
3. Remove the grille.
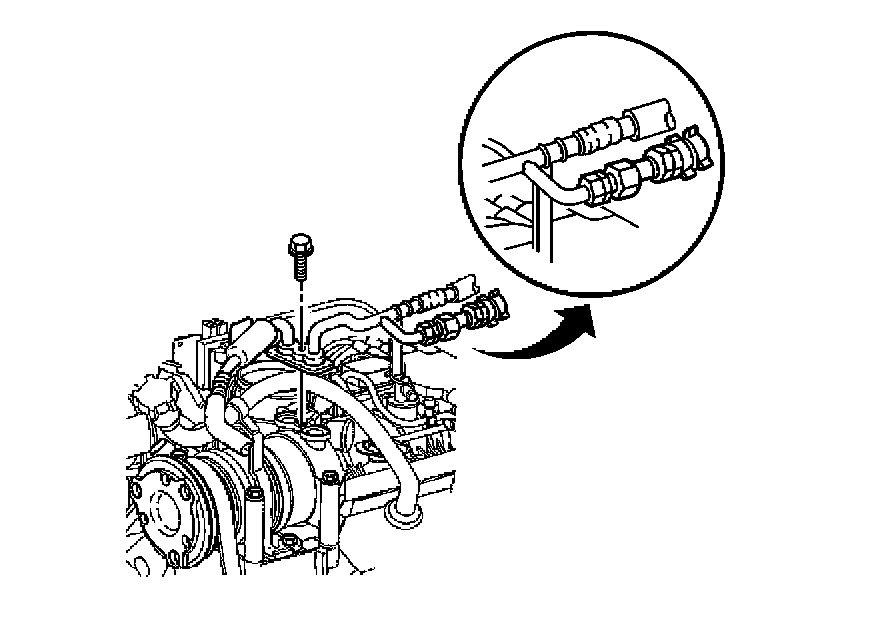
4. Remove the engine cover.
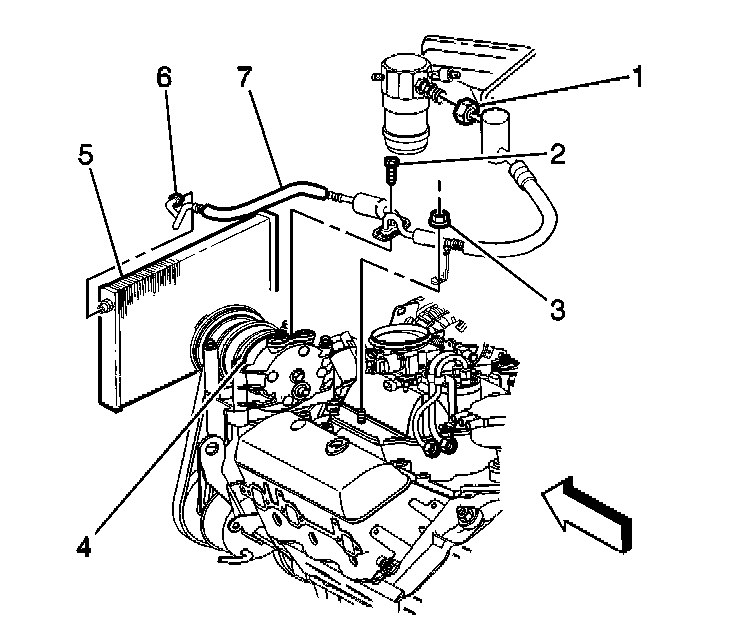
5. Remove the compressor hose assembly bolt (2).
6. Remove the compressor hose assembly from the compressor.
7. Remove and discard the old sealing washers.
8. Remove the hose clamp bracket nut (3) from the engine stud.
9. Loosen the compressor hose assembly nut (6) from the condenser.
10. Remove the compressor hose assembly nut (1) from the accumulator.
11. Remove the bolt from the transmission filler tube to the oil indicator tube.
12. Remove transmission filler tube from the throttle cable bracket.
13. Remove the compressor hose assembly from the vehicle.
14. Cap or plug all open connections on the vehicle.
INSTALLATION PROCEDURE
1. Uncap or unplug all open connections.
2. Install the compressor hose assembly to the vehicle.
3. Install transmission filler tube to the throttle cable bracket.
4. Install the bolt to the transmission filler tube to the oil indicator tube.
NOTE: Refer to Fastener Notice in Service Precautions.
Tighten
Tighten the bolt to 12 N.m (106 lb in).
5. Install new O-rings.
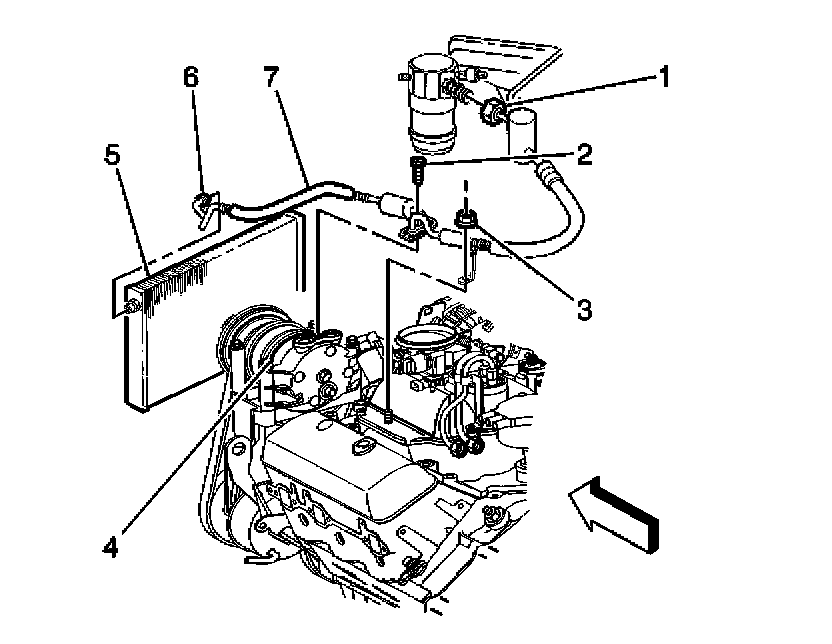
6. Install the compressor hose assembly to the accumulator.
7. Tighten the compressor hose assembly nut at the accumulator.
Tighten
Tighten the nut to 48 N.m (35 lb ft).
8. Install new O-rings.
9. Install the compressor hose assembly to the condenser.
10. Tighten the compressor hose assembly nut (6).
Tighten
Tighten the nut to 28 N.m (21 lb ft).
11. Install the hose clamp bracket nut (3) to the engine stud.
Tighten
Tighten the nut to 5 N.m (44 lb in).
12. Install new sealing washers.
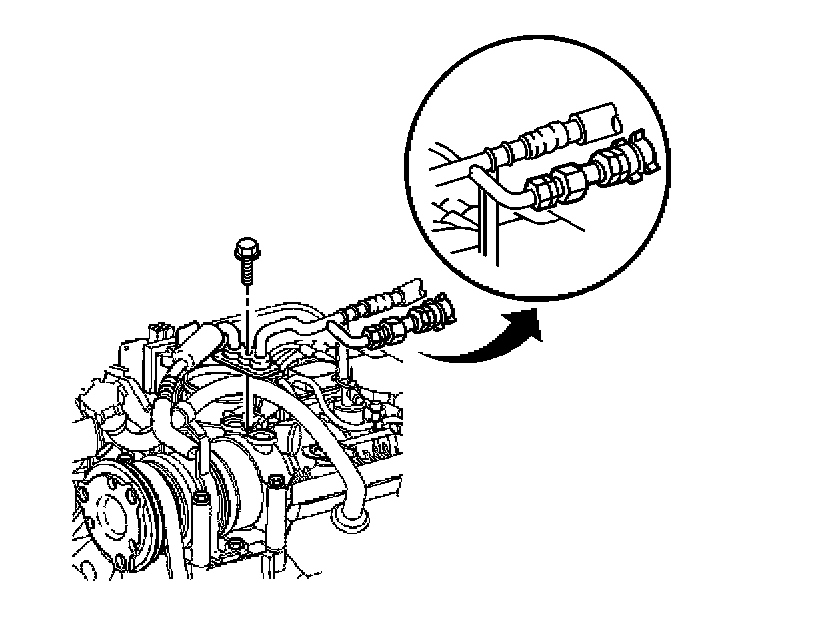
13. Install the compressor hose assembly to the compressor.
14. Tighten the compressor hose assembly bolt.
Tighten
Tighten the bolt to 34 N.m (25 lb ft).
15. Install the engine cover.
16. Install the grille.
17. Evacuate and recharge the system.
18. Leak test the fittings of the component using the J 39400-A.
19. Install the air cleaner.