Defroster Duct Replacement
DEFROSTER DUCT REPLACEMENT - WINDSHIELD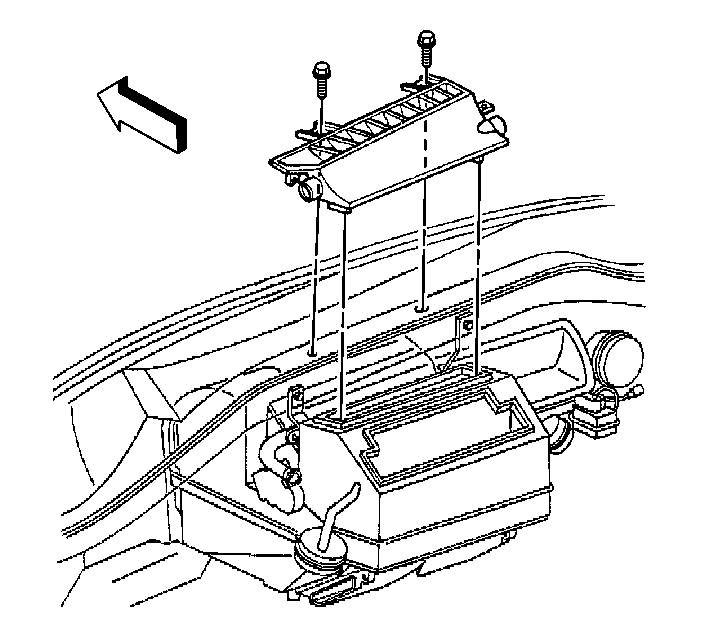
REMOVAL PROCEDURE
1. Remove the I/P upper trim pad.
2. Remove the DRL and sunload temperature sensor wire retainers from the windshield defroster duct.
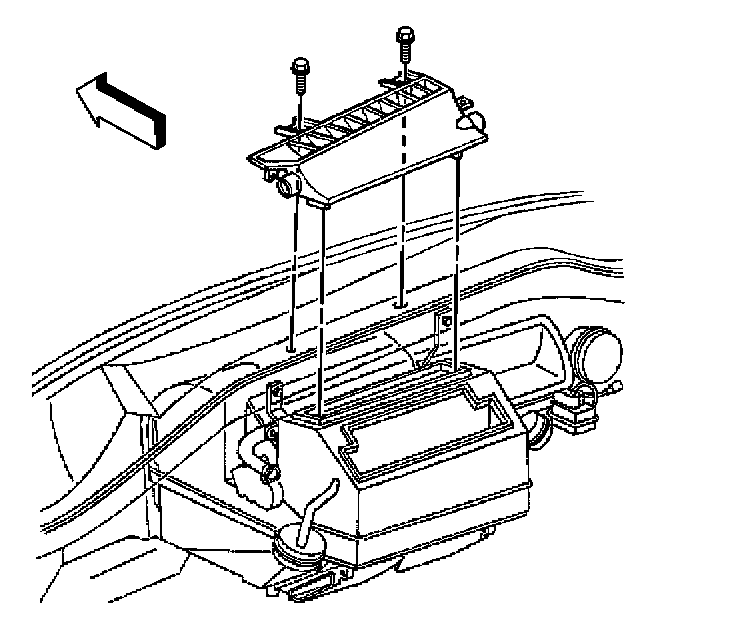
3. Remove the windshield defroster duct retaining screws.
4. Release the windshield defroster duct from the LH and RH side window lower defogger outlet ducts.
Lift the windshield defroster duct slightly, then use a twisting motion to release from the side window lower defogger ducts.
5. Remove the defroster duct.
INSTALLATION PROCEDURE
1. Install the defroster duct.
Use a twisting motion to secure the windshield defroster duct to the LH and RH side window lower defogger outlet ducts.
2. Lower the windshield defroster duct into position and align the duct with the opening of the HVAC module and the I/P upper support beam.
3. Install the windshield defroster duct LH retaining screw first (net location), then install the RH retaining screw.
NOTE: Refer to Fastener Notice in Service Precautions. Vehicle Damage Warnings
Tighten
Tighten the screws to............10 N.m (89 lb in).
4. Install the DRL and sunload temperature sensor wire retainers to the windshield defroster duct.
5. Install the I/P upper trim pad.