Shoulder Belt Guide Bracket Replacement
SHOULDER BELT GUIDE BRACKET REPLACEMENT
REMOVAL PROCEDURE
1. Remove the safety belt webbing anchor.
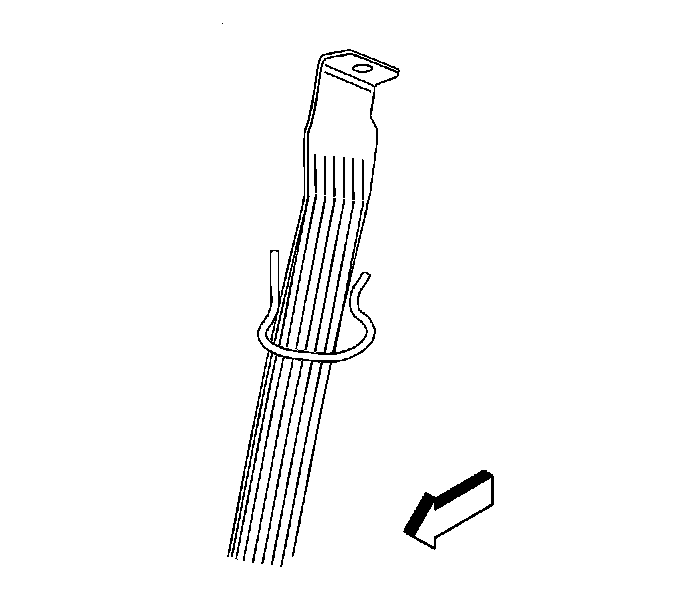
2. Route the safety belt webbing anchor and webbing through the shoulder belt guide bracket.
3. Remove the folding top stowage compartment lid lock pillar muckets.
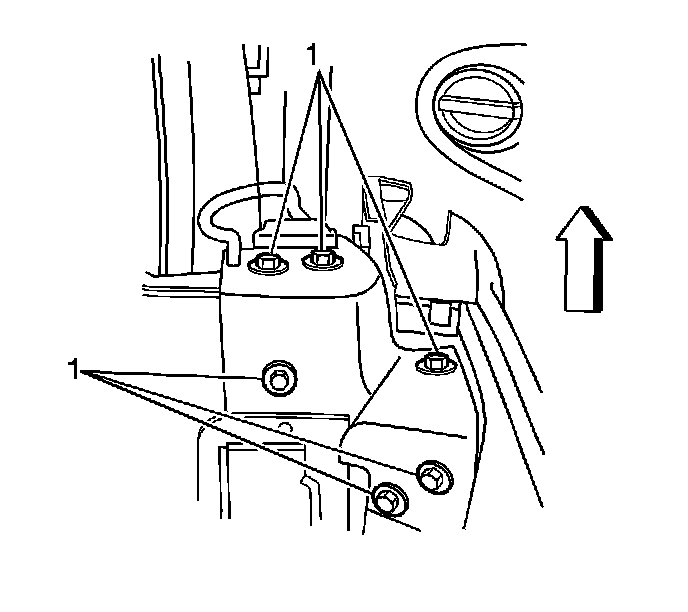
4. Remove the shoulder belt guide bracket fasteners (1).
5. Remove the shoulder belt guide bracket from the vehicle.
INSTALLATION PROCEDURE
NOTE: Follow the tightening sequence and procedure for the seat belt guide loop fasteners. If these steps are not followed, permanent vehicle body damage will occur.
1. Position the shoulder belt guide bracket to the vehicle body.
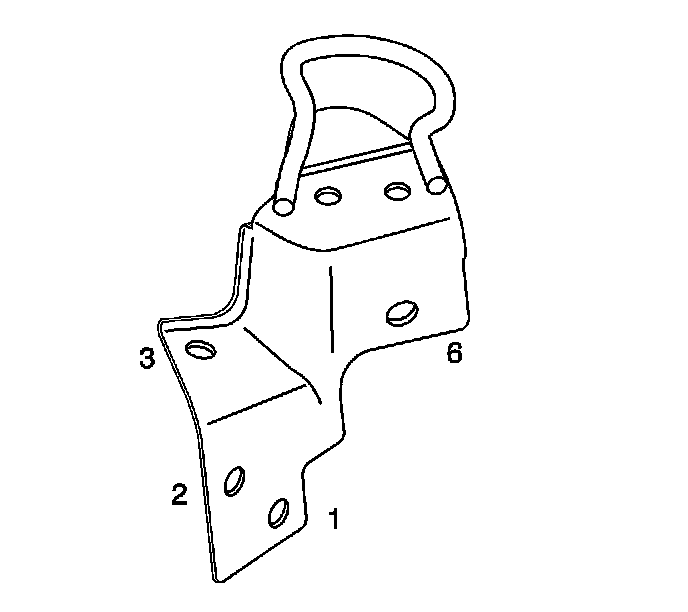
2. Finger tighten the 4 fasteners (1, 2, 3, 6).
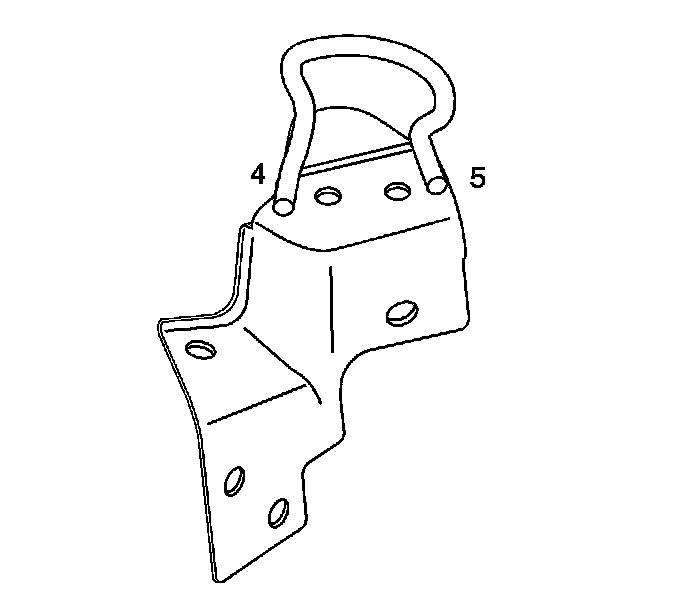
3. Position the trim attachment bracket and finger tighten bolts (4, 5).
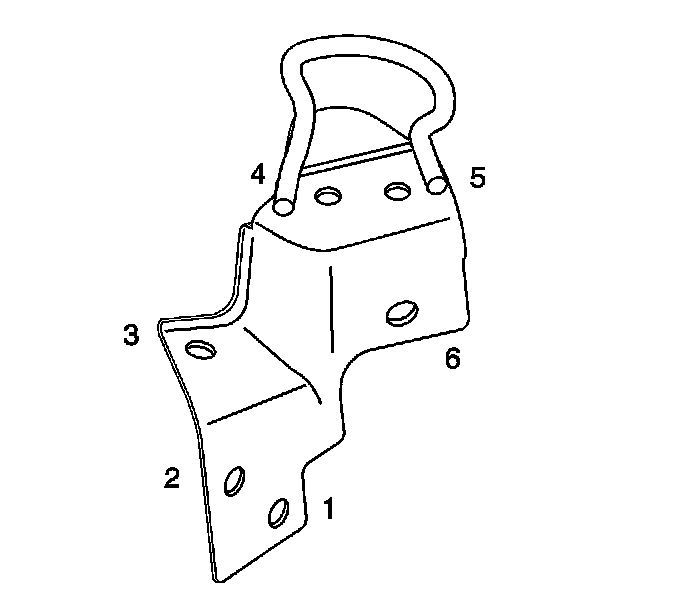
4. In sequence per the number locations (1, 2, 3, 4, 5, 6), drive and tighten the shoulder belt guide bracket fasteners.
NOTE: Refer to Fastener Notice in Service Precautions.
Tighten the shoulder belt guide bracket fasteners to 25 N.m (18 lb ft).
5. Install the folding top stowage compartment lid lock pillar muckets.
6. Route the safety belt webbing anchor and webbing through the shoulder belt guide bracket.
7. Install the safety belt webbing anchor.