Defogger Outlet Duct Replacement - Side Window, LH
DEFOGGER OUTLET DUCT REPLACEMENT - SIDE WINDOW, LHREMOVAL PROCEDURE
1. Remove the instrument panel I/P carrier.
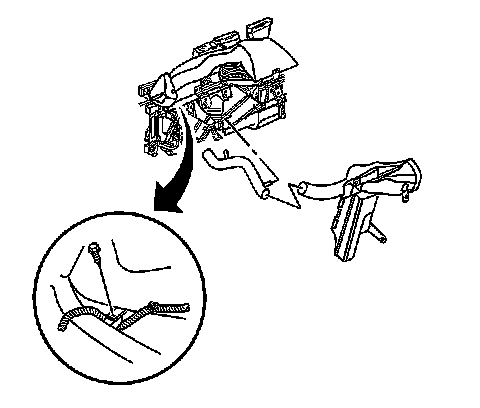
2. Remove the left defogger outlet duct bolt from the air distribution duct.
3. Remove the left defogger outlet duct retainer from the from the tie bar.
4. Remove the left defogger outlet duct from the vehicle.
INSTALLATION PROCEDURE
1. Install the left defogger outlet duct through the tie bar bracket.
2. Install the left defogger outlet duct retainer to the tie bar bracket.
NOTE: Refer to Fastener Notice in Service Precautions.
3. Install the left defogger outlet duct and bolt to the air distribution duct.The wiring harness goes under the attachment tab on the left defogger outlet duct.
Tighten the bolt to 2 N.m (18 lb in).
4. Install the instrument panel I/P carrier.