Steering Column
Steering Column ReplacementRemoval Procedure
Caution: Refer to SIR Caution in Service Precautions.
1. Disable the SIR system.

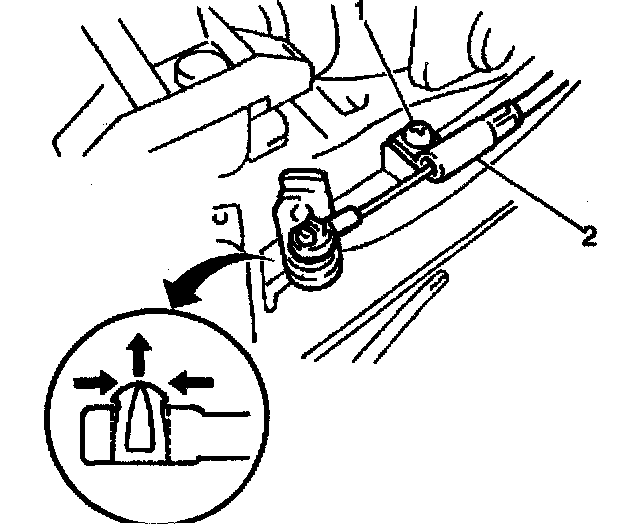
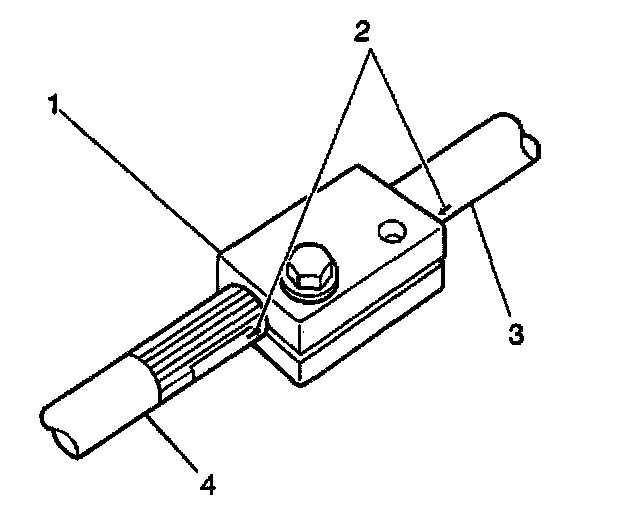
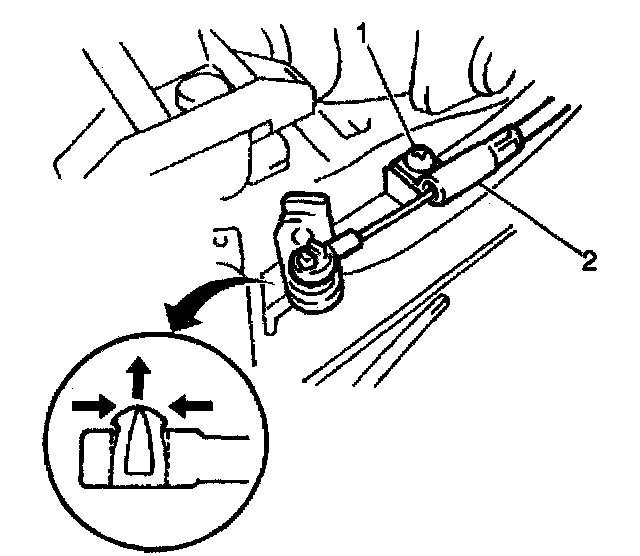
2. Rotate the steering wheel in order to position the opening in the steering shaft coupling (2) in the vertical position.
3. Using paint, place match marks (3) on the steering column shaft (1), steering shaft coupling (2), the and the lower steering shaft in order to mark the location of the opening in the coupling.
4. Rotate the steering wheel to the straight-ahead position.
Notice: The steering column must be in the LOCK position before disconnecting the following components:
^ The steering column
^ The steering shaft coupling
^ The intermediate shaft
^ The lower steering shaft
After disconnecting these components, do not move the front tires and wheels. Failure to follow these procedures may cause improper alignment of some components during installation and result in possible damage to the SIR coil.
5. Turn the key to the LOCK position and remove the key.
6. Rotate the steering wheel to the left in order to lock the steering column and allow access to the steering shaft coupling bolts.
7. Remove the knee bolster.
8. Remove the steering column trim covers.
Important: When you service the steering column or any column-mounted component, remove the steering wheel. However, when you remove the steering column in order to gain access to the instrument panel components, leave the steering wheel installed on the steering column.
9. Remove the following components, if necessary:
^ The steering wheel inflator module.
^ The steering wheel.
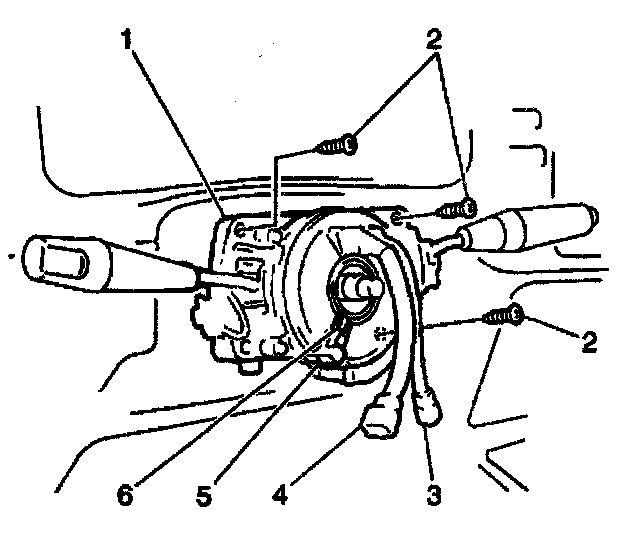
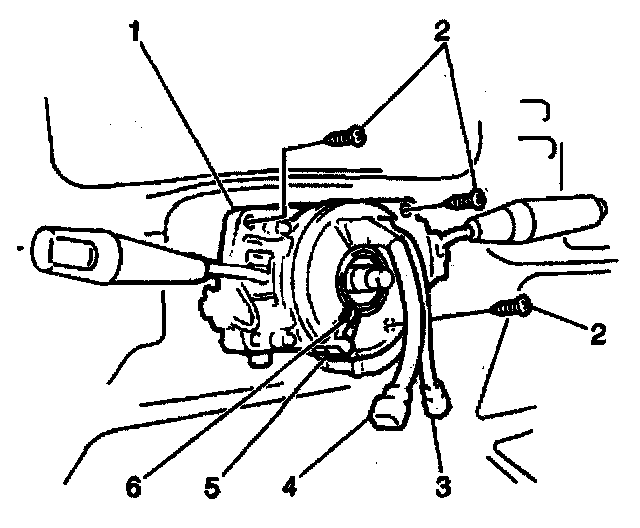
^ The turn signal and headlamp and windshield washer switch and inflatable restraint steering wheel module coil assembly (1).
^ The steering column lock and ignition switch cylinder.
10. If the steering wheel remains on the column, disconnect the connectors on the steering column for the following components:
^ The inflatable restraint steering wheel module coil
^ The horn
^ The turn signal and headlamp and windshield washer switch
^ The ignition switch
11. If the steering wheel remains on the column, and the vehicle is equipped with an automatic transmission, complete the following steps:
11.1. Verify the shift lever is in PARK.
11.2. Remove the screw (1) from the park lock cable (2).
11.3. Disconnect the park lock cable from the steering column lock and ignition switch cylinder.
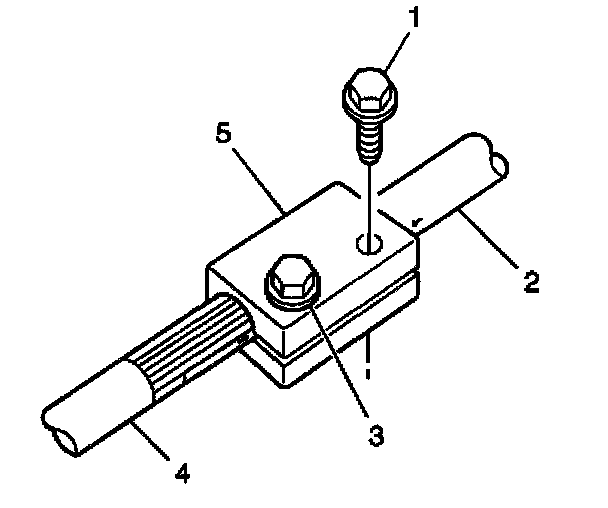
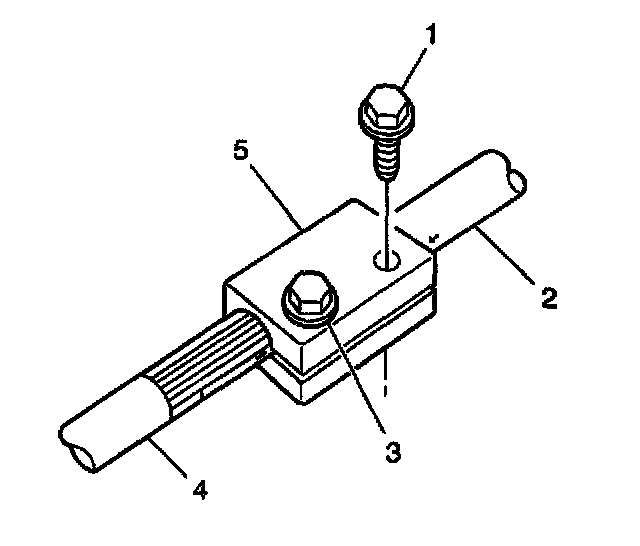
12. Remove the bolt (1) on the column side of the steering shaft coupling.
13. Loosen the bolt (3) on the lower steering shaft side of the steering shaft coupling.
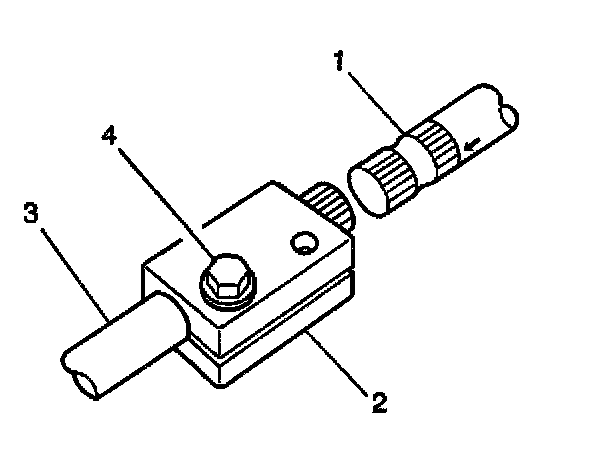
14. Use a plastic hammer in order to tap the steering shaft coupling (2) down over the lower steering shaft (3), releasing the steering column shaft (1).
15. Secure the coupling on the lower steering shaft with the bolt (4).
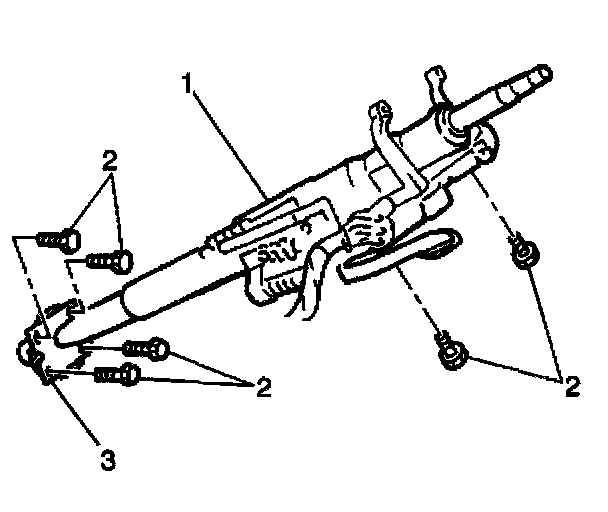
16. Remove 6 bolts (2) from the steering column (1).
Notice: Once the steering column is removed from the vehicle, the column is extremely susceptible to damage. Dropping the column assembly on the end could collapse the steering shaft or loosen the plastic injections, which maintain column rigidity. Leaning on the column assembly could cause the jacket to bend or deform. Any of the above damage could impair the columns collapsible design. Do NOT hammer on the end of the shaft, because hammering could loosen the plastic injections, which maintain column rigidity. If you need to remove the steering wheel, refer to the Steering Wheel Replacement procedure.
17. Remove the steering column from the vehicle.
Installation Procedure
1. Verify the front tires and wheels have not moved since the removal of the steering column.
2. If you are replacing the steering column, place match marks on the new steering column in the same positions as on the old steering column.

3. Install the steering column (3) to the cowl (2) and to the upper bracket so that the boss of the steering column lower seal (1) projects through the cowl into the engine compartment.
Caution: In order to ensure the Intended function of the steering column In a vehicle during a crash and In order to avoid personal Injury to the driver, perform the following:
^ Tighten the steering column lower fasteners before you tighten the steering column upper fasteners. Failure to do this can damage the steering column.
^ Tighten the steering column fasteners to the specified torque. Overtightening the upper steering column fasteners could affect the steering column collapse.
Notice: Refer to Fastener Notice in Service Precautions.
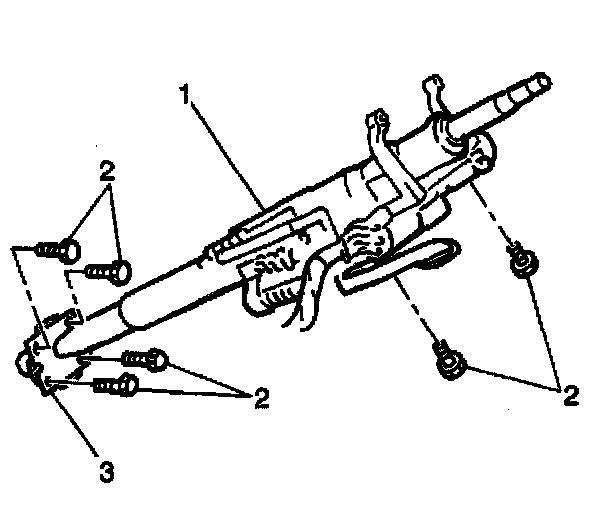
4. Tighten the 4 lower bolts that retain the column to the cowl (3).
Tighten the lower bolts to 23 Nm (17 ft. lbs.).
5. Tighten the 2 upper bolts.
Tighten the upper bolts to 23 Nm (17 ft. lbs.).
6. Align the match marks (2) on the following components:
^ The lower steering shaft (4)
^ The steering shaft coupling (1)
^ The steering column shaft (3)
7. Loosen the bolt (3) on the steering shaft coupling and move the steering shaft coupling up over the steering column shaft (2).
8. Install the bolt (1).
9. Tighten the 2 steering shaft coupling bolts.
Tighten the bolts to 25 Nm (18 ft. lbs.).
10. If necessary, install the steering column lock and ignition switch cylinder.
11. If the vehicle has an automatic transmission, connect the park lock cable (2) to the steering column lock and ignition switch cylinder.
12. Install the screw (1).
Tighten the screw to 2.2 Nm (19.5 inch lbs.).
13. If you are reinstalling the old inflatable restraint steering wheel module coil, complete the following steps:
13.1. Unlock the steering column.
13.2. Move the front tires and wheels to the straight ahead position.
13.3. Center the inflatable restraint steering wheel module coil.
14. If you are installing a new coil install the turn signal and headlamp and windshield washer switch with the inflatable restraint steering wheel module coil (1).
15. Connect the connectors to the following components:
^ The inflatable restraint steering wheel module coil
^ The horn
^ The turn signal and headlamp and windshield washer switch
^ The ignition switch
16. Install the knee bolster.
17. If necessary, install the steering wheel.
18. If necessary, install the steering wheel inflator module.
19. Install the steering column trim covers.
20. Enable the SIR system.