Valve Body: Service and Repair
Control Valve Body Replacement
Tools Required
DT 46475 (DW260-070) Auto Transaxle Plug Remover/Installer
Removal Procedure

Caution:
Refer to Battery Disconnect Caution Battery Disconnect Caution in Cautions and Notices.
1. Disconnect the negative battery cable.
2. Remove the air filter housing.
3. Disconnect the transaxle wiring harness and the park/neutral position switch electrical connector.
Notice:
Refer to Vehicle Lifting and Jacking Notice Vehicle Lifting and Jacking Notice in Cautions and Notices.
4. Raise and suitably support the vehicle.
5. Remove the engine under cover. Refer to Engine Cover Replacement Service and Repair in Frame and Underbody.
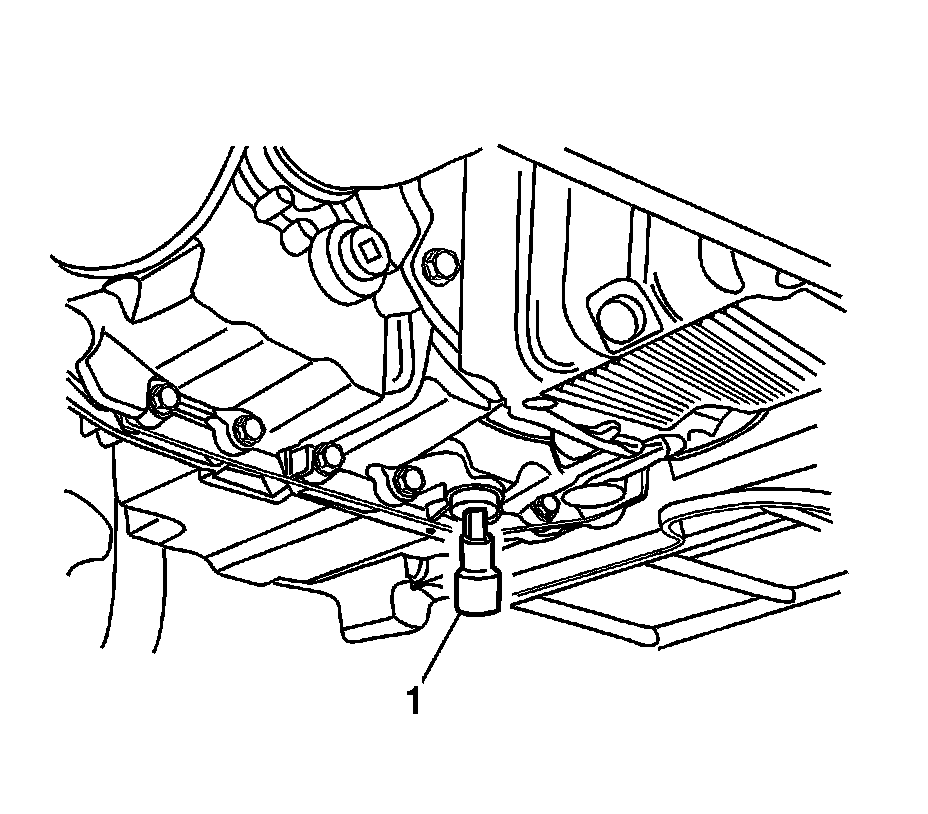
6. Use the DT 46475 (1) to remove the transaxle fluid drain plug.
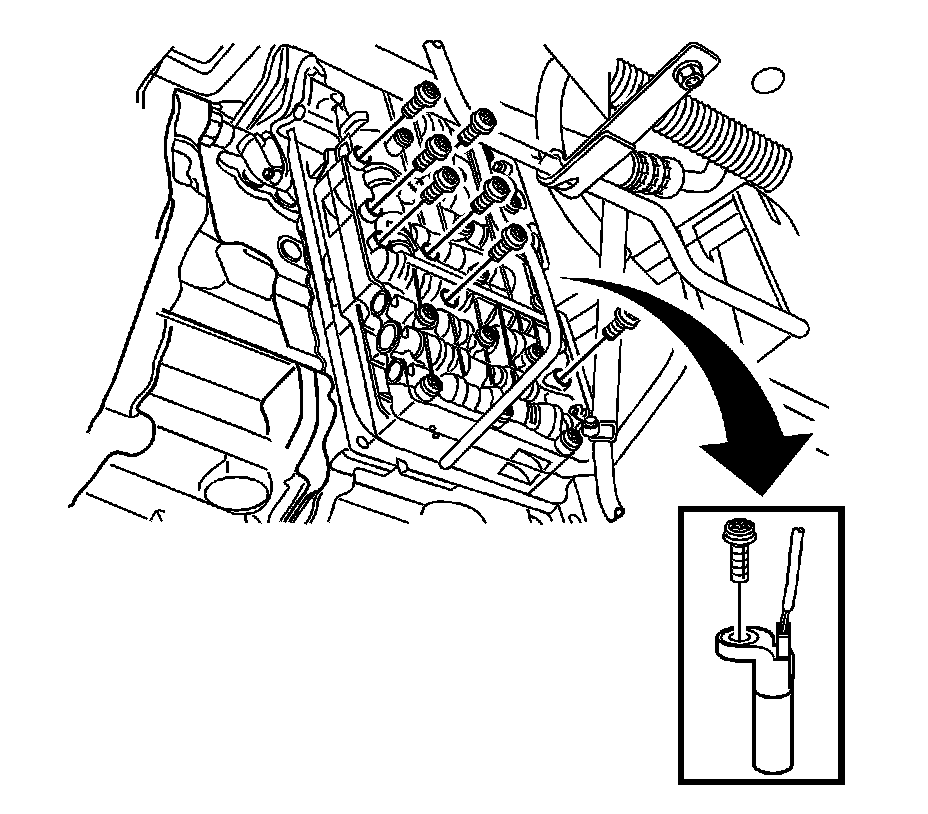
7. Remove the oil pan and the oil pan gasket. Refer to Automatic Transmission Fluid Pan and Gasket Removal 9. Automatic Transmission Fluid Pan and Gasket Removal.
8. Remove the valve body mounting bolts.
9. Remove the automatic transmission input speed sensor mounting bolt.
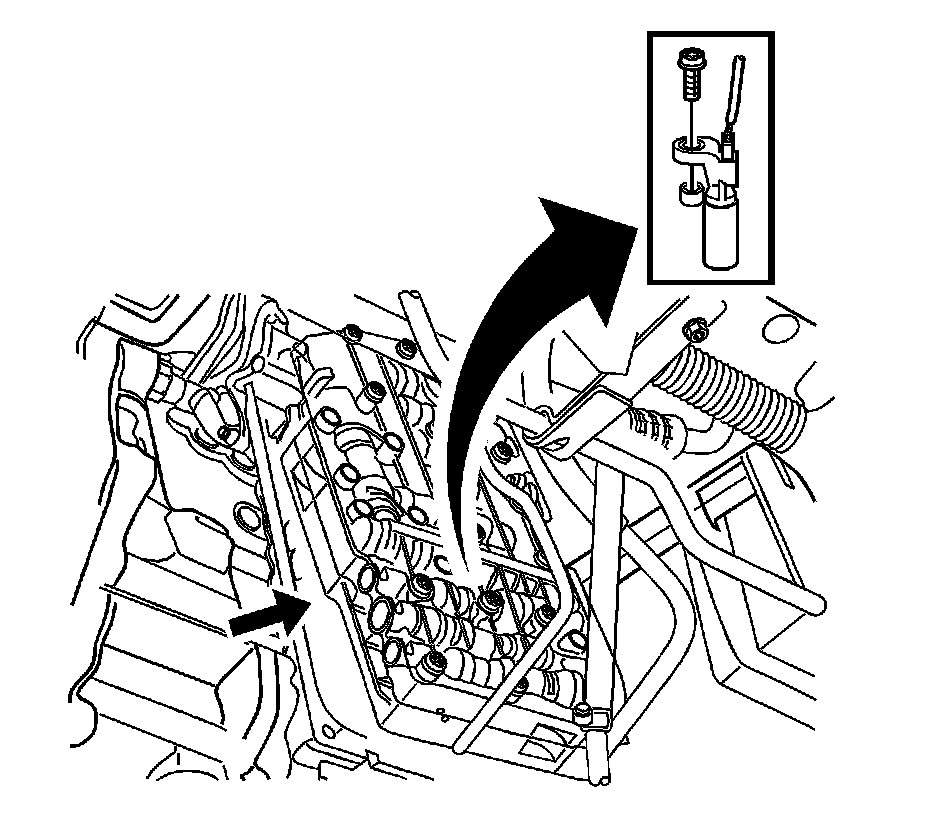
10. Remove the automatic transmission output speed sensor mounting bolt.
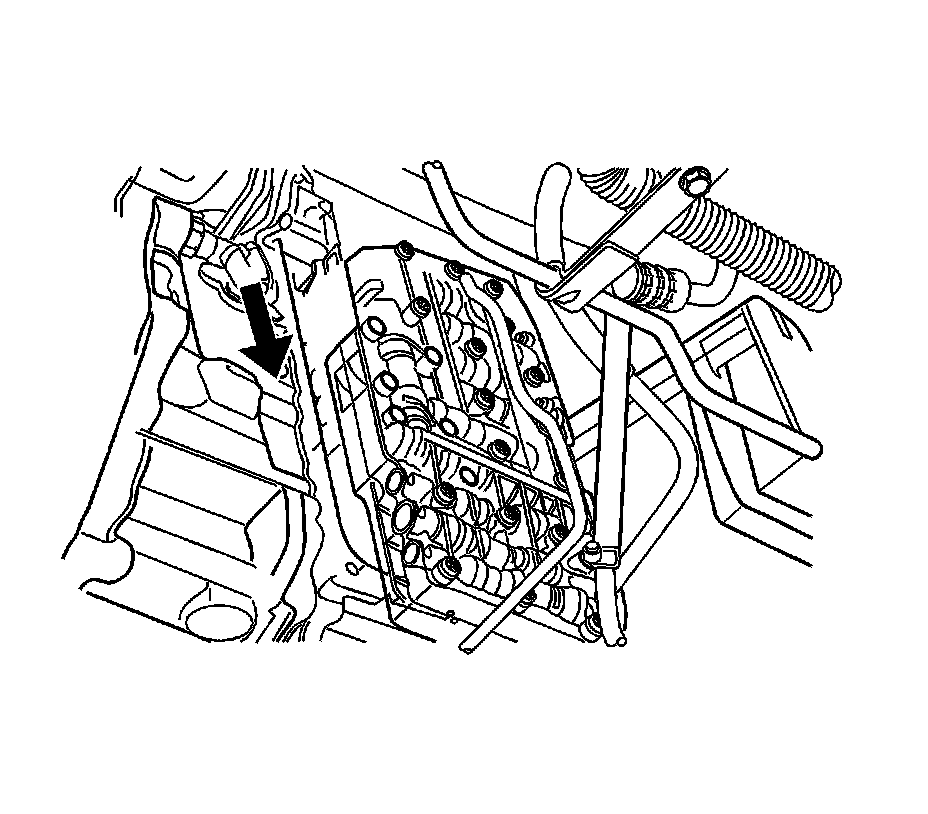
11. Remove the control valve body.
Installation Procedure
Important:
After installing the control valve body assembly, the shift adapts must be reset. reset the shift adapts using the scan tool. Go to "Trans Adaptives Reset" under "Special Functions" on the scan tool.
Notice:
Refer to Fastener Notice Fastener Notice in Cautions and Notices.
1. Install the control valve body mounting and the bolts.
Tighten the valve mounting bolts to 8 Nm (71 lb in).
2. Install the input speed sensor mounting bolt.
Tighten the input speed sensor mounting bolts to 8 Nm (71 lb in).
3. Install the output speed sensor mounting bolt.
Tighten the output speed sensor mounting bolts to 6 Nm (53 lb in).
4. Install the oil pan and the oil pan gasket. Refer to Automatic Transmission Fluid Pan and Gasket Removal 9. Automatic Transmission Fluid Pan and Gasket Removal.
5. Use the DT 46475 (1) to install the transaxle fluid drain plug.
6. Install the engine under cover. Refer to Engine Cover Replacement Service and Repair in Frame and Underbody.
7. Lower the vehicle.
8. Connect the transaxle wiring harness and the park/neutral position (PNP) switch electrical connector.
9. Install the air filter housing.
10. Refill the transaxle fluid. Refer to Transmission Fluid Level Inspection Testing and Inspection.
11. Connect the negative battery cable.
Important:
After installing the control valve body assembly, the shift adapts must be reset. reset the shift adapts using the scan tool. Go to "Trans Adaptives Reset" under "Special Functions" on the scan tool.