Control Arm: Service and Repair
Control Arm Replacement
Tools Required
KM-507-C Ball Joint Remover
Removal Procedure
1. Raise and suitably support the vehicle. Let the control arms hang free. Refer to Lifting and Jacking the Vehicle Service and Repair.
2. Remove the wheel. Refer to Tire and Wheel Removal and Installation Service and Repair.
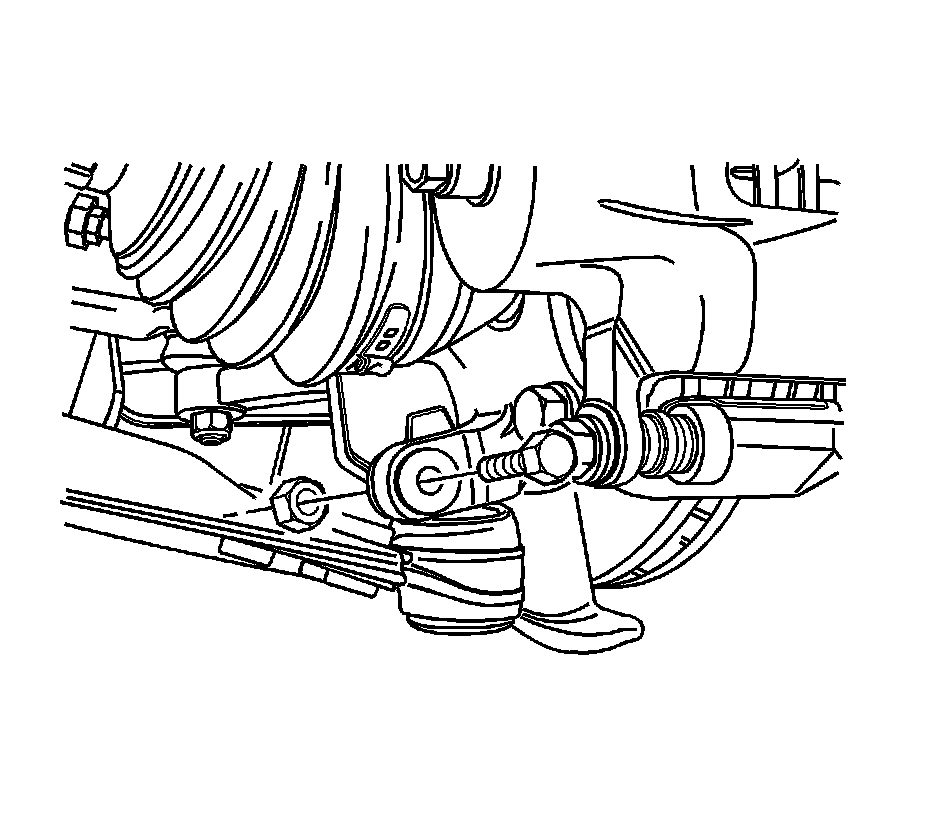
3. Remove the pinch bolt and the nut from the ball joint.
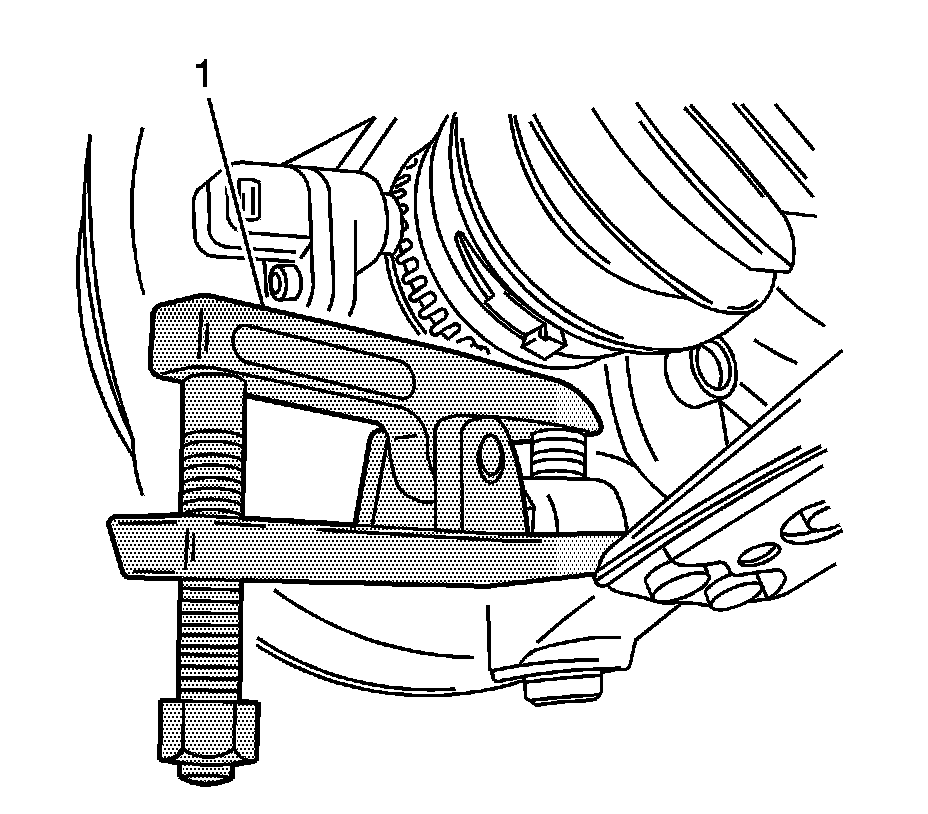
4. Disconnect the ball joint from the knuckle assembly using the KM-507-C (1).
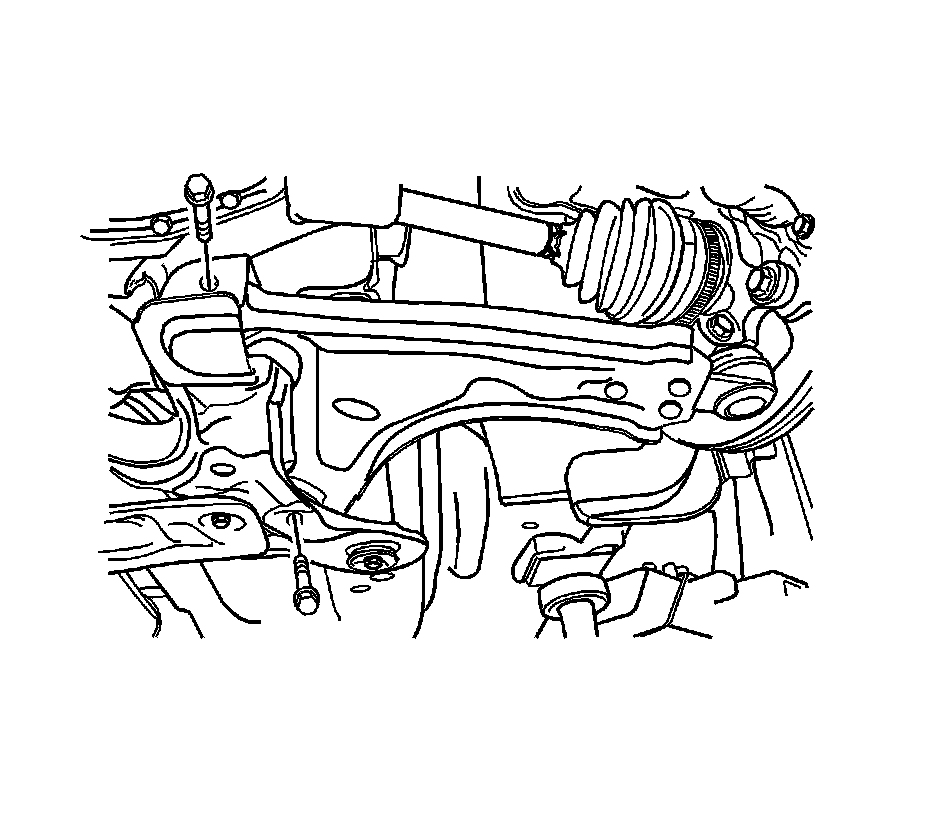
5. Remove the control arm-to-crossmember bolts.
6. Remove the control arm from the vehicle.
Installation Procedure
1. Install the control arm.
2. Install the control arm-to-crossmember bolts. Do not tighten the bolts.
3. Connect the ball joint to the steering knuckle.
Notice:
Refer to Fastener Notice Fastener Notice.
4. Install the ball joint pinch bolt and the nut.
Tighten the ball joint pinch bolt nut to 60 Nm (44 lb ft).
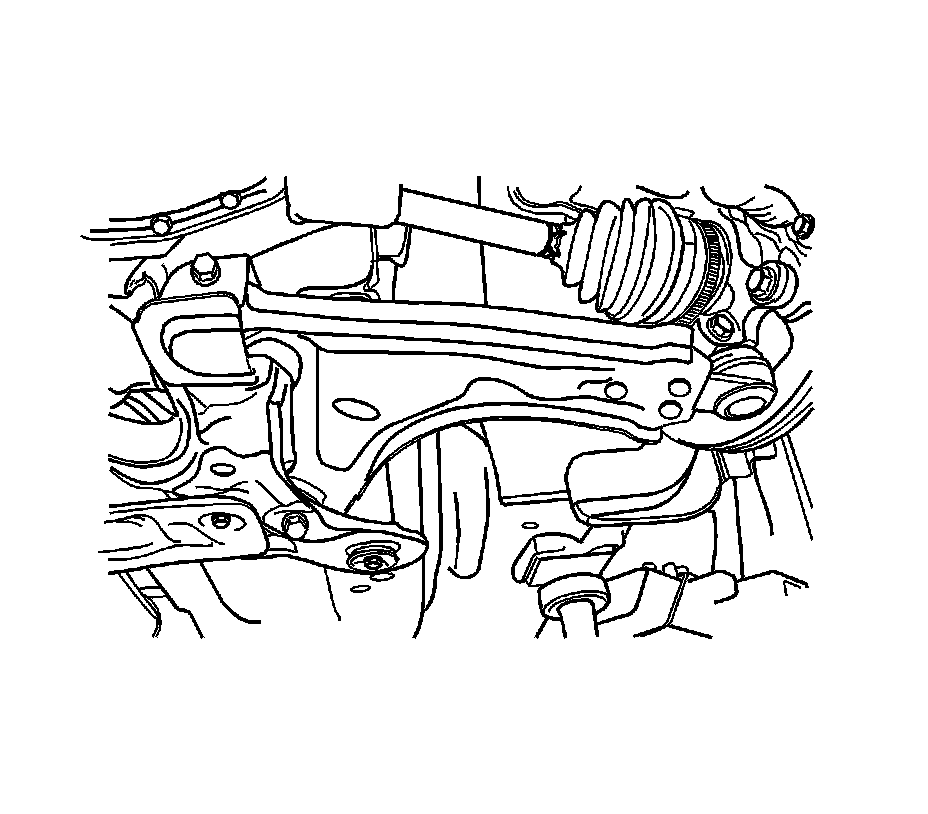
5. Install the control arm-to-crossmember bolts.
* Tighten the front control arm-to-crossmember bolt to 125 Nm (92 lb ft).
* Tighten the rear control arm-to-crossmember bolt to 110 Nm (81 lb ft).
6. Install the wheel. Refer to Tire and Wheel Removal and Installation Service and Repair.
7. Lower the vehicle.