Engine Flywheel Installation
Engine Flywheel Installation

1. Important:
^ The flywheel does not use a locating pin for alignment, and will not initially seat against the crankshaft flange or spacer, if applicable, but will be pulled onto the crankshaft by the engine flywheel bolts. This procedure requires a 3 stage tightening process.
^ Certain applications, the 4.8L manual transmission and all 6.0L, require a spacer and longer bolts for proper flywheel position.
Install the spacer, if applicable, onto the rear of the crankshaft. A longer flywheel bolt must be used on applications using a flywheel spacer.
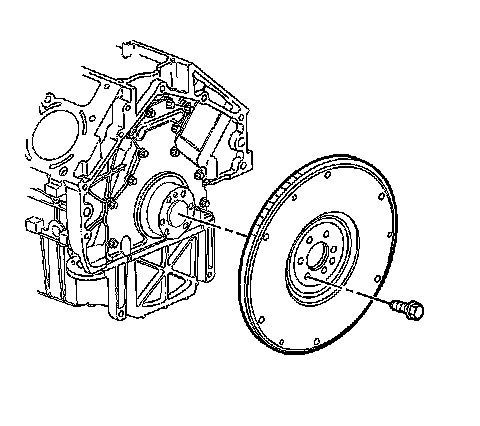
2. Install the manual transmission engine flywheel to the crankshaft, if applicable.

3. Install the automatic transmission engine flywheel to the crankshaft, if applicable.
4. Important: A longer flywheel bolt must be used on applications using a flywheel spacer.
Apply threadlock GM P/N 12345382 (Canadian P/N 10953489) or equivalent to the threads of the flywheel bolts.

5. Notice: Refer to Fastener Notice in Service Precautions.
Install the engine flywheel bolts.
1. Tighten the engine flywheel bolts first pass in sequence to 20 Nm (15 ft. lbs.).
2. Tighten the engine flywheel bolts second pass in sequence to 50 Nm (37 ft. lbs.).
3. Tighten the engine flywheel bolts final pass in sequence to 100 Nm (74 ft. lbs.).