Crossmember Replacement - Front Suspension
Crossmember Replacement - Front Suspension
Removal Procedure
1. Raise and suitably support the vehicle. Refer to Lifting and Jacking the Vehicle Service and Repair in General Information.
2. Remove the wheels. Refer to Tire and Wheel Removal and Installation Service and Repair in Tires and Wheels.
3. Drain the power steering oil. Refer to Bleeding the Power Steering System Bleeding the Power Steering System in Power Steering System.
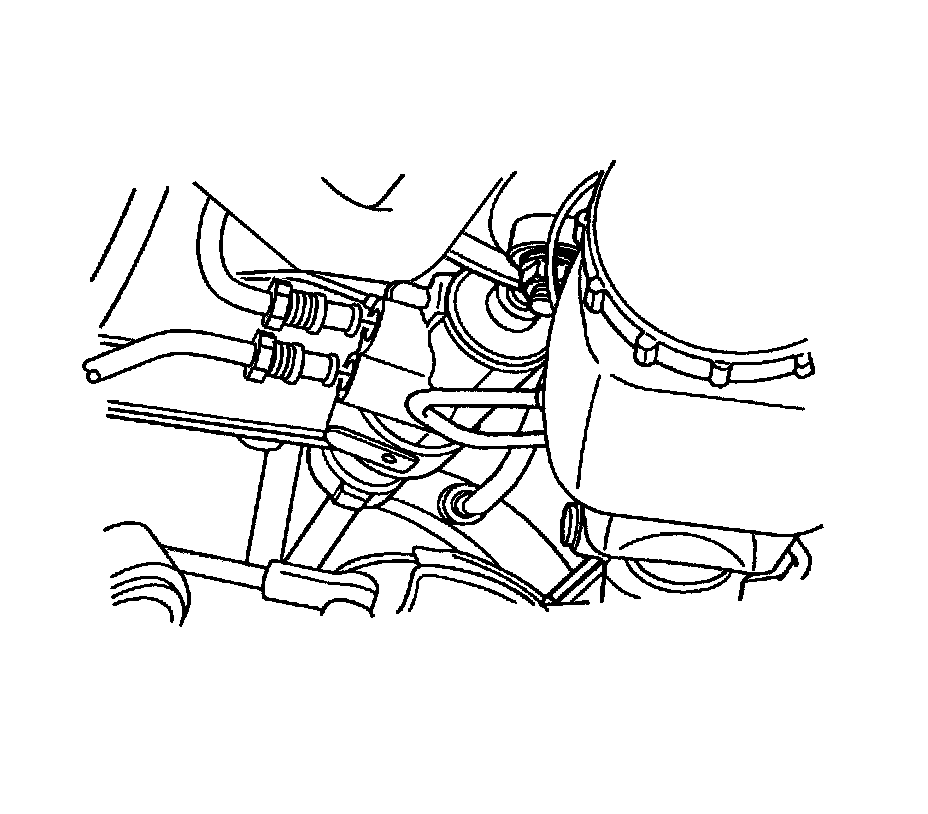
4. Remove the power steering pipe union nuts.

Important: Before removing the interm shaft and the bolt, be advised that the steering wheel unit is horizontal, with the spokes pointing down. This is the straight-ahead position. Make a mark on the stub shaft housing that lines up with a mark on the intermediate shaft lower universal joint. This mark will be used for proper alignment during installation.
5. Remove the interm shaft and the bolt.

6. In case of manual transaxle vehicle, remove the gear shift control bracket and fixing clip.

7. Remove the centermember.
8. Remove the front exhaust pipe. Refer to Front Pipe Replacement (2.5L) Service and RepairFront Pipe Replacement (2.0L) Service and Repair in Engine Exhaust.
9. Remove the outer tie rod. Refer to Rack and Pinion Outer Tie Rod End Replacement Service and Repair in Power Steering System.
10. Disconnect the control arm ball joint. Refer to Control Arm Replacement Front Suspension.

11. Remove the crossmember bolts-to-control arm and nuts-to-longitudinal.
Caution: To remove the possibility of personal injury or any kind of damage, be sure to support the crossmember assembly properly by jackstands before removing the crossmember.
12. Remove the crossmember.

13. Remove the power steering gear set. Refer to Power Steering Gear Replacement Power Steering Gear Replacement in Power Steering System.
14. Remove the stabilizer bar.
15. Remove the control arm from the crossmember assembly.
Installation Procedure

Notice: Refer to Fastener Notice Fastener Notice in Cautions and Notices.
1. Install the control arm onto the crossmember assembly.
Tighten the stabilizer bar bolts and nuts to 50 Nm (37 lb ft).
2. Install the crossmember bolts-to-control arm, nuts-to-longitudinal and crossmember.
Tighten the crossmember bolts-to-control arm and nuts-to-longitudinal to 150 Nm (110 lb ft).
3. Install the out tie rod and control arm ball joint.
4. Install the front exhaust pipe and centermember.
5. In case of manual transaxle vehicle, install the shift control bracket and clip.
6. Install the steering interm shaft and bolt.
Tighten the steering interm shaft bolt to 25 Nm (18 lb ft).
7. Install the power steering pipe union nuts.
Tighten the power steering pipe union nuts to 30 Nm (22 lb ft).
8. Fill the power steering oil into the power steering system.