Air Temperature Actuator Replacement
Air Temperature Actuator Replacement
Removal Procedure
Caution: Refer to Battery Disconnect Caution Battery Disconnect Caution in Cautions and Notices.
1. Disconnect the negative battery cable.
2. Remove the glove box lower panel cover. Refer to Storage Compartment Replacement - Instrument Panel (I/P) Service and Repair in Instrument Panel, Gages, and Console.
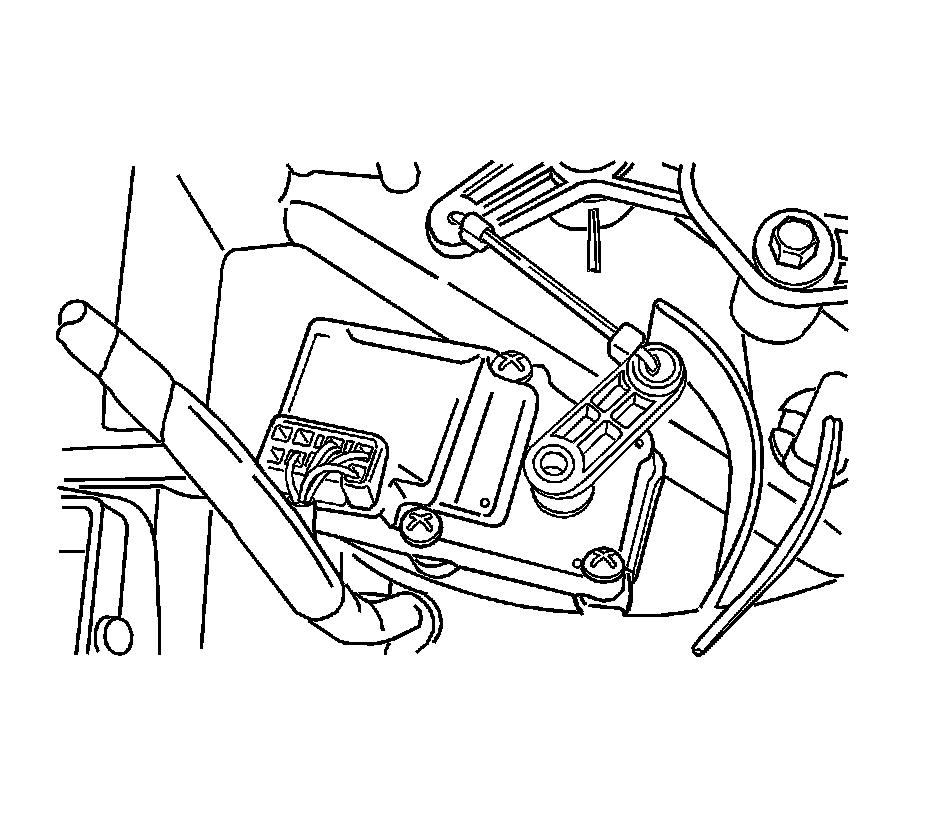
3. Disconnect the electrical connector.
4. Remove the actuating rod by snapping it out of the lever with needle-nose pliers.
5. Remove the motor lever from its shaft by pulling the lever off.
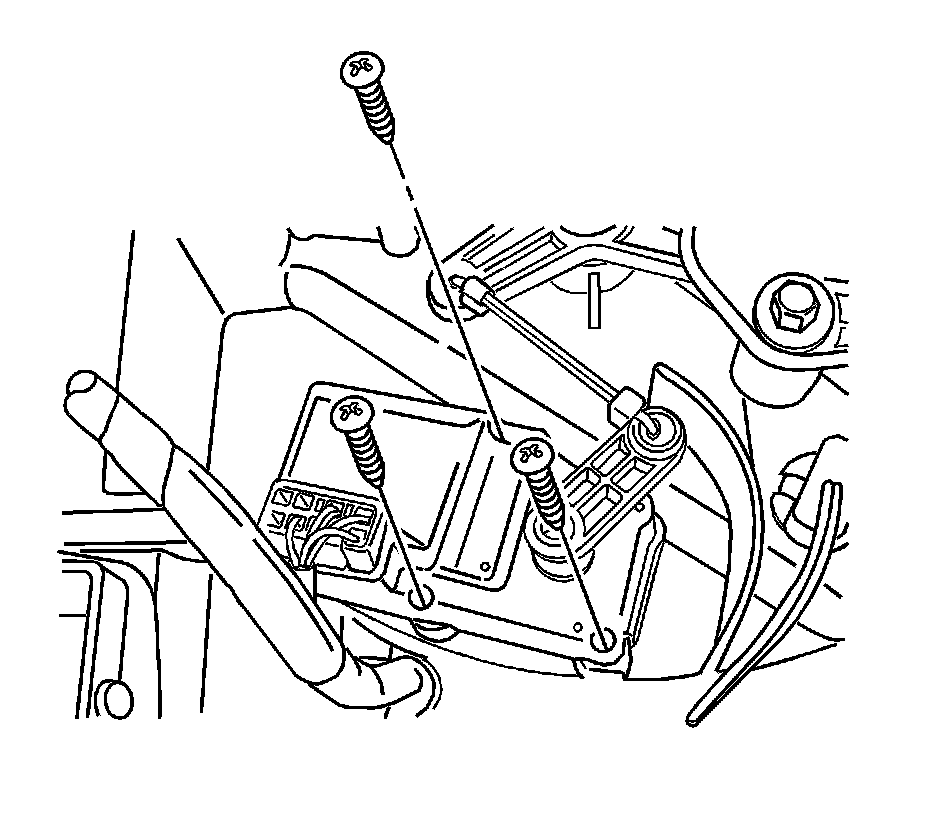
6. Remove the motor retaining screws.
7. Remove the temperature door motor.
Installation Procedure
1. Install the temperature door motor.
2. Install the retaining screws and tighten.
3. Press the lever onto motor shaft.
4. Install the actuating rod onto the lever.
5. Connect the electrical connector.
6. Install the glove box lower panel cover. Refer to Storage Compartment Replacement - Instrument Panel (I/P) Service and Repair in Instrument Panel, Gages, and Console.
7. Connect the negative battery cable.