Canister Purge Solenoid: Service and Repair
EVAPORATIVE EMISSION (EVAP) CANISTER PURGE SOLENOID VALVE REPLACEMENT
REMOVAL PROCEDURE

1. Disconnect the evaporative emission (EVAP) canister purge valve electrical connector (1).

2. Disconnect the EVAP canister purge valve tube from the intake manifold.
3. Disconnect the chassis EVAP vapor line from the EVAP canister purge valve.
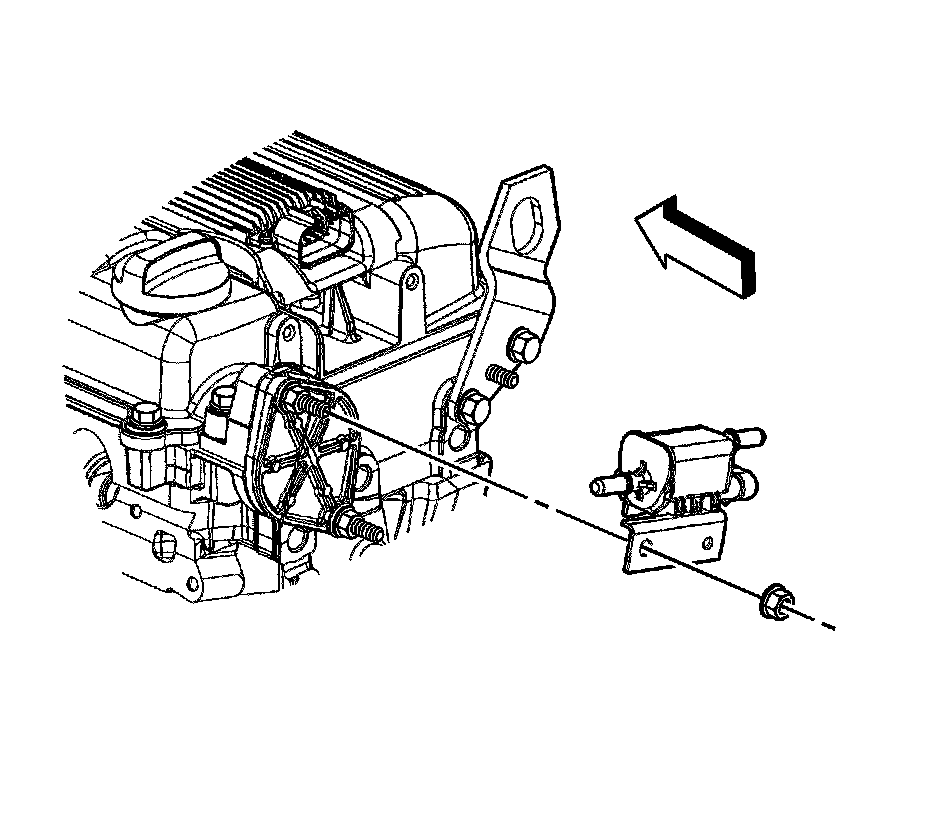
4. Remove the EVAP canister purge valve bracket bolt.
5. Remove the EVAP canister purge valve with bracket.
6. Remove the EVAP canister purge valve from the bracket.
7. Inspect for carbon release in the EVAP canister purge valve ports. If there is any loose carbon, replace the EVAP canister and any components necessary to remove the carbon particles.
INSTALLATION PROCEDURE
1. Install the EVAP canister purge valve to the bracket.
2. Position the EVAP canister purge valve with bracket to the cylinder head.
3. Install the EVAP canister purge valve bracket bolt.
NOTE: Refer to Fastener Notice.
Tighten the bolt to 18 N.m (13 lb ft).
4. Connect the EVAP canister purge valve tube to the intake manifold.
5. Connect the chassis EVAP vapor line to the EVAP canister purge valve.
6. Connect the EVAP canister purge valve electrical connector (1).