Air Temperature Door Replacement
Air Temperature Door Replacement
Removal Procedure

1. Remove the HVAC module. Refer to HVAC Module Assembly Replacement (Service and Repair).
2. Remove the evaporator temperature sensor connector (1) from the case.

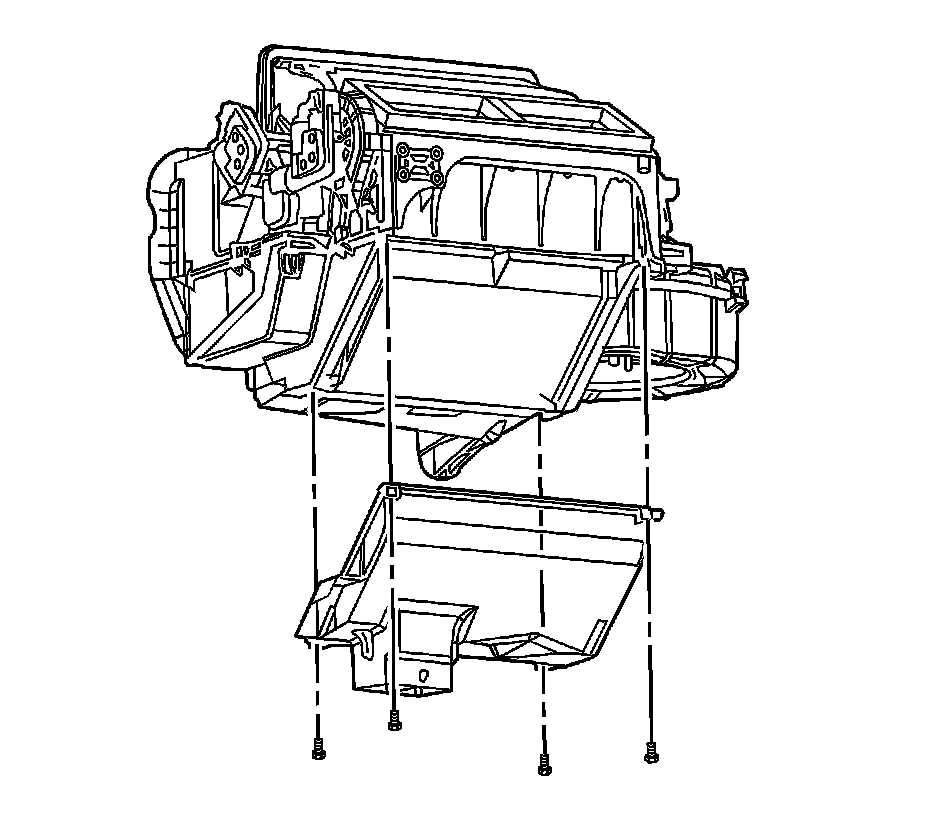
3. Remove the air inlet housing bolts/screws (1).

4. Remove the air inlet housing.

5. Remove the right side HVAC module bracket bolts/screws (1).
6. Remove the right side HVAC module bracket (2).

Important: The upper HVAC module bolt/screw is located under the right HVAC module bracket.
7. Remove the upper HVAC module bolt/screw.

8. Remove the HVAC module to dash panel sound barrier seal (1).
9. Remove the heater outlet duct bolts/screws.
10. Remove the heater outlet duct.

11. Remove the heater core cover bolts/screws (1).
12. Remove the heater core cover (2).

13. Remove the heater core pipe bolt/screw (1).
14. Remove the heater core (2).

15. Remove the lower HVAC module bolts/screws (1).
16. Separate the HVAC module case halves.

17. Remove the air temperature actuator bolts/screws (1).
18. Remove the air temperature actuator (2).
19. Remove the air temperature actuator lever (3).
20. Remove the air temperature door (4).
Installation Procedure
1. Install the air temperature door (4).
Important: The actuator lever can only be inserted into the door one way.
2. Install the air temperature actuator lever (3).
3. Install the air temperature actuator (2).
Notice: Refer to Fastener Notice (Fastener Notice).
4. Install the air temperature actuator bolts/screws (1).
Tighten the bolts/screws to 1.2 N.m (11 lb in).
Important: Align the temperature sensor wire with the opening in the upper HVAC case. Improper alignment will pinch and/or cut the sensor wire.
5. Align and install the upper module case to the lower module case.
6. Install the lower HVAC module bolts/screws (1).
Tighten the bolts/screws to 1.2 N.m (11 lb in).
7. Install the heater core (2).
8. Install the heater core pipe bolt/screw (1).
Tighten he bolts/screws to 1.2 N.m (11 lb in).
9. Install the heater core cover (2).
10. Install the heater core cover bolts/screws (1).
Tighten the bolts/screws to 1.2 N.m (11 lb in).
11. Install the heater outlet duct.
12. Install the heater outlet duct bolts/screws.
Tighten the bolts/screws to 1.2 N.m (11 lb in).
13. Install the HVAC module to dash panel sound barrier seal (1).
14. Install the upper HVAC module bolt/screw.
Tighten the bolt/screw to 1.2 N.m (11 lb in).
15. Install the right side HVAC module bracket (2).
16. Install the right side HVAC module bracket bolts/screws (1).
Tighten the bolts/screws to 1.4 N.m (12 lb in).
17. Install the air inlet housing.
18. Install the air inlet housing bolts/screws (1).
Tighten the bolt/screw to 1.2 N.m (11 lb in).
19. Install the evaporator temperature sensor connector (1) to the case.
20. Install the HVAC module. Refer to HVAC Module Assembly Replacement (Service and Repair).
21. Re-calibrate the actuators. Refer to Actuator Recalibration (Programming and Relearning).