Coolant Heater Replacement
Coolant Heater Replacement
Removal Procedure
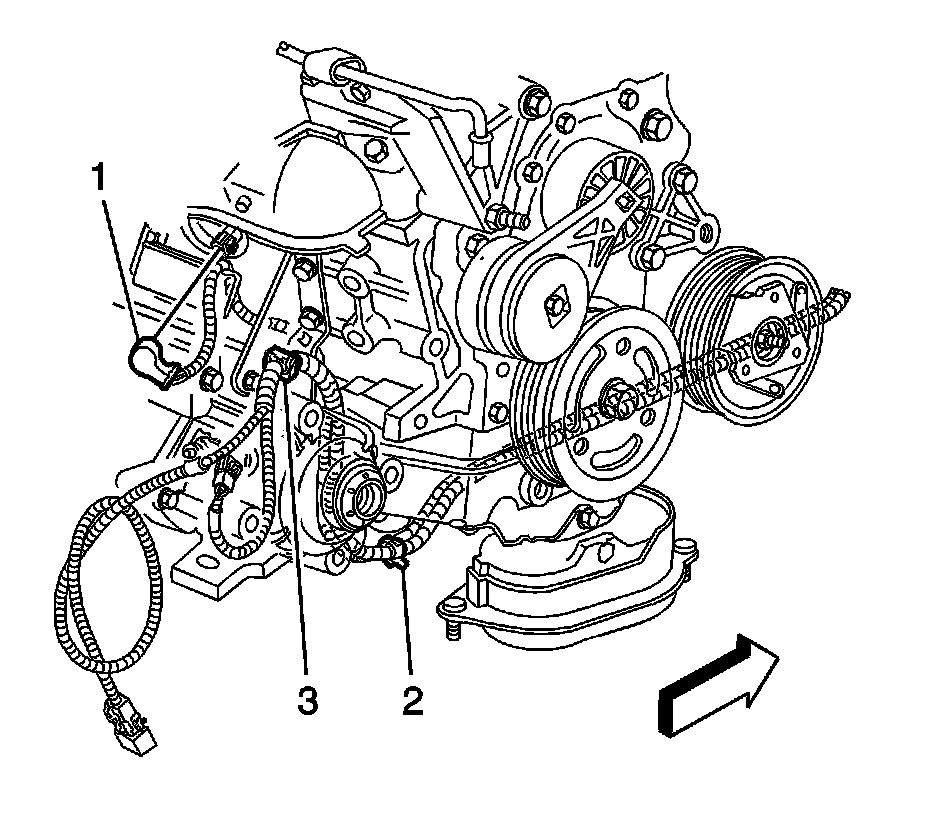
1. Drain the engine coolant. Refer to Cooling System Draining and Filling (Vac-N-Fill) Cooling System Draining and Filling (Vac-N-Fill)Cooling System Draining and Filling (Static Fill LZ9) Cooling System Draining and Filling (Static Fill LZ9).
2. Disconnect the coolant heater cord (1) from the heater.
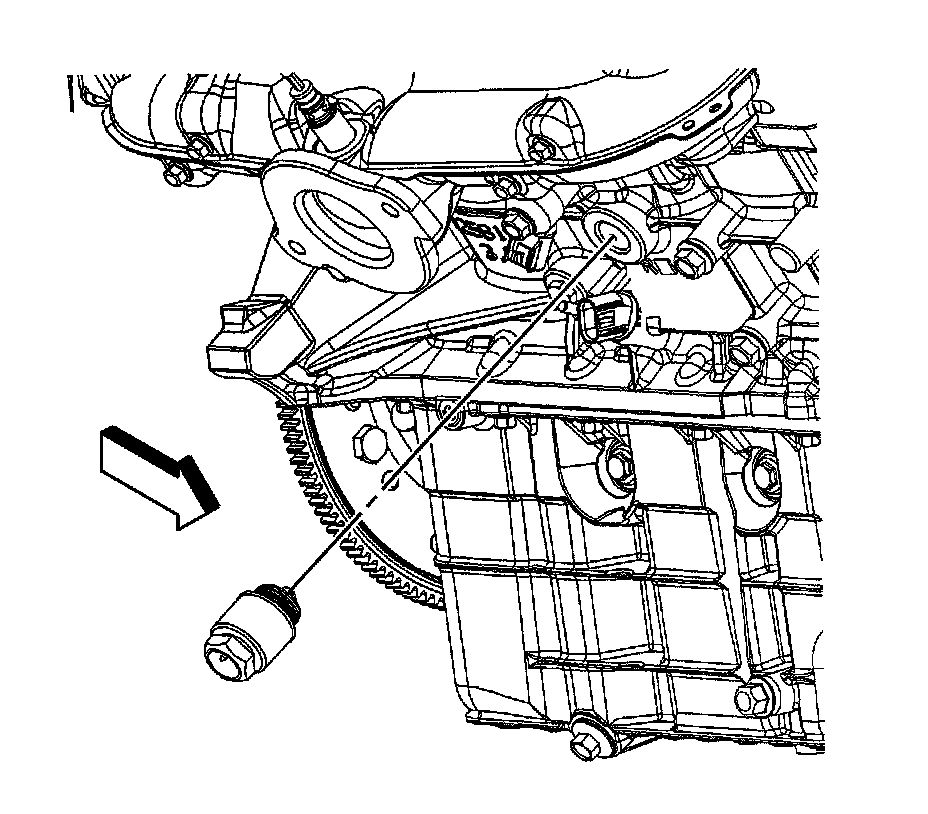
Note: Do not score the surface of the engine block hole when removing the coolant heater.
3. Remove the coolant heater.
Installation Procedure
1. Remove any burrs, sealer, paint or other foreign material from the threads/sealing surface of the engine block and from the old coolant heater if the heater is to be reused.
2. If reusing the old coolant heater, apply thread sealant GM P/N 12346004 (Canadian P/N 10953480), or equivalent to the threads.
Caution: Refer to Fastener Caution Fastener Caution.
3. Install the coolant heater to the engine block and tighten to 50 Nm (37 lb ft).
4. Connect the coolant heater cord (1) to the heater.
5. Fill the cooling system. Refer to Cooling System Draining and Filling (Vac-N-Fill) Cooling System Draining and Filling (Vac-N-Fill)Cooling System Draining and Filling (Static Fill LZ9) Cooling System Draining and Filling (Static Fill LZ9).