Brake Pressure Modulator Valve Bracket Replacement
Brake Pressure Modulator Valve Bracket Replacement
Removal Procedure
1. Raise and support the vehicle. Refer to Lifting and Jacking the Vehicle Service and Repair.
2. Remove the left front tire and wheel assembly. Refer to Tire and Wheel Removal and Installation Removal and Replacement.
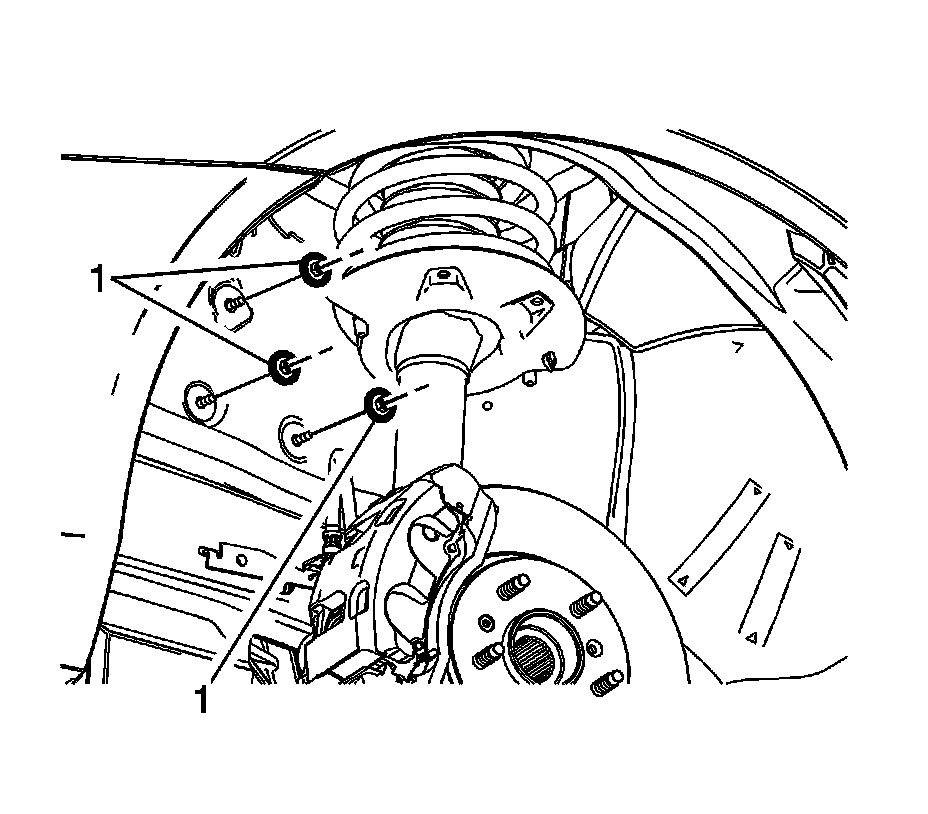
3. Remove the brake pressure modulator valve (BPMV) bracket outer nuts (1).
4. Lower the vehicle to access the engine compartment.
5. Remove the air cleaner assembly. Refer to Air Cleaner Assembly Replacement Air Cleaner Assembly Replacement.
6. Remove the air cleaner outlet duct. Refer to Air Cleaner Outlet Duct Replacement Service and Repair.
7. Without draining the engine coolant and without disconnecting the hoses, remove the nuts and position aside the radiator surge tank. Refer to Radiator Surge Tank Replacement Radiator Surge Tank Replacement.
Caution:
To prevent equipment damage, never connect or disconnect the wiring harness connection from the EBCM with the ignition switch in the ON position.
8. Disconnect the electronic brake control module (EBCM) electrical connector.

9. Remove the BPMV bolt (1) and washer (2).
10. Without disconnecting the brake pipes, carefully lift the BPMV assembly from the BPMV bracket and secure with heavy mechanics wire.
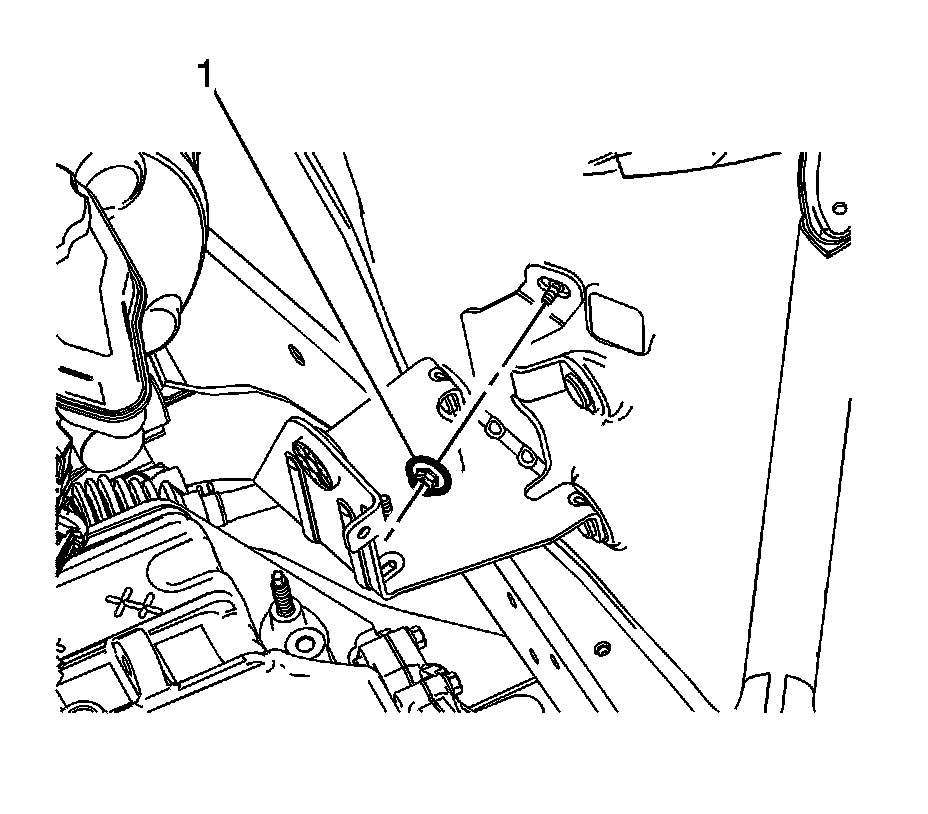
11. Remove the BPMV bracket inner nut (1).
12. Remove the BPMV bracket.
Installation Procedure
1. Install the BPMV bracket to the strut tower.
Caution: Refer to Fastener Caution Fastener Caution.
2. Install the BPMV bracket inner nut (1) and tighten to 3 Nm (27 lb in).
3. Carefully position the BPMV assembly to the BPMV bracket.
4. Install the BPMV bolt (1) and washer (2) and tighten the bolt to 10 Nm (89 lb in).
5. Connect the EBCM electrical connector.
6. Reposition the radiator surge tank and install the nuts. Refer to Radiator Surge Tank Replacement Radiator Surge Tank Replacement.
7. Install the air cleaner outlet duct. Refer to Air Cleaner Outlet Duct Replacement Service and Repair.
8. Install the air cleaner assembly. Refer to Air Cleaner Assembly Replacement Air Cleaner Assembly Replacement.
9. Raise and support the vehicle.
10. Install the BPMV bracket outer nuts (1) and tighten to 10 Nm (89 lb in).
11. Install the left front tire and wheel assembly. Refer to Tire and Wheel Removal and Installation Removal and Replacement.