Intake Manifold Installation
Intake Manifold Installation
Special Tools
EN-50790 - HP Fuel Pump Installation Alignment Gauge
For equivalent regional tools, refer to Special Tools Special Tools.

1. Install a NEW gasket (1) on the intake manifold (3). Install the intake manifold and hand start the intake manifold bolts (2, 4).

Caution: Refer to Fastener Caution Fastener Caution.
2. Tighten the bolts and nuts in sequence twice to 12 Nm (106 lb in).

3. Install the MAP sensor (1) and bolt (2). Tighten the bolt to 5 Nm (44 lb in).
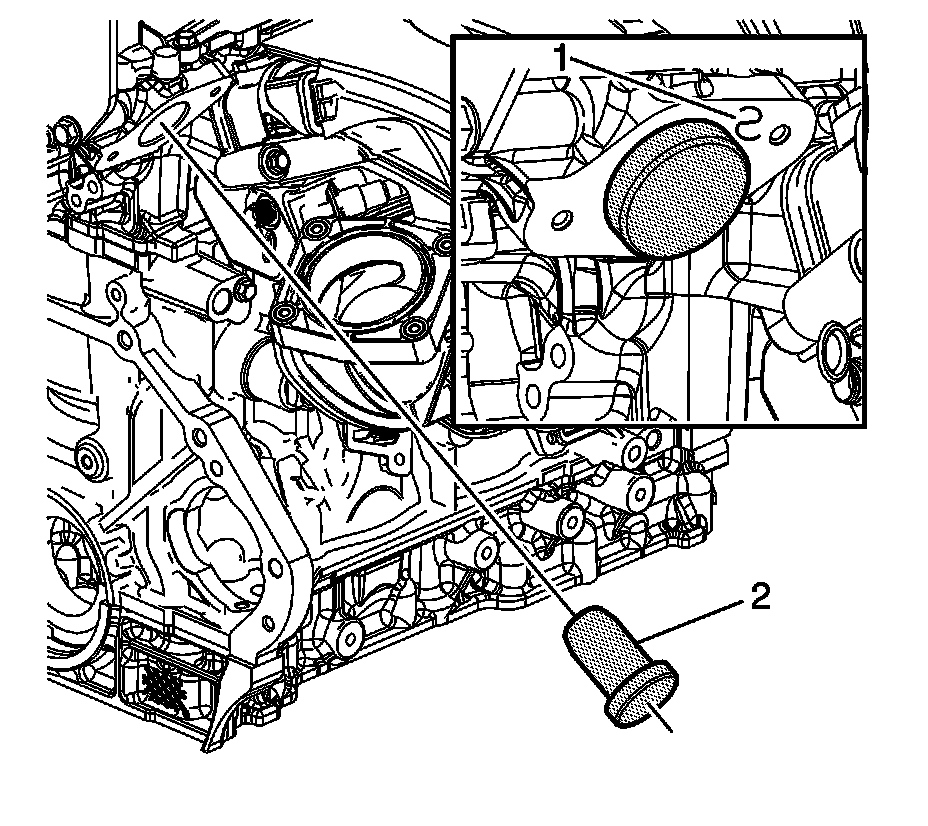
Note: The camshaft must be in the base circle position before the high pressure fuel pump is installed.
4. Use the EN-50790 - alignment gauge (2) to ensure that the camshaft lobe is in the base circle position. At base circle position, the tool will be flush with the head (1).

5. Lubricate the high pressure fuel pump cylinder head bore with clean, silicone-free 5W30 engine oil.
Note: Ensure that the high pressure fuel pump roller lifter is oriented properly, and the camshaft is at base circle.
6. Lubricate the high pressure fuel pump roller lifter (1) with 5W30 engine oil and install into the cylinder head bore.
Note: Ensure the fuel pump housing gasket (2) is properly aligned with the tab upward at the 2 O'clock position.
7. Install a NEW fuel pump housing O-ring (3) and gasket (2).
8. Install the fuel pump assembly (4).
9. Hand start the fuel pump assembly bolts evenly. Tighten the fuel pump bolts evenly to 15 Nm (11 lb ft).
10. Hand start both ends of the NEW fuel feed intermediate pipe (5).
1. Tighten the fitting nut to the fuel rail to 15 Nm (11 lb ft).
2. Tighten the fitting nut to the fuel pump to 15 Nm (11 lb ft).
3. Tighten the fitting nut to the fuel rail a final pass to 30 Nm (22 lb ft).
4. Tighten the fitting nut to the fuel pump a final pass to 30 Nm (22 lb ft).
11. Install the fuel pump insulator (6).

12. Install the fuel pump cover and bolts. Tighten the bolts to 10 Nm (89 lb in).

13. Install a new throttle body gasket (3).
14. Install the throttle body (2).
15. Install the throttle body bolts (1) and tighten to 10 Nm (89 lb in).

Note: Ensure the quick-connect is clean and free of debris. The latch should move freely prior to installation.
16. Install the EVAP canister valve (1) and connect the EVAP canister valve tube.