Control Valve Body Disassemble
Control Valve Body Disassemble
Important: Retainer clips hold in each of the valve line-ups. Use a small screwdriver in order to remove the retainer clips. Be careful not to score the valve body when removing the retainer clips and valves. Before removing the valve line-ups, inspect each valve line-up for freedom of movement.

1. Remove the 3-4 shift valve retainer clip (304), the bore plug (321), with O-ring (320), the 3-4 shift valve (319) and the 3-4 shift valve spring (318).
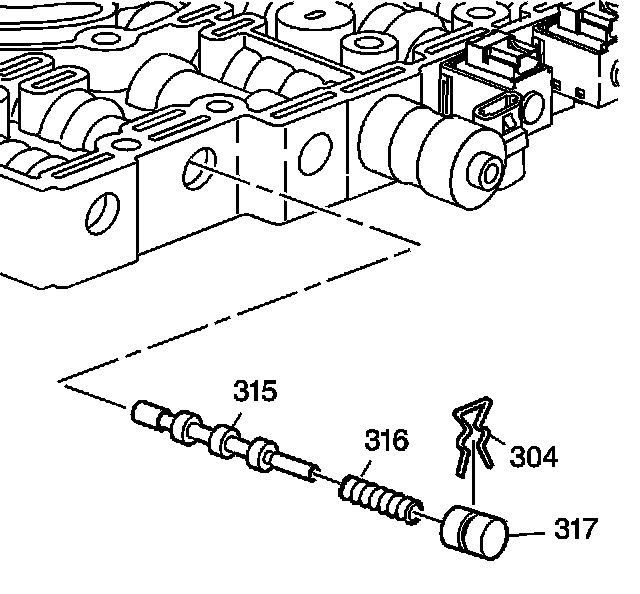
2. Remove the actuator feed limit valve retainer clip (304), the bore plug (317), the actuator feed limit spring (316) and the actuator feed limit valve (315).
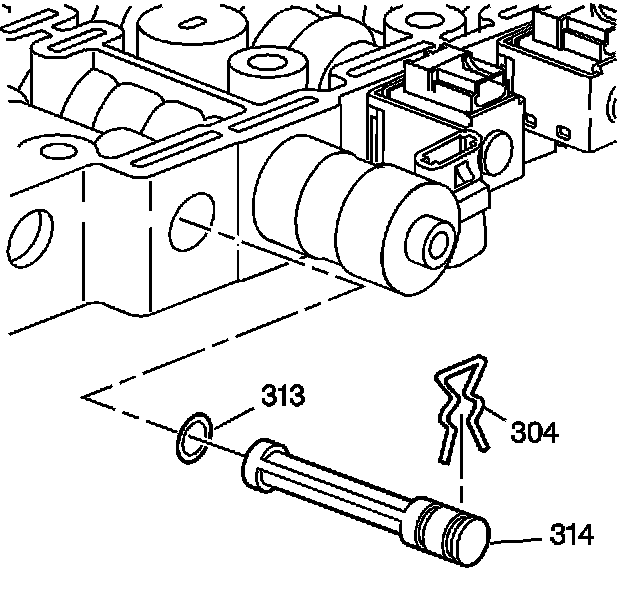
3. Remove the actuator oil filter retainer clip (304), and the actuator oil filter (314) with O-ring (313).

4. Remove the Pressure Control Solenoid (PCS) retainer clip (304), the PCS with two O-rings and screen (312, 309, 310), the torque signal regulator valve (309), and the torque signal regulator spring (308).
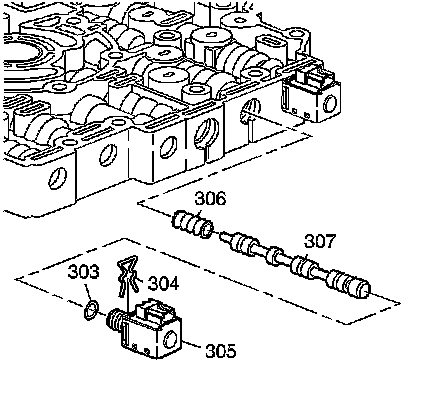
5. Remove the 2-3 shift solenoid retainer clip (304), the 2-3 shift solenoid (305) with O-ring (303), the 2-3 shift valve (307), and the 2-3 shift valve spring (306).

6. Remove the 1-2 shift solenoid retainer clip (304), the 1-2 shift solenoid (305) with O-ring (303), the 1-2 shift valve (302), and the 1-2 shift valve spring (301).

7. Remove the TCC solenoid retainer clip (304), the TCC solenoid (335), with two O-rings (337, 338), and screen, the TCC regulated apply valve (339) and the spring (340).
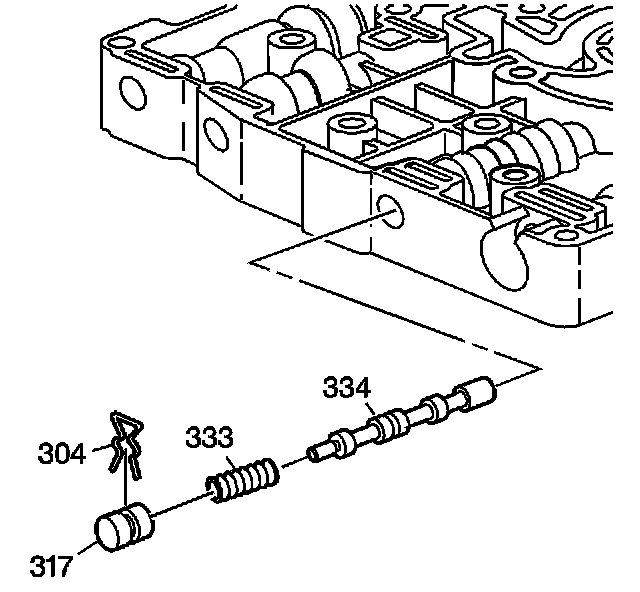
8. Remove the TCC control valve retainer clip (304), the bore plug (317), the spring (333), and the TCC control valve (334).
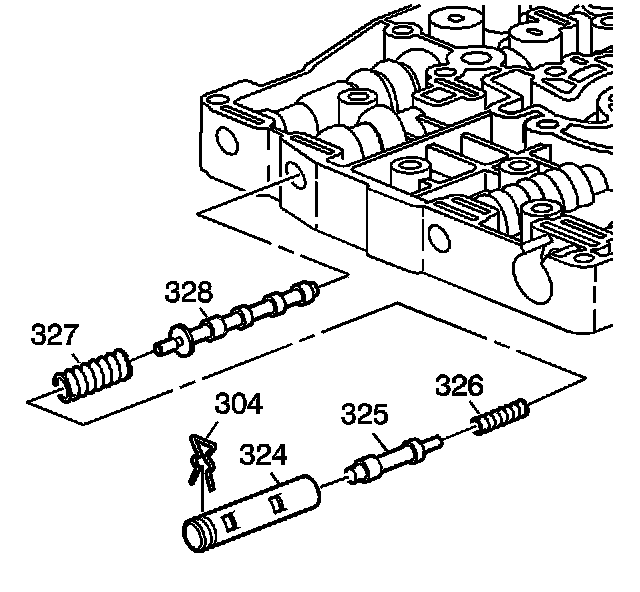
9. Remove the pressure regulator valve retainer clip (304), the bushing (324), the pressure regulator boost valve (325), the isolator spring (326), the pressure regulator valve spring (327), and the pressure regulator valve (328).
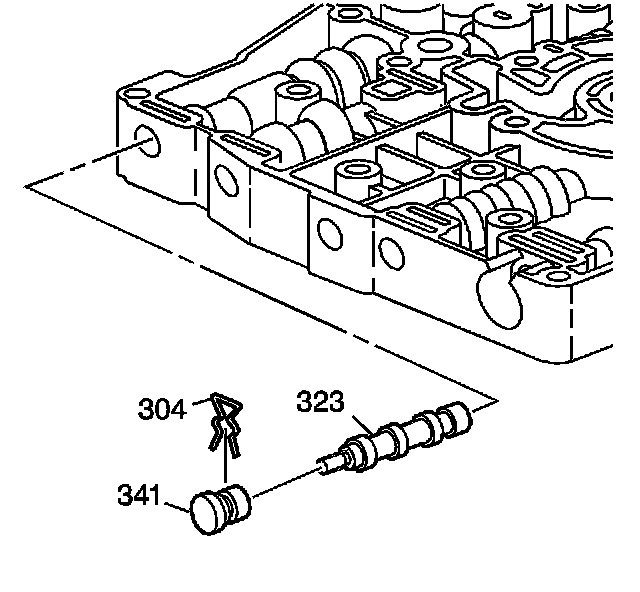
10. Remove the 1-2/3-4 accumulator valve retainer clip (304), the plug (341), and the accumulator valve (323).
11. Inspect the valve body passages for debris.
12. Inspect the machined surfaces for nicks or scratches. Some polish is normal for the machined surfaces.
13. Inspect the valves for nicks or scratches that could cause sticking valves or fluid leaks.
14. Inspect the springs, bushings, O-rings, screens and solenoids for damage.
15. Clean and dry the valve body and valve body components.