Driven Sprocket Support Assembly Disassemble
Driven Sprocket Support Assembly Disassemble
Tools Required
* J 23327 Clutch Spring Compressor
* J 41232 Return Spring Compressor

1. Remove the two seal rings (403) from the driven sprocket support (401).
2. Discard the two seal rings (403).
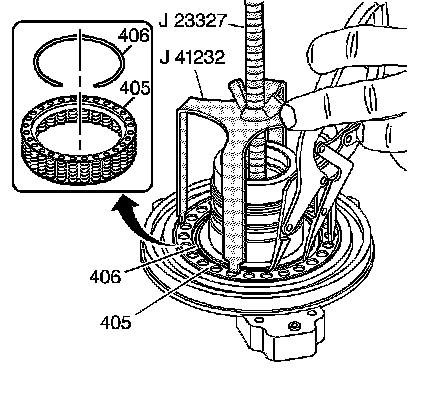
3. Compress the 2nd clutch spring and retainer assembly (405). Use the J 41232 and J 23327 or equivalent.
4. Remove the 2nd clutch spring retainer snap ring (406).
5. Remove the J 41232 and J 23327.
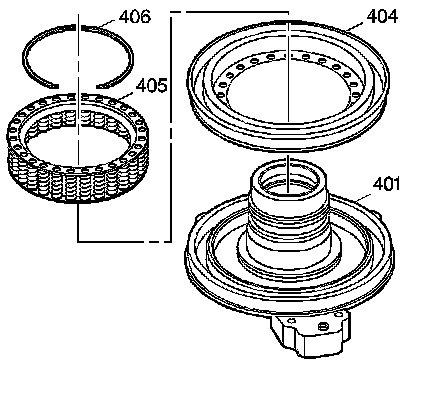
6. Remove the 2nd clutch spring and retainer assembly (405).
7. Remove the 2nd clutch piston and seal assembly (404). If not damaged, the piston and seal assembly is reusable.

8. Inspect the piston and seal assembly (404) for damaged seals.
9. If the seal is cut or damaged replace the seal with a new piston and seal assembly.
10. Inspect the bushing and bearing for damage or excessive wear.
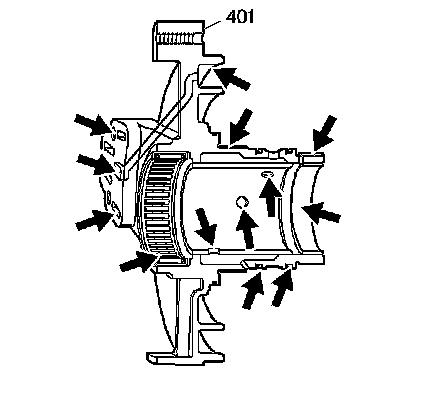
11. Inspect the driven sprocket support (401) for plugged feed holes, damaged seal grooves, stripped bolt holes, and a damaged machined surface.
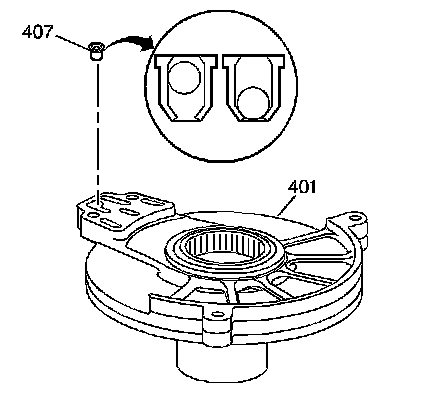
12. Inspect the reverse intermediate clutch housing valve assembly (407) for free operation.
Important: The valve assembly must be in its seated position before you perform the leak test.
13. Using Automatic Transmission fluid, inspect the reverse intermediate clutch housing valve assembly (407) for leaks.
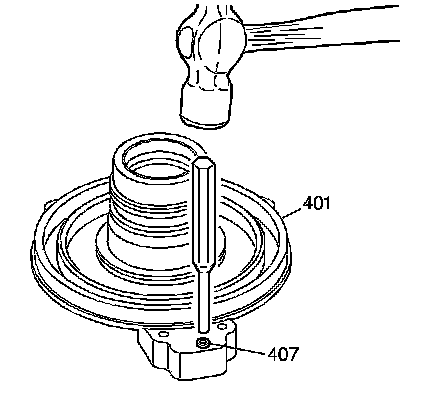
Important: Remove the reverse clutch housing valve assembly (407) only if inspection or the leak test has indicated a problem.
14. Using a 6.25 mm (1/4 in) drift and a mallet, remove the valve assembly (407) from the driven sprocket support (401).
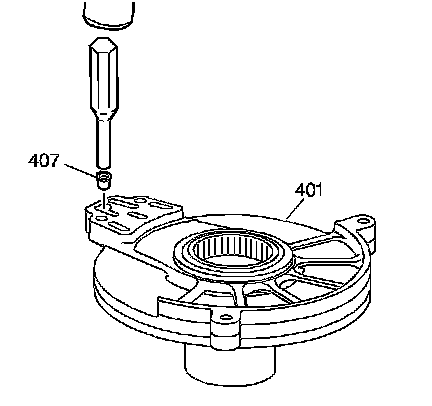
15. Using a 6.25 mm (1/4 in) drift and a mallet, install the valve assembly (407) in the driven sprocket support (401).
16. Inspect the spring assembly (405) for dislocated or damaged springs.
17. Clean and dry each of the components.