Stub Shaft Sleeve Assembly Installation
Stub Shaft Sleeve Assembly Installation
Tools Required
J 41228 Output Shaft Sleeve Installer
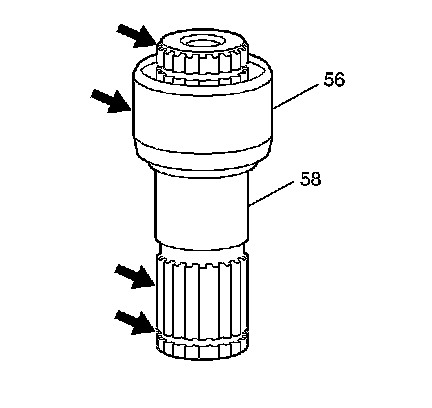
1. Inspect the stub shaft (58) for damage to the splines, the snap ring grooves, and the journals.
Important: If the sleeve (56) appears damaged, replace the sleeve (56) using the same procedure for removal and installation as with the output shaft sleeve. This procedure is listed below.
2. Inspect the sleeve (56) for excessive wear, scratches or nicks that could cause a leak or damage the seal portion.
3. Clean and dry the stub shaft and sleeve assembly.

Notice: Use the J 41228 to install the sleeve onto the output and stub shaft, to prevent a fluid leak.
4. Place a NEW sleeve (56) over the end of the stub shaft (58).
5. Install the collet into the stub shaft snap ring groove with the collet attached to the threaded collet shaft.
6. Place the sleeve installing tube over the collet. Be sure the small outside diameter of the tube fits securely into the sleeve.
7. Install the bearing and nut onto the threaded collet shaft.
8. In order to move the installing tube and press the sleeve onto the stub shaft, hold the end of the threaded collet shaft while tightening the nut down.
9. Remove the J 41228.

10. Install the 2 new snap rings (57) on the stub shaft (58). The snap rings (57) are not reusable after you remove the shaft (58).
11. Install the stub shaft into the transmission. Use a mallet in order to install the shaft through the final drive differential gear.