Removal and Installation
REMOVAL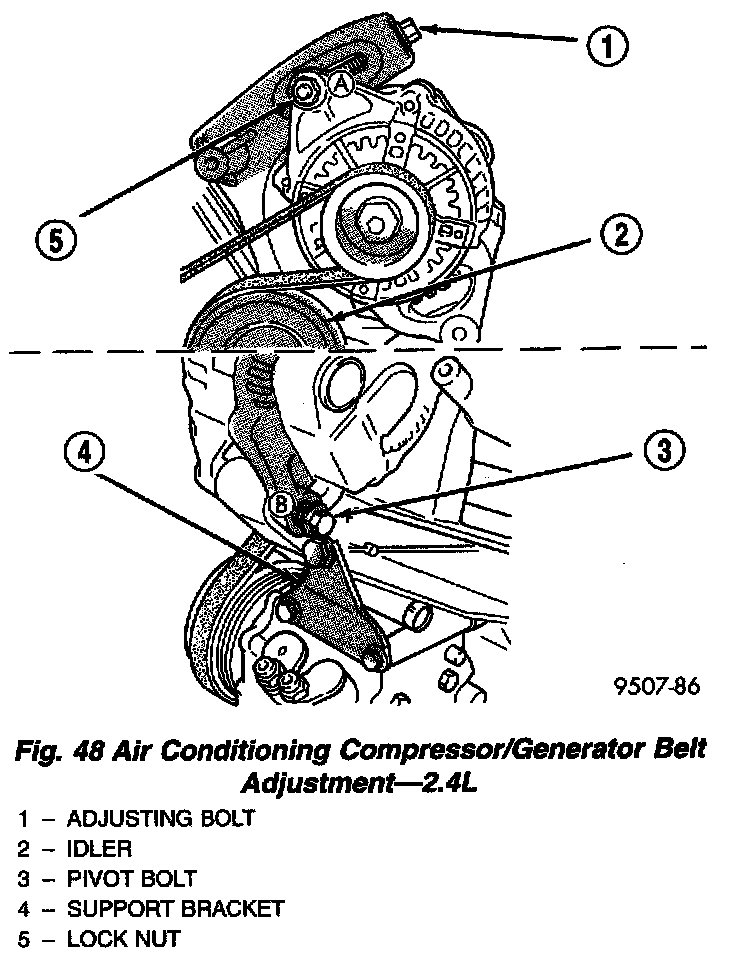
Fig. 48
1. Loosen lower generator pivot bolt (B) and upper locking nut (A) (Fig. 48).
2. Loosen adjusting bolt (Fig. 48) to remove belt tension.
3. Remove belt.
INSTALLATION/ADJUSTMENT
CAUTION: Belt damage may occur if the following procedure is not performed.

Fig. 47
1. Install belt onto pulleys. For belt routing, refer to (Fig. 47).
2. Pre-torque adjusting lock nut (A) to 21 Nm (180 in. lbs.) and torque generator pivot bolt (B) to 54 Nm (40 ft. lbs.) (Fig. 48). This preliminary torque is to ensure proper alignment of generator assembly.
3. Adjust belt tension by tightening the adjusting bolt (Fig. 48) until proper belt tension is obtained. Refer to Belt Tension Chart for specification.
4. Final torque lock nut (A) to 54 Nm (40 ft. lbs.).
REMOVAL
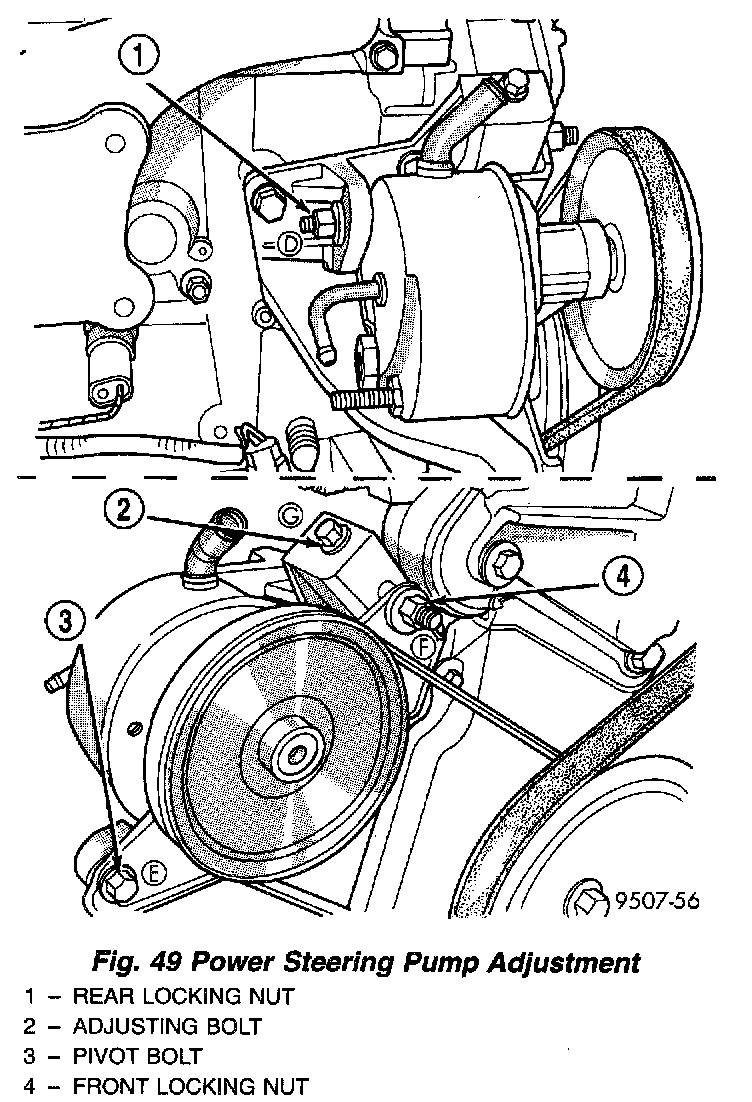
Fig. 49
1. From top of the vehicle, loosen locking nuts (D) and (F) (Fig. 49).
2. From under the vehicle, loosen the pivot bolt (E). Loosen adjusting bolt (G) until belt can be removed.
INSTALLATION/ADJUSTMENT
1. Install belt onto pulleys. For belt routing, refer to (Fig. 47).
2. Apply an initial snug torque to fasteners (D), (E), and (F).
3. Tighten adjusting bolt (G) until the proper tension obtained. Refer to Belt Tension Chart for specification.
4. Tighten locking nuts (D) and (F) to 54 Nm (40 ft. lbs.).
5. Tighten pivot bolt (E) to 54 Nm (40 ft. lbs.).