Headlamp Replacement
REMOVALHeadlamp lens fogging is a normal condition and does not require service unless excessive or continual. Moisture will vent from tubes or vents located on the back of the lamp.
1. Release hood latch and open hood.
2. Disconnect and isolate the battery negative cable.
3. Remove jackscrews attaching headlamp unit to crossmember and remove to access the lamp(s).
Fig.25 Headlamp Bulb:
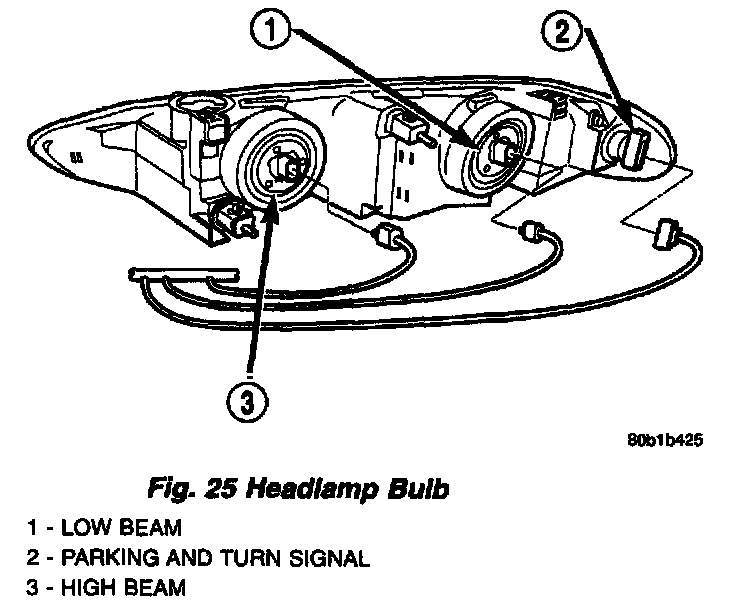
4. Disconnect wire connector from back of lamp socket.
CAUTION: Do not touch the glass of halogen bulbs with fingers or other possibly oily surface, reduced bulb life will result.
5. Rotate bulb (High beam or Low beam) and pull from headlamp unit.
INSTALLATION
CAUTION: Do not touch the glass of halogen bulbs with fingers or other possibly oily surface, reduced bulb life will result.
1. Rotate bulb (High beam or Low beam) and push into headlamp unit.
2. Connect wire connector to the back of lamp socket.
3. Install the jackscrews attaching headlamp unit to crossmember.
4. Connect the battery negative cable.
5. Close the hood.