Front Disc Brake Caliper
DISC BRAKE CALIPER (FRONT)NOTE: Before disassembling the brake caliper, remove it from the vehicle. Before disassembling the brake caliper, clean and inspect it.
DISASSEMBLY
WARNING: UNDER NO CONDITION SHOULD HIGH PRESSURE AIR EVER BE USED TO REMOVE A PISTON FROM A CALIPER BORE. PERSONAL INJURY COULD RESULT FROM SUCH A PRACTICE.
CAUTION: Do not use excessive force when clamping caliper in vise. Excessive vise pressure will cause bore distortion.
1. Mount the caliper in a vise equipped with protective jaws.
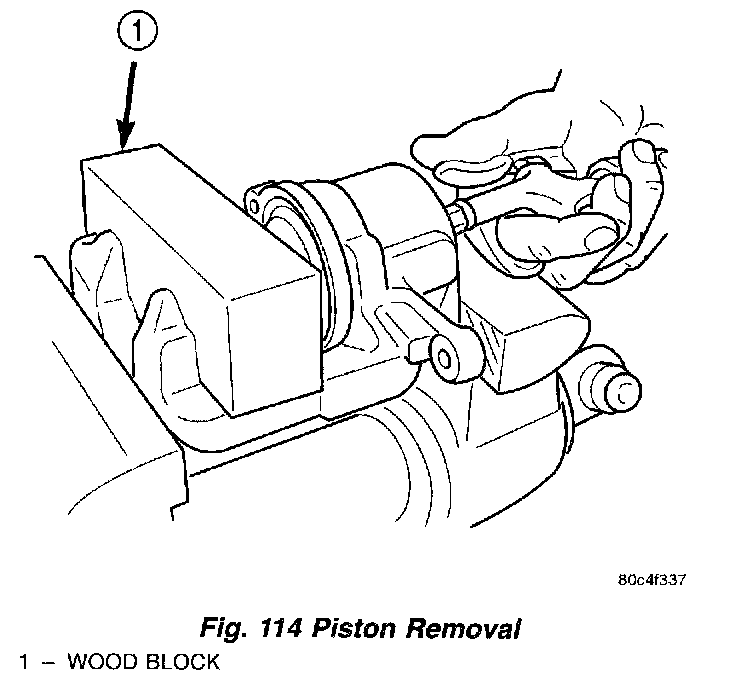
2. Place a wooden block in the caliper as shown.
WARNING: DO NOT PLACE FACE OR HANDS NEAR CALIPER AND PISTON IF USING COMPRESSED AIR PRESSURE TO REMOVE PISTON. DO NOT USE HIGH PRESSURE.
3. If necessary, apply low pressure compressed air to the caliper fluid inlet in short spurts to force the piston out.
4. Remove the piston from the caliper.
5. Remove the dust boot from the piston and discard it.
CAUTION: Do not use a screw driver or other metal tool for seal removal. Using such tools can scratch the bore or leave burrs on the seal groove edges.
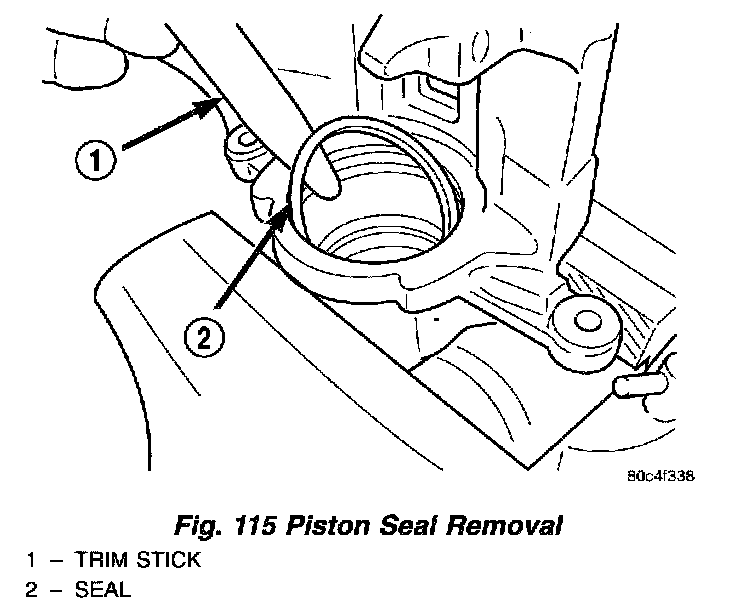
6. Using a soft tool such as a plastic trim stick, work the piston seal out of its groove in caliper piston bore. Discard the old seal.
7. Clean the piston bore and drilled passage ways with alcohol or a suitable solvent. Wipe it dry using only a lint-free cloth.
8. Inspect both the piston and bore for scoring or pitting. Bores that show light scratches or corrosion can usually be cleared of the light scratches or corrosion using crocus cloth.
ASSEMBLY
NOTE: Always use new, clean Mopar DOT 3 brake fluid when assembling the brake caliper. Never use an old piston seal.
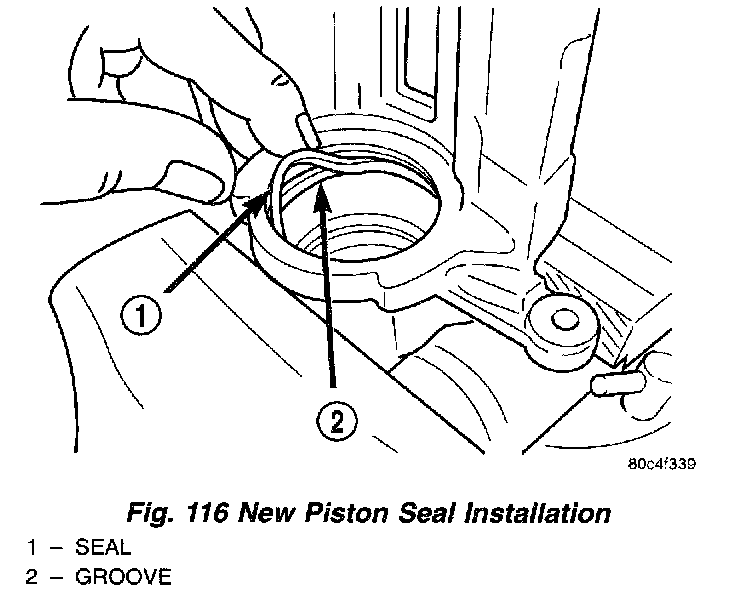
1. Dip the new piston seal in clean brake fluid and install it in the groove of the caliper bore. The seal should be started at one area of the groove and gently worked around into the groove using only your clean fingers to seat it.
2. Coat the new piston with clean brake fluid.
3. Coat the new piston boot with clean brake fluid leaving a generous amount inside the boot.
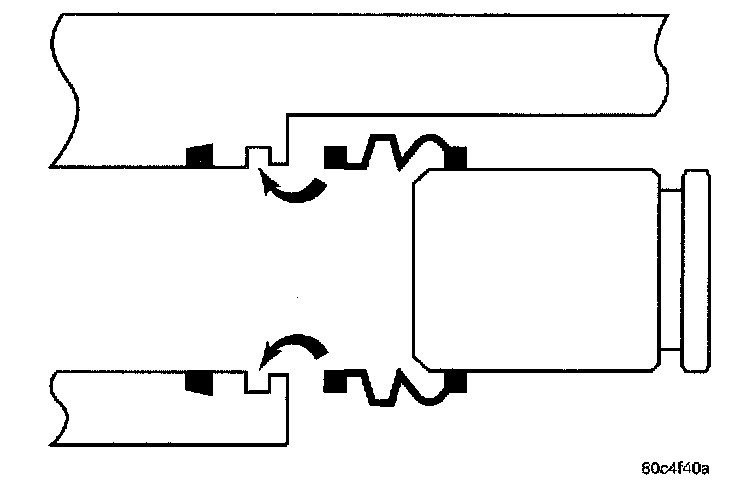
4. Position the dust boot over the lower section of the piston.
5. Extend the dust boot below the bottom of the piston and guide the lip seal into the groove in the caliper piston bore.
CAUTION: Force applied to the piston to seat it in the bore must be applied uniformly to avoid cocking and binding of the piston.
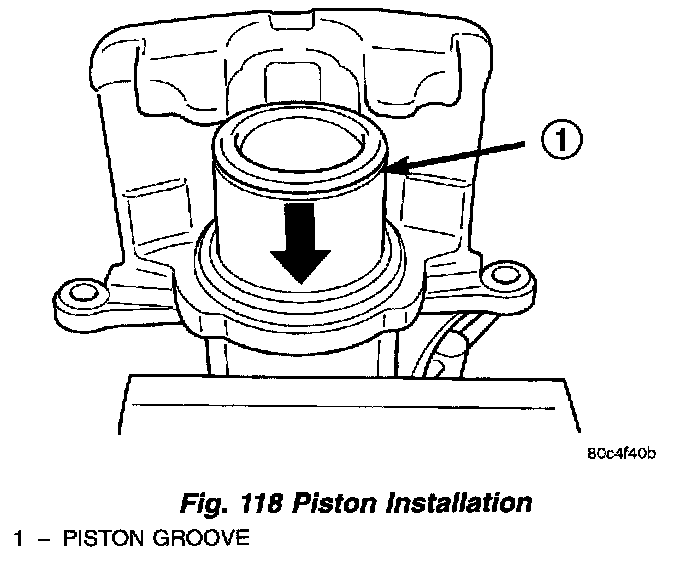
6. Install the piston into the bore carefully pushing it past the piston seal using hand pressure. Push the piston in until it bottoms in the caliper bore and the dust boot lip seal falls into the groove near the top of the piston.
7. Reinstall the caliper on the vehicle and bleed the brakes as necessary.