Torque Converter Cover: Service and Repair
STRUCTURAL COLLAR REMOVAL1. Raise vehicle on hoist.
2. Remove front engine mount through bolt.
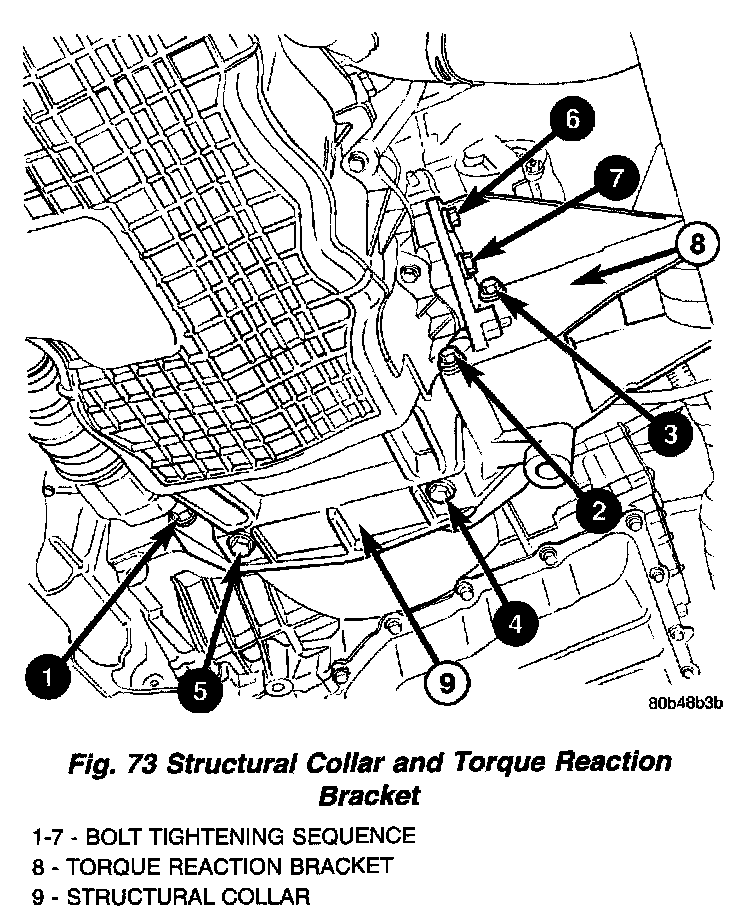
3. Remove bolts attaching torque reaction bracket to engine and transaxle (Fig. 73). Remove torque reaction bracket.
4. Remove bolts attaching structural collar to oil pan and transaxle (Fig. 73). Remove structural collar.
INSTALLATION
CAUTION: Torque procedure for structural collar and torque reaction bracket must be followed or damage could occur to oil pan, collar, and/or bracket.
1. Perform the following steps for installing structural collar and torque reaction bracket. Refer to (Fig. 73):
- Step 1: Place collar into position between transaxle and oil pan. Install collar to transaxle bolt (1), hand tight only.
- Step 2: Install collar to oil pan bolts (4) and (5), hand tight only.
- Step 3: Position torque reaction bracket in place. Install attaching bolts (2) and (3), hand tight only.
- Step 4: Final torque bolts (1-3) to 101 Nm (75 ft. lbs.).
- Step 5: Install bolts (6) and (7) through torque reduction bracket into engine block, hand tight only.
- Step 6: Final torque bolts (4) and (5) to 45 Nm (35 ft. lbs.).
- Step 7: Final torque bolts (6) and (7) to 61 Nm (45 ft. lbs.).
2. Install front engine mount through bolt and torque to 61 Nm (45 ft. lbs.).
3. Lower vehicle.