Removal and Replacement
REMOVAL - ENGINE ASSEMBLY
1. Perform fuel pressure release procedure, then disconnect and remove fuel line.
2. Remove air cleaner housing assembly and clean air hose.
3. Disconnect both cables from battery.
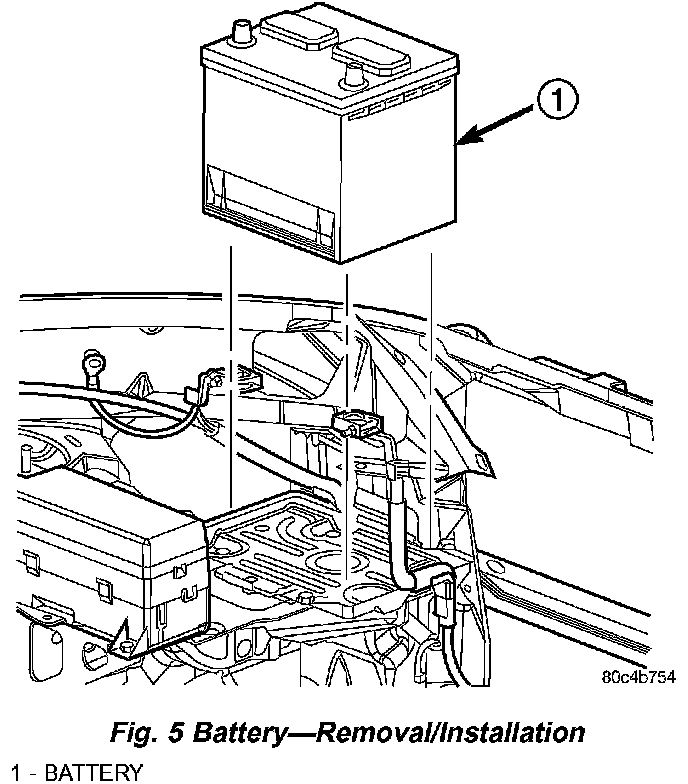
4. Remove battery hold down clamp and bolt, and remove battery (Fig. 5).
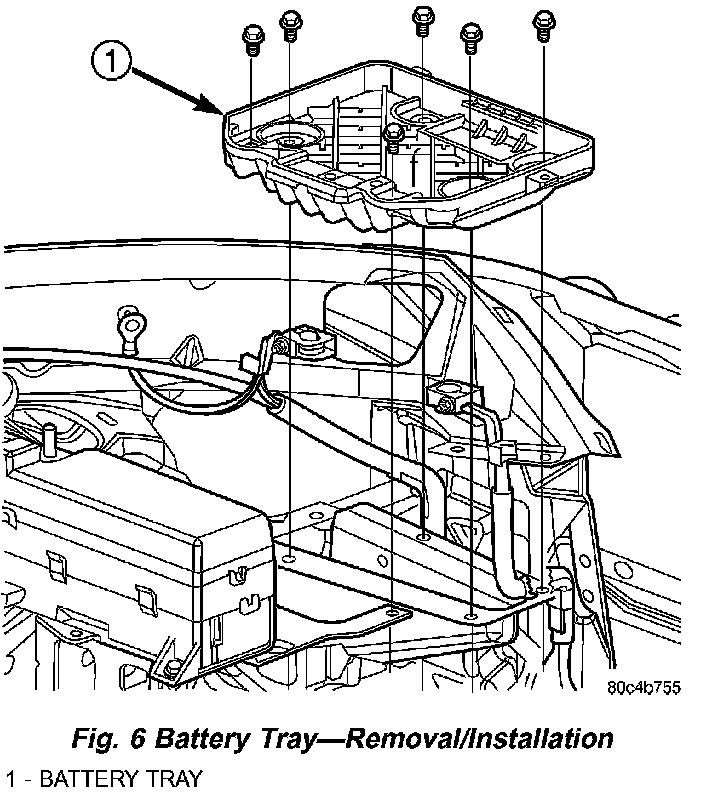
5. Remove battery tray (Fig. 6).
6. Drain cooling system.
7. Discharge air conditioning system, if equipped.
8. Disconnect throttle and speed control cables.
9. Disconnect engine wiring harness at Powertrain Control Module (PCM).
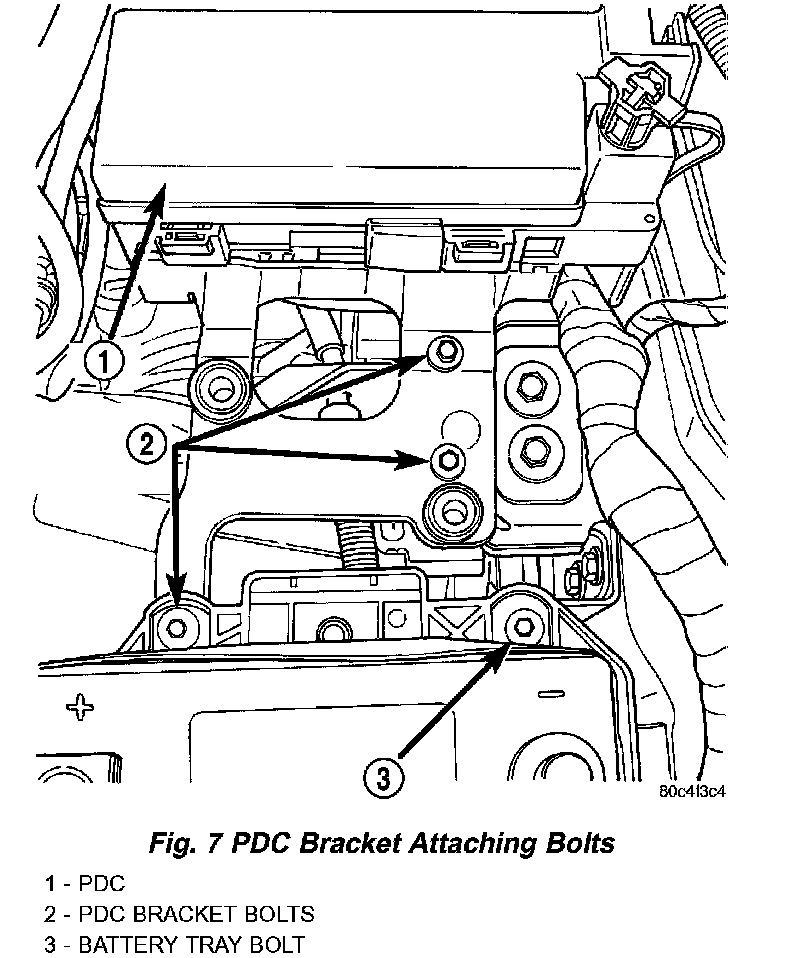
10. Disconnect positive cable from Power Distribution Center (PDC) and ground wire from vehicle body. Remove bolts attaching PDC and set aside (Fig. 7).
11. Disconnect wiring connectors at lower battery tray support.
12. Disconnect ground wire from the vehicle body- to-engine at the right side strut tower.
13. Disconnect brake booster vacuum hose from intake manifold.
14. Disconnect the proportional purge hoses from intake manifold.
15. Disconnect coolant reserve/recovery hose from coolant outlet connector.
16. Disconnect heater hoses.
17. Remove upper radiator support crossmember.
18. Remove upper radiator hose.
19. Remove lower radiator hose.
20. Disconnect upper A/C line from A/C condenser.
21. Disconnect A/C lines at junction near upper torque strut.
22. Disconnect radiator fan electrical connector and remove cooling module assembly (fan, radiator, A/C condenser).
23. Automatic Transmission equipped vehicles:
a. Using a blade or suitable hose cutter, cut transaxle oil cooler lines off flush with transmission fittings. Plug lines and fittings to prevent debris from entering transaxle or cooler circuit. A service splice kit will be installed upon reassembly.
b. Disconnect transmission electrical connectors.
c. Disconnect transmission shift linkage.
24. Manual Transmission equipped vehicles:
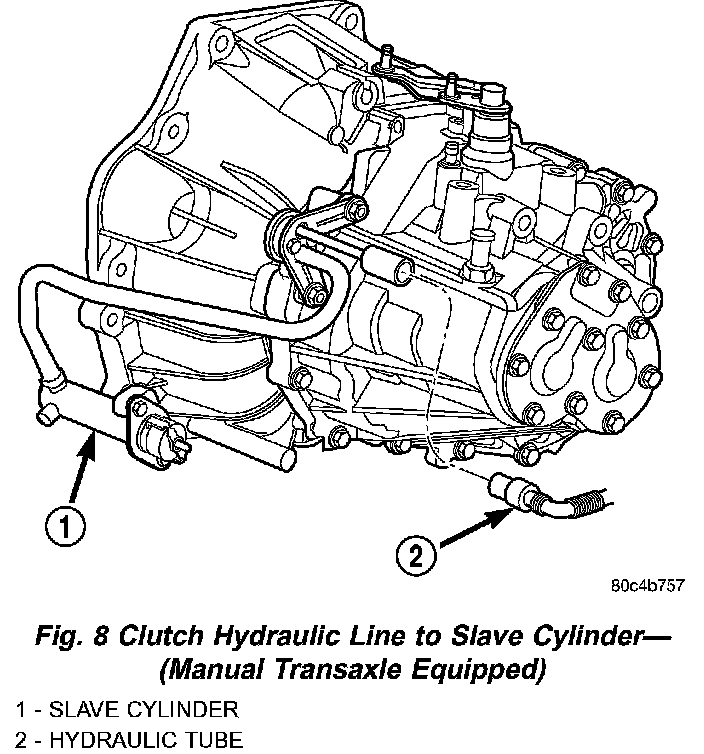
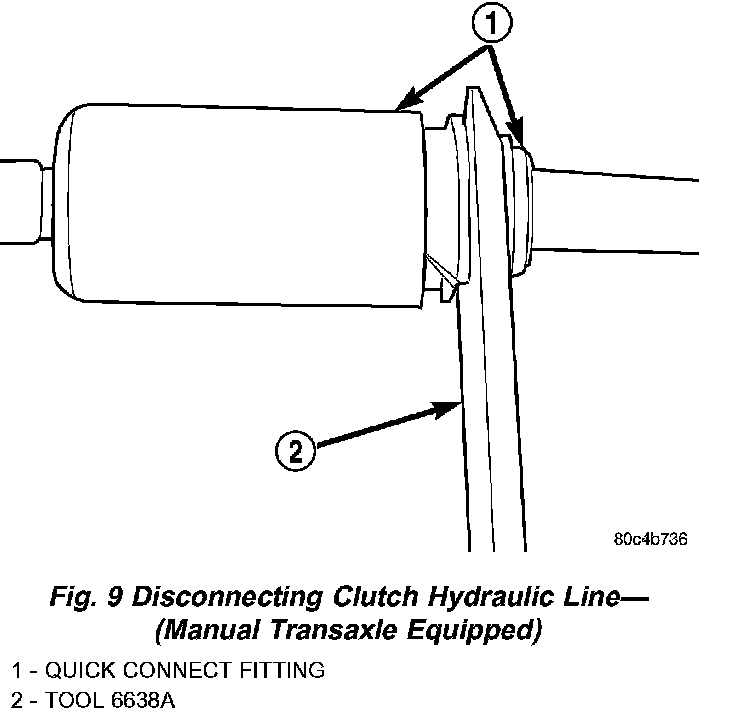
a. Using Special Tool 6638A, disconnect clutch hydraulic line (Fig. 8) and (Fig. 9).
b. Disconnect transmission shift linkage.
c. Disconnect transmission electrical connectors.
25. Hoist vehicle and remove front wheels.
26. Remove right inner splash shield.
27. Remove axle shafts.
28. Remove accessory drive belts.
29. Remove generator and support brackets.
30. Drain engine oil.
31. Disconnect the downstream oxygen sensor connector.
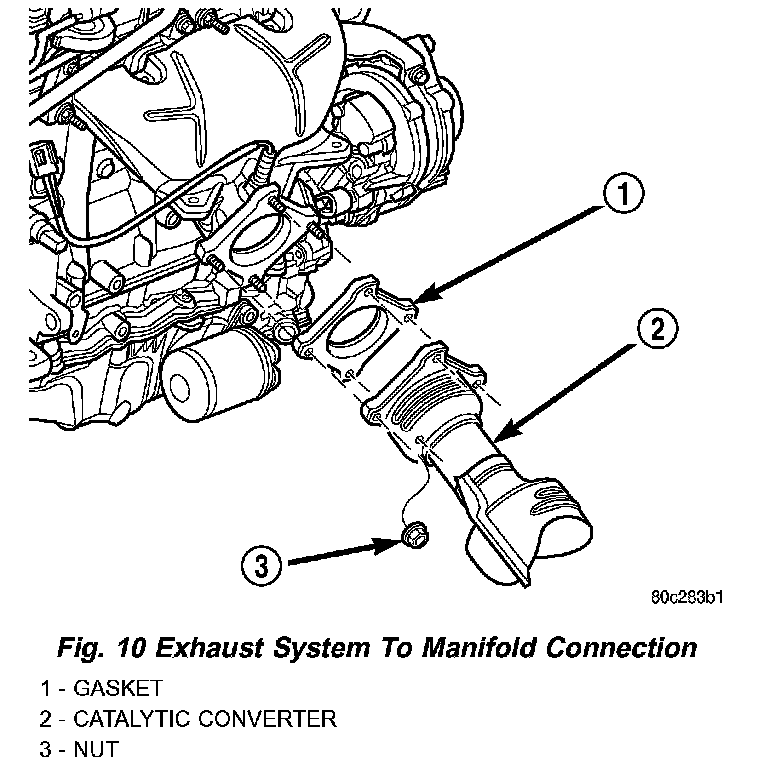
32. Disconnect exhaust system from manifold (Fig. 10).
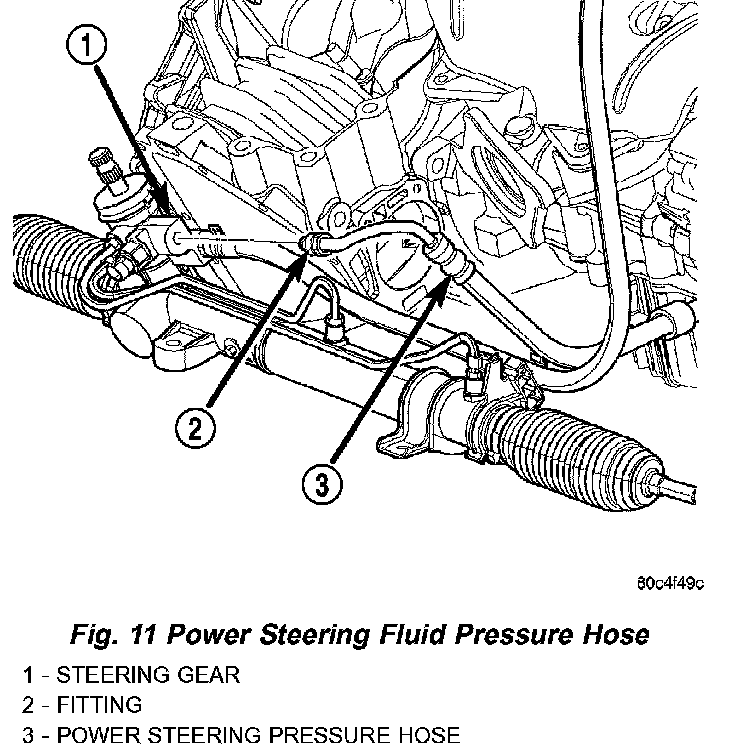
33. Disconnect power steering pressure hose from steering gear (Fig. 11).
34. Remove lower engine torque strut.
35. Remove structural collar. Engine Mount
36. Automatic Transmission equipped vehicles:
a. Remove torque converter bolts and mark converter to flex plate orientation for reassembly.
37. Manual Transmission equipped vehicles:
a. Remove drive plate to clutch module bolts.
38. Lower vehicle and remove A/C compressor.
39. Disconnect power steering fluid return line from reservoir.
40. Remove power steering pump.
41. Raise vehicle enough to allow engine dolly, cradle, and posts, (Special Tools 6135, 6710, and 6848) to be installed under vehicle.
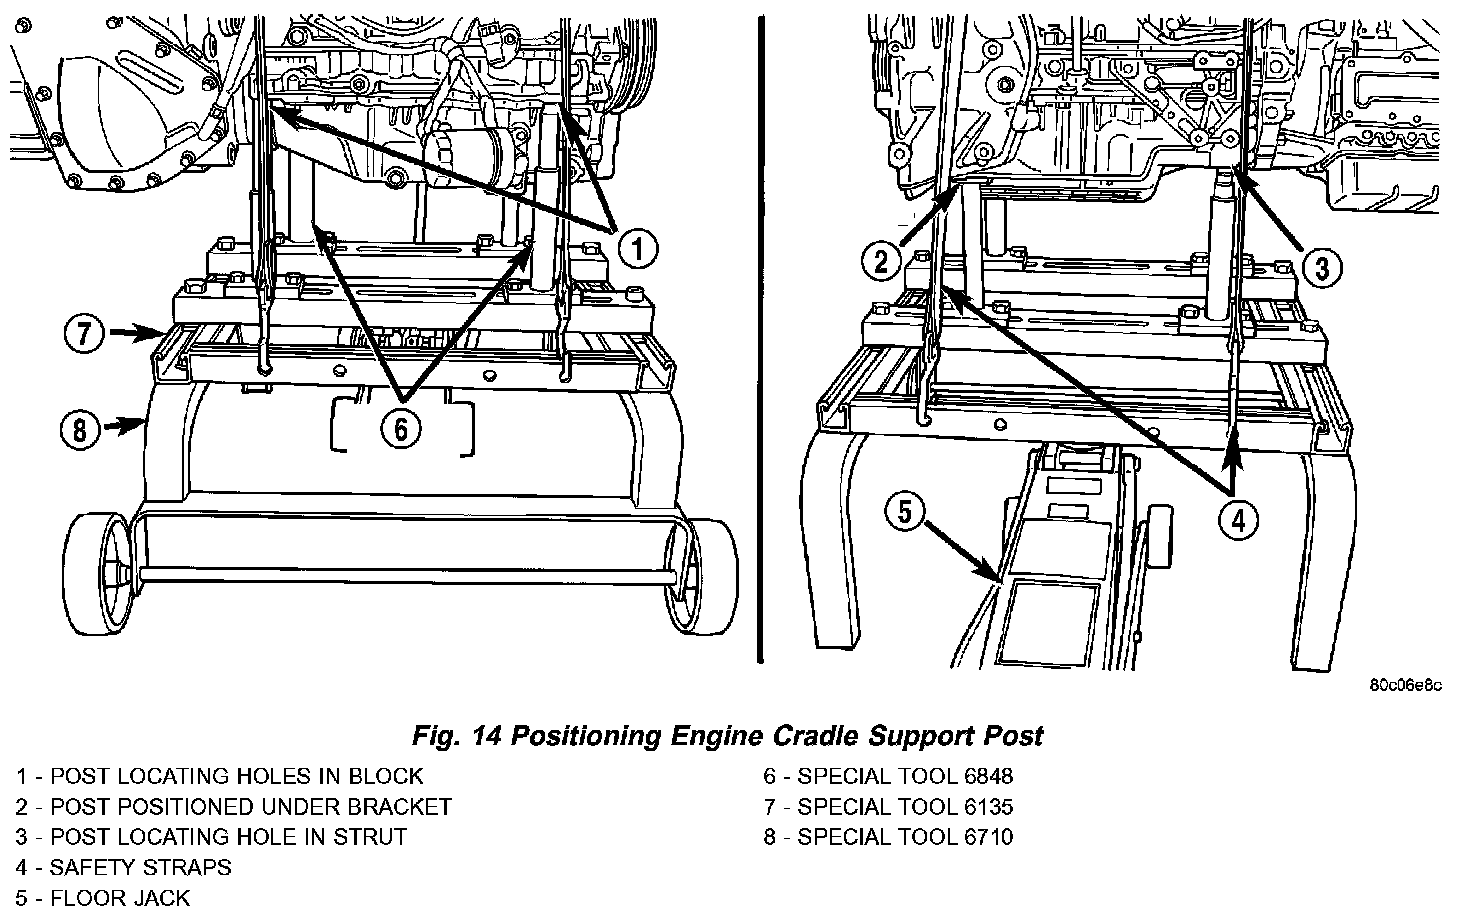
42. Loosen engine support posts to allow movement for positioning onto engine locating holes and flange on the engine bedplate. Lower vehicle and position cradle until the engine is resting on support posts (Fig. 14). Tighten mounts to cradle frame. This will keep support posts from moving when removing or installing engine and transmission.
43. Install safety straps around the engine to cradle (Fig. 14). Tighten straps and lock them into position.
WARNING: Safety straps MUST be used.
44. Raise vehicle enough to determine if straps are secure enough to hold cradle assembly to engine.
45. Lower vehicle so weight of the engine and transmission ONLY is on the cradle assembly.
46. Remove the upper engine torque strut.
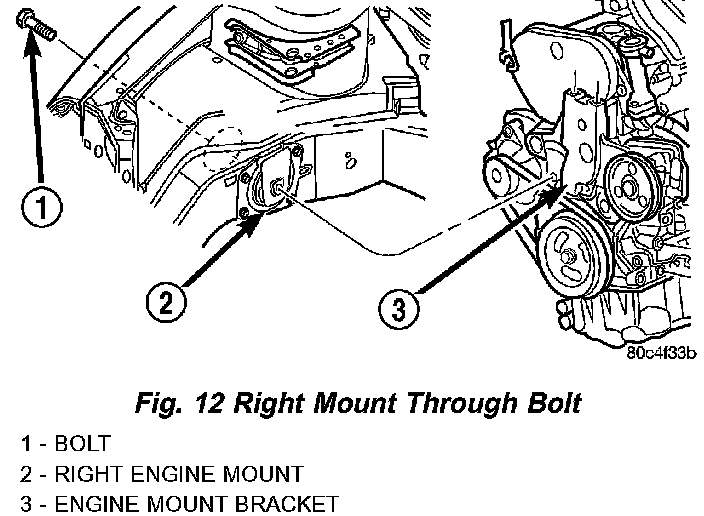
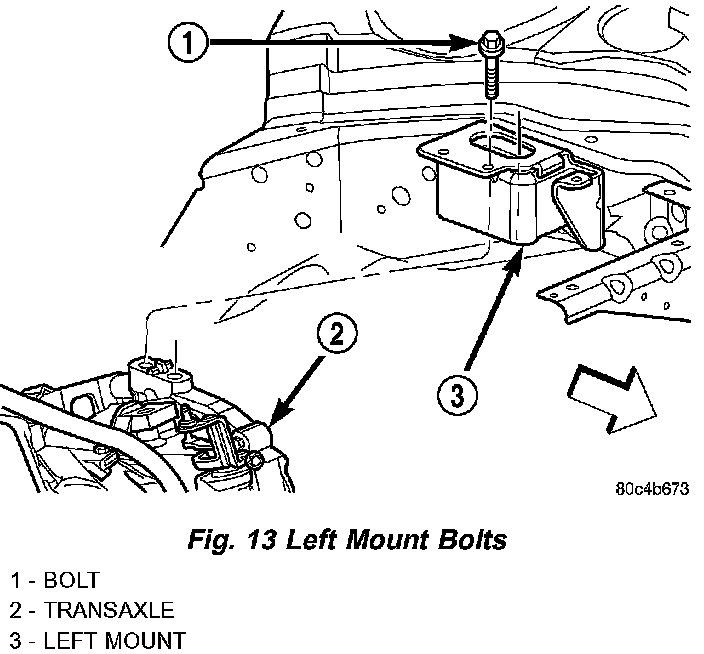
47. Remove right mount through bolt (Fig. 12) and left mount attaching bolts (Fig. 13).
48. Raise vehicle slowly until engine/transaxle assembly clears engine compartment. It may be necessary to move the engine/transmission assembly with the cradle to allow for removal around body flanges.
INSTALLATION - ENGINE ASSEMBLY
1. Position engine and transmission assembly under vehicle and slowly lower the vehicle over the engine/transaxle assembly.
2. Continue lowering vehicle until engine/transaxle aligns to mounting locations. Install mounting bolts at the right and left engine/transaxle mounts (Fig. 12) and (Fig. 13). Tighten bolts to 118 Nm (87 ft. lbs.).
3. Install upper engine torque strut.
4. Remove safety straps from engine/transaxle assembly. Slowly raise vehicle enough to remove the engine dolly and cradle.
5. Install generator and mounting brackets.
6. Install axle shafts.
7. Automatic Transmission equipped vehicles:
a. Install torque converter bolts.
8. Manual Transmission equipped vehicles:
a. Install drive plate to clutch module bolts.
9. Install structural collar.
10. Install lower engine torque strut.
11. Connect exhaust system to manifold (Fig. 10).
12. Connect the downstream oxygen sensor.
13. Connect power steering fluid pressure hose to steering gear (Fig. 11).
14. Install A/C compressor and hoses.
15. Install power steering pump.
16. Install accessory drive belts.
17. Install inner splash shield.
18. Install wheels and lower vehicle.
19. Connect power steering fluid return hose to reservoir. Fill power steering fluid reservoir to proper level.
20. Manual Transmission equipped vehicles:
a. Connect clutch hydraulic line (Fig. 8).
b. Connect transmission shift linkage.
c. Connect transmission electrical connectors.
NOTE: It is not necessary to bleed the clutch hydraulic system. The quick-connect fittings close immediately after disconnection; allowing no fluid to escape.
21. Automatic Transmission equipped vehicles:
a. Connect transmission oil cooler lines using service splice kit.
b. Connect transmission electrical connectors.
c. Connect transmission shift linkage.
22. Install cooling module assembly (fan, radiator, A/C condenser). Connect radiator fan electrical connector.
23. Connect A/C lines at junction near upper torque strut.
24. Connect upper A/C line to A/C condenser.
25. Connect upper and lower radiator hoses.
26. Install upper radiator crossmember.
27. Connect fuel line and heater hoses.
28. Install all ground straps and connect engine wiring harness.
29. Install lower radiator hose, fan module, and upper radiator hose.
30. Position PDC and install bolts (Fig. 7).
Connect positive battery cable to PDC and ground wire to vehicle body.
31. Install battery tray (Fig. 6) and battery (Fig. 5).
32. Connect cables to battery.
33. Install air cleaner housing assembly and connect clean air hose to intake manifold.
34. Connect throttle and speed control cables.
35. Install oil filter. Fill engine crankcase with proper oil to correct level.
36. Fill power steering system.
37. Fill cooling system.
38. Evacuate and recharge A/C system.
39. Start engine and run until operating temperature is reached.
40. Perform torque strut adjustment procedure.
41. Adjust transmission linkage, if necessary.