Disc Brake Caliper Adapter
DISC BRAKE CALIPER ADAPTER-FRONTREMOVAL
1) Access and remove front brake caliper and shoes.
Fig. 41 Anti-Rattle Clip - Lower (Upper - Typical):
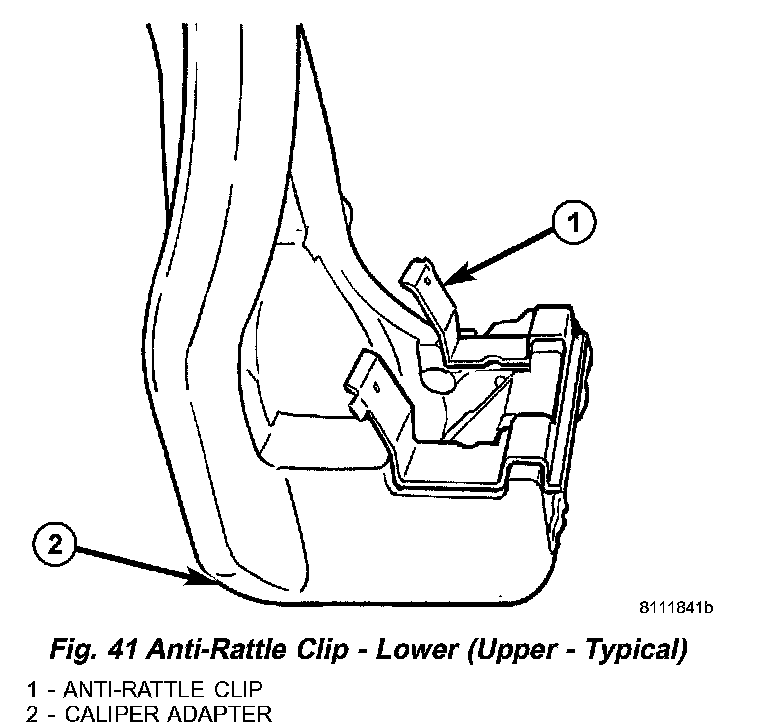
2) Remove shoe anti-rattle clips from adapter (Fig. 41).
Fig. 42 Front Caliper And Adapter Mounting:
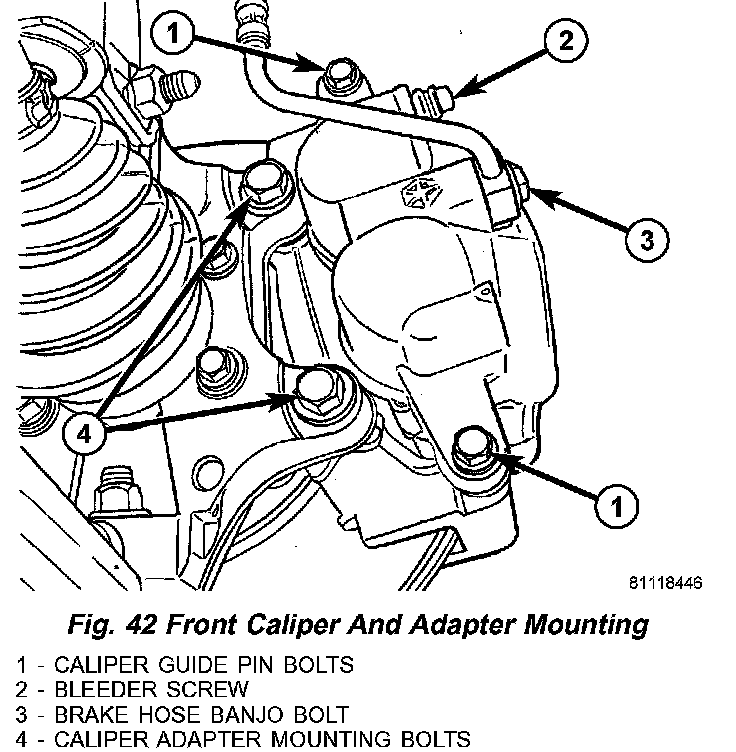
3) Remove two bolts securing caliper adapter to steering knuckle (Fig. 42).
4) Remove caliper adapter.
INSTALLATION
Fig. 43 Brake Caliper Adapter:
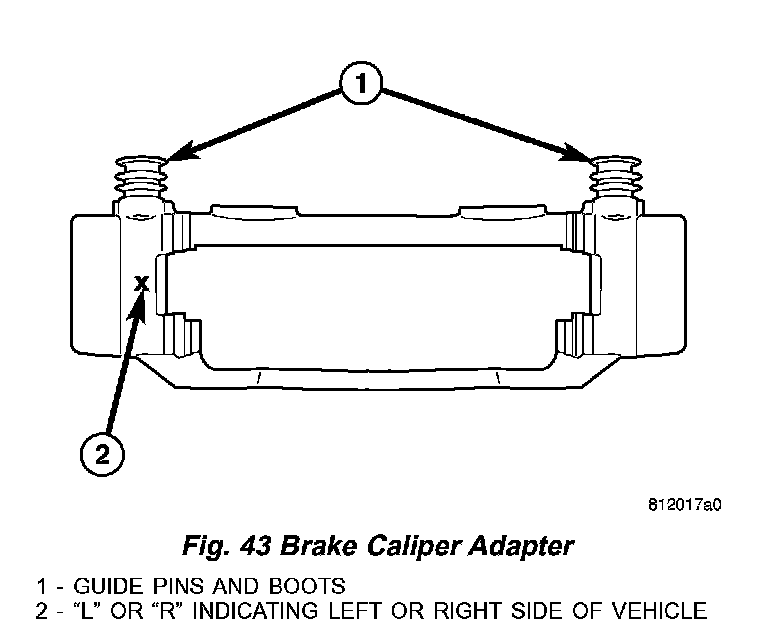
NOTE: Brake caliper adapters are side-oriented. Left adapters are marked with an L while right adapters are marked with an R where shown (Fig. 43).
1) Install disc brake caliper adapter on steering knuckle.
2) Install two bolts securing caliper adapter to steering knuckle (Fig. 42). Tighten bolts to 169 Nm (125 ft. lbs.).
3) Attach two brake shoe anti-rattle clips to adapter matching contour of each clip to adapter's lower caliper abutments (Fig. 41).
4) Install NEW brake shoes as well as all components necessary to access them.
5) Lower vehicle.
6) Pump brake pedal several times to set shoes to caliper and brake rotor.
7) Check and adjust brake fluid level as necessary.
8) Road test vehicle making several stops to wear off any foreign material on brakes and to seat brake shoes.