Master Cylinder Bleeding
MASTER CYLINDER BLEEDINGCAUTION: When clamping master cylinder in vise, only clamp master cylinder by its mounting flange. Do not clamp master cylinder piston rod, reservoir, seal or body.
1) Clamp master cylinder in a vise.
Fig. 47 Master Cylinder Set Up For Bleeding:
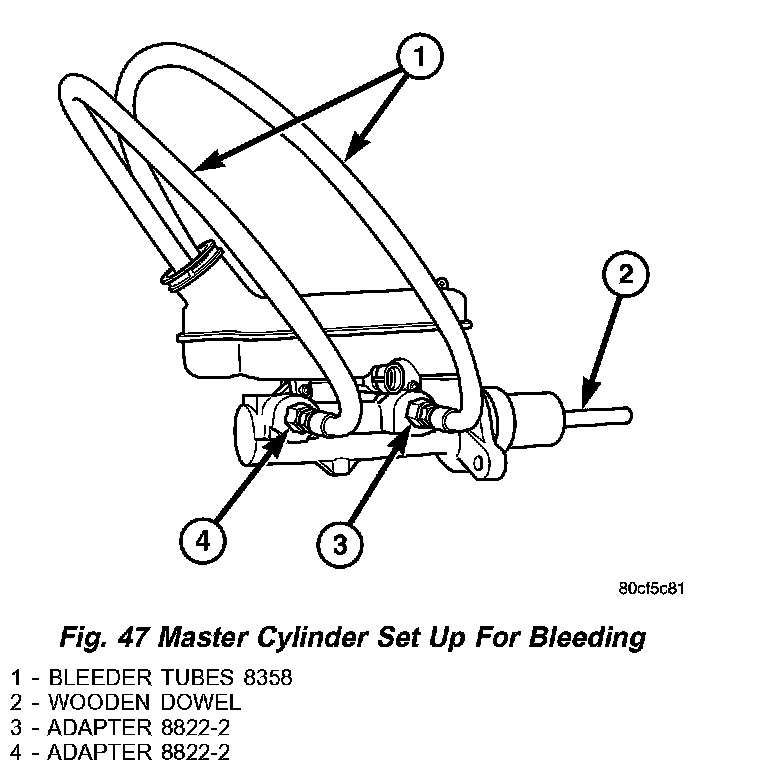
2) Attach special tools for bleeding master cylinder in the following fashion:
a) Thread one Adapter, Special Tool 8822-2, in each outlet port. Tighten Adapters to 14 Nm (120 inch lbs.).
b) Thread a Bleeder Tube, Special Tool 8358-1, into each Adapter 8822-2. Tighten each tube to 14 Nm (120 inch lbs.). Flex bleeder tubes and place open ends into mouth of fluid reservoir as far down as possible to keep them below fluid level while bleeding (Fig. 47).
NOTE: Make sure open ends of bleeder tubes stay below surface of brake fluid once reservoir is filled to proper level.
3) Fill brake fluid reservoir with Mopar Brake Fluid or equivalent conforming to DOT 3 specifications. Make sure fluid level is above tips of bleeder tubes in reservoir to ensure no air is ingested during bleeding.
4) Using a wooden dowel as a pushrod (Fig. 47), slowly depress master cylinder pistons, then release pressure, allowing pistons to return to released position. Repeat several times until all air bubbles are expelled. Make sure fluid level stays above tips of bleeder tubes in reservoir while bleeding.
5) Remove bleeder tubes from master cylinder outlet ports, then plug outlet ports and install fill cap on reservoir.
6) Remove master cylinder from vise.
7) Install master cylinder on vehicle.